It’s that time of year again… last week I got my scissors out and cut back my tradescantia fluminensis tricolour entirely. My plant fared surprisingly well during the move but as Spring growth kicked in, my plant was looking a little… straggly. I think this is the third cycle of cutting I have done with this plant which makes me happy because it sort of feels like you are giving a bedraggled houseplant a new lease of life. Plus, you can make a new plant for free.
Before we get into this process, here’s a link to my blogpost about general care for this plant: ‘How to stop your tradescantia fluminensis tricolour from looking like a crispy mess’.
But now, back to the plant haircut…

How to do it
As you can see from this photo, my plant was growing well with the warmer temperatures + more sunshine. But it had got to that point where it was looking like it had outgrown any hairstyle it might have had (like many of us during lockdown) + the stems were just sort of hanging there. If you can clear a flat surface for this job, it makes untangling the stems easier.

1. Inspect the plant
The first thing to do is to take your plant to a well-lit spot + have a good close look at it. Check the undersides of the leaves + look out for any pests (or leaf markings suggesting pests), areas of damage or withered stems. When you are propagating, you want to use healthy stems + not ones that look half dead already!

2. Get the snips out
Before you cut anything with your snips, make sure they are clean + sterilised + sharp enough. When you cut the stems you want a fluid cut + not a hacked up stem!
Then comes the fun/daunting bit… using the scissors methodically work your way around the plant near the base of the stem, or where a stem branches off from another, snipping as you go. You don’t really want to be rooting any stems that are really long + straggly — ones with a few sets of leaves on are ideal (you can see what I mean in the photos that follow).
3. Separate dried stems
As you are cutting, remove any dried, crispy stems + discard. It sounds obvious but it makes it easier at the end to not have dried stems mixed in with good stems ready to prep!

4. Group good stems together in similar lengths
As I mentioned above, you don’t want to bother rooting any extremely long stems, keeping them all a similar length or vaguely in ‘groups of lengths’ will help the new plant you make to look neater with nice compact growth. The photo below shows this stage:
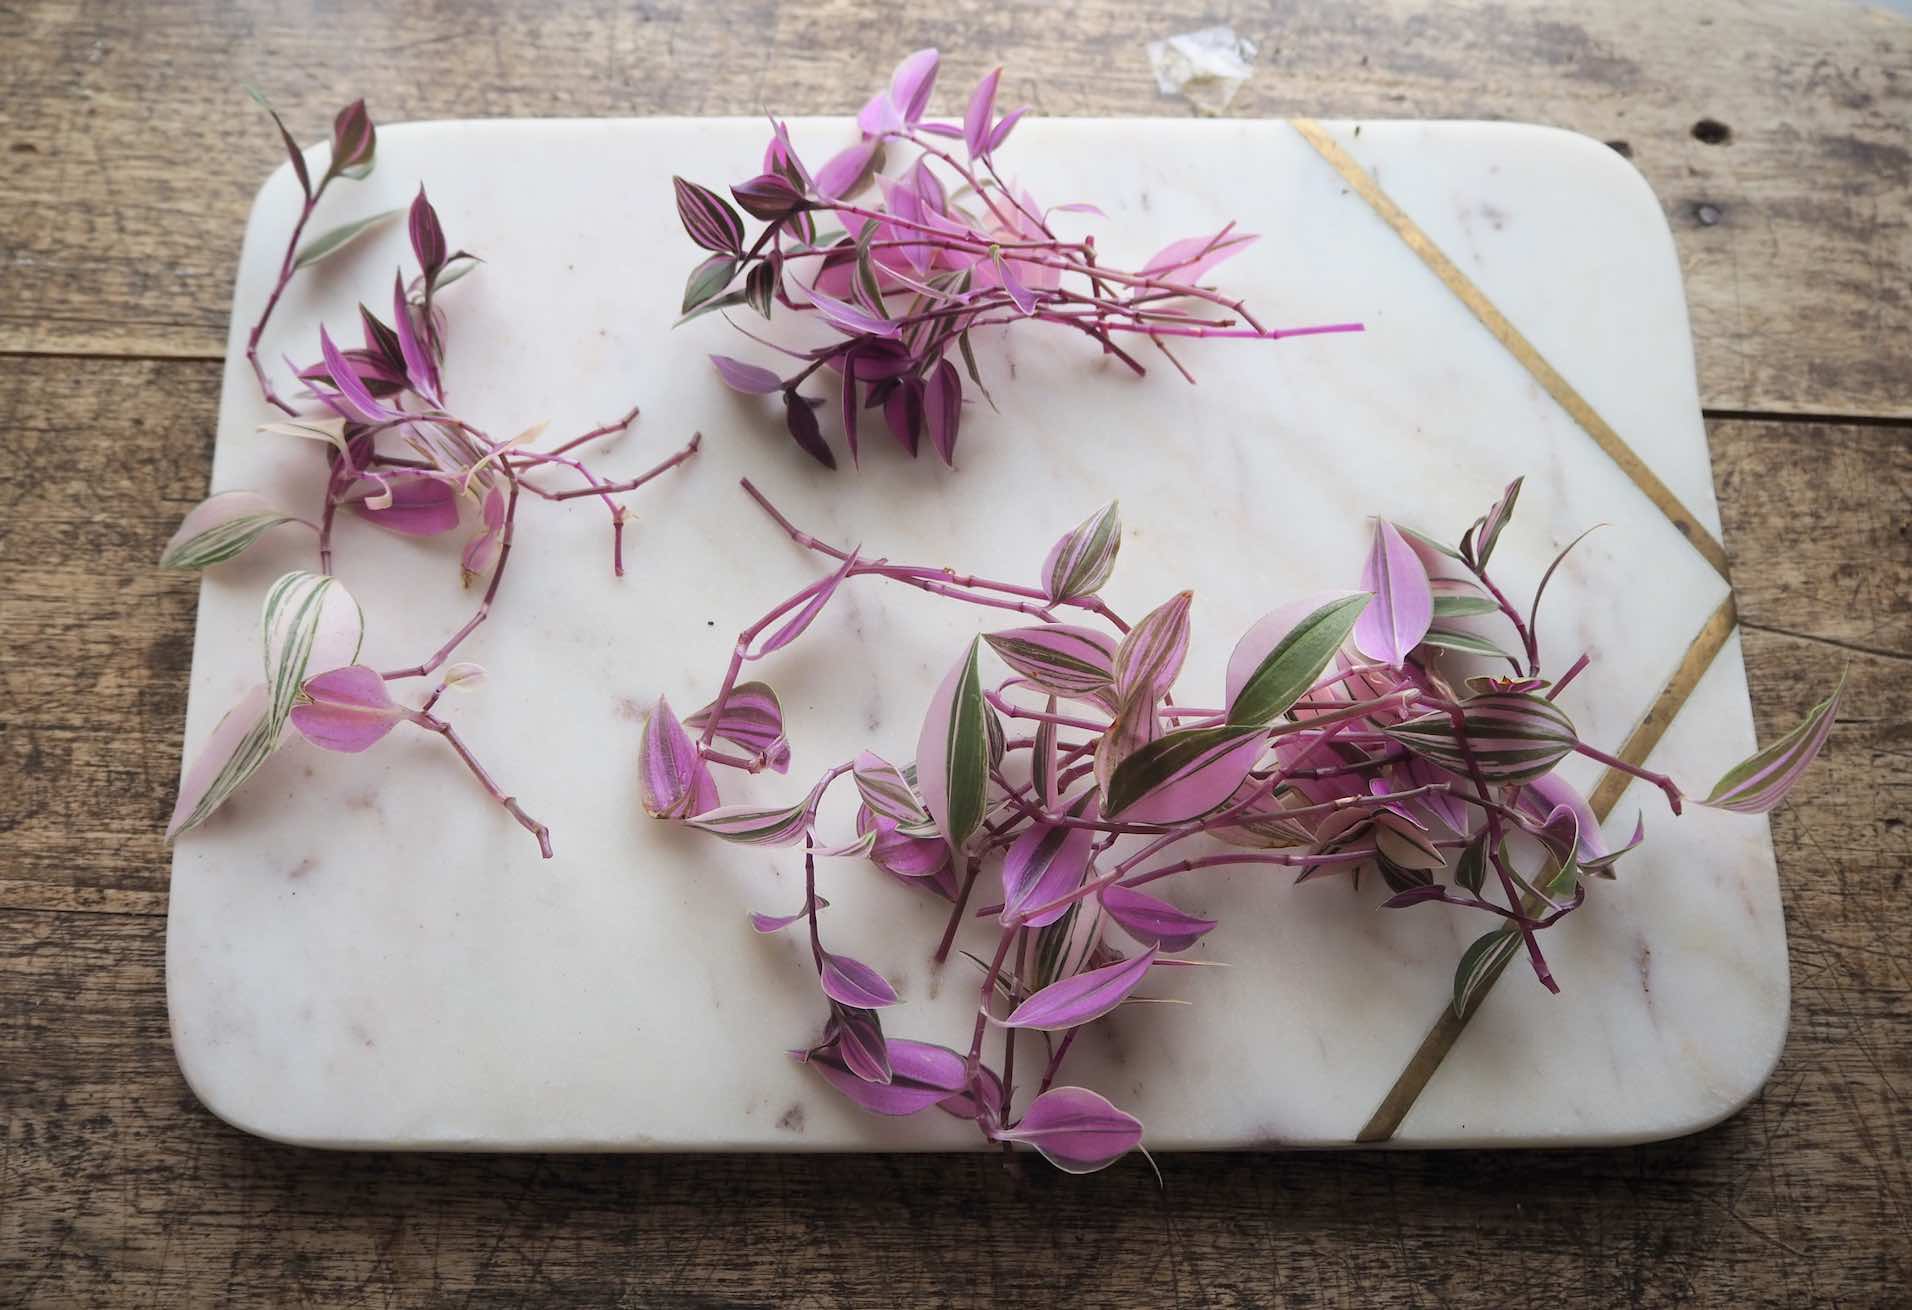
5. Strip bottom leaves off good stems
If you are new to houseplants, this can sometimes be a step that is skipped but for me, it’s what helps to keep the chances of my cuttings rooting successfully good. Take your stem cuttings + remove the bottom few leaves with a snips. By doing this, you are increasing the rooting potential for each stem as it is at these points that roots can grow. It’s good practice to do this as even though your cuttings might still root around this point, having a leaf submerged in water can encourage things like mould/algae in the water. Also, you’d need to remove the leaves when you come to pot the cutting on anyway!
Here are some of my stems with the bottom leaves stripped — these are now ready for propagating:

Here are some photos I took for my instagram stories that show the process some more:


**a note on soil propagation**
It’s worth saying here that tradescantia cuttings can also cope well when propagated directly into soil or rooted in sphagnum moss. This is personal preference but for me, I really like to watch the process of roots growing! I also find I have a better success rate when rooting in water as I can monitor the roots + see if there are any stems that are struggling.
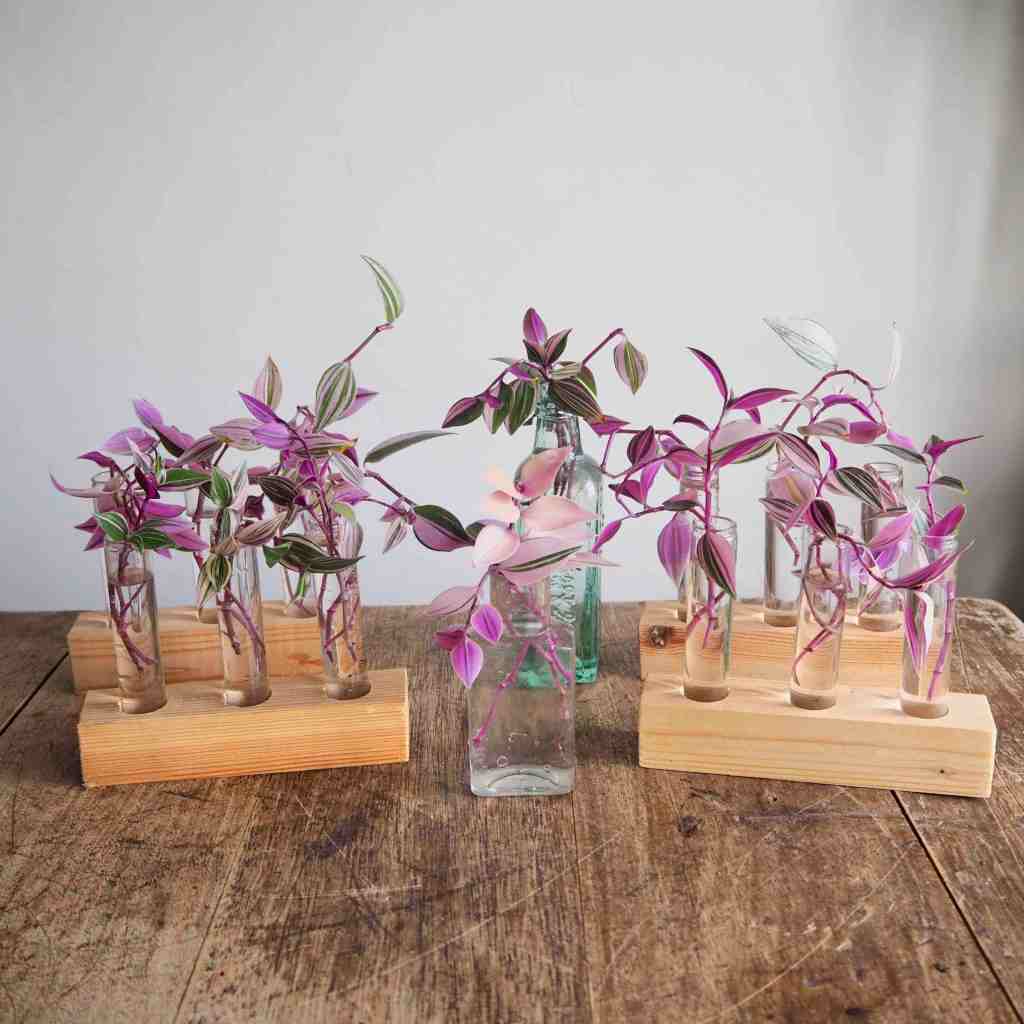
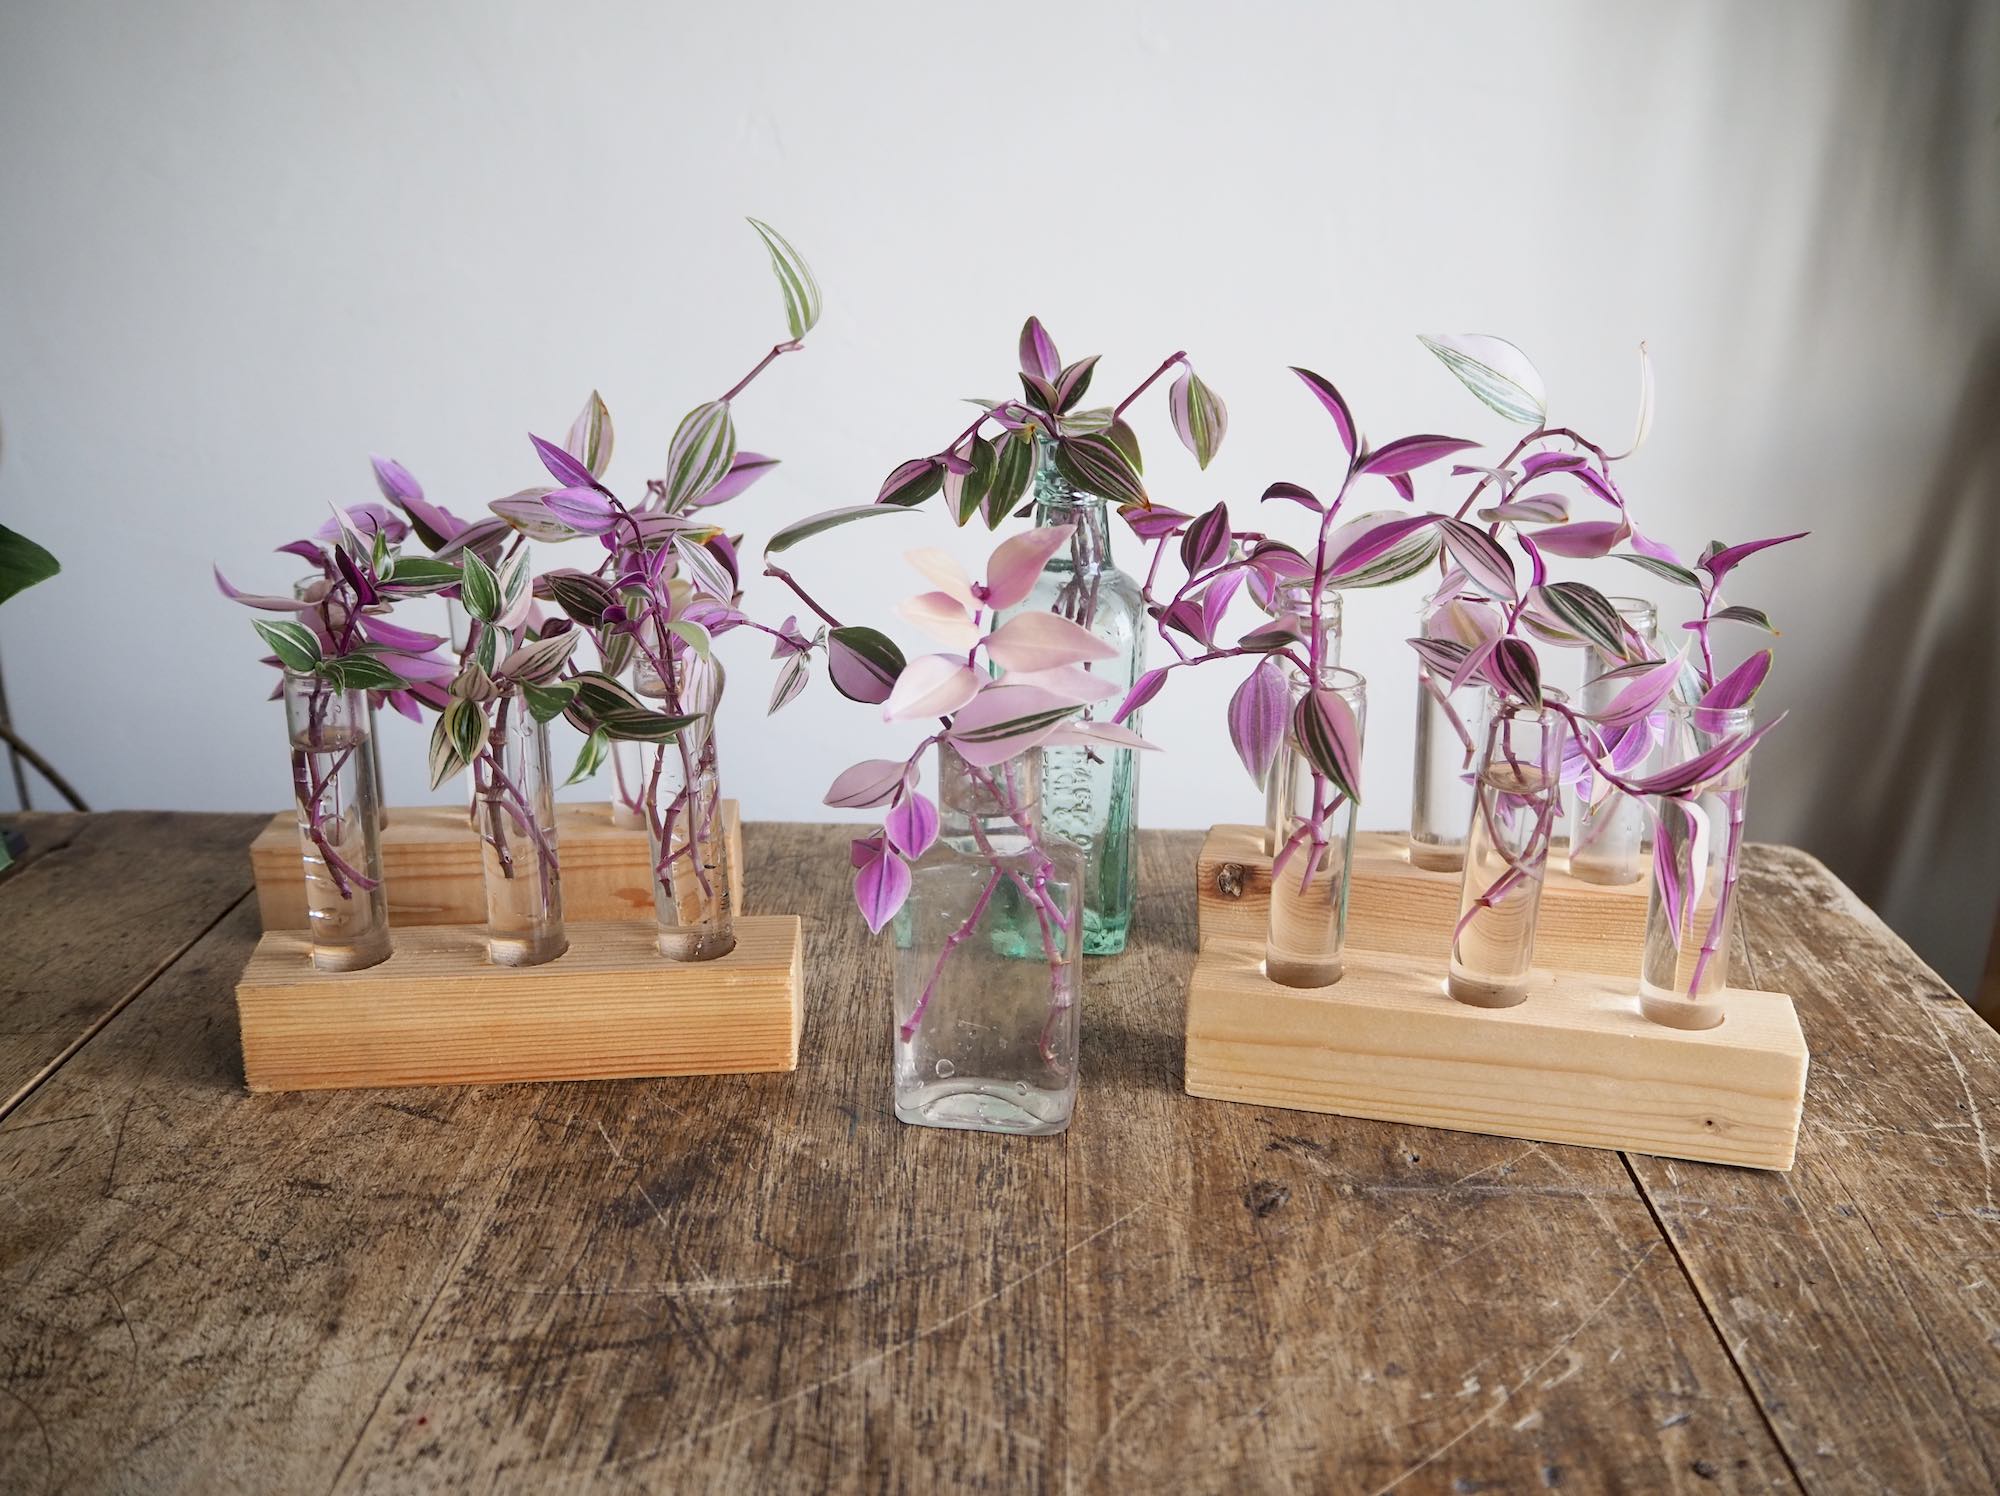
6. Put in water + wait!
Now you’ve got to the stage where you are ready to put the stems in water. I make these propagation stations but you can use a variety of vessels…glass bottles are great as they generally have a thin neck so can hold these thin stems well. Fill your container with fresh water so that the stems are well covered. I don’t add anything to the water. If it’s warm, you might need to top up your bottles every few days as the water evaporates — make sure the stems aren’t sitting in an empty vessel as they can start to sweat… this can lead to the cuttings rotting.
Place your vessels in a well lit spot that is out of direct sunlight.

Here is the after of my plant… there’s not much left! I’m not going to throw this away though — I’ll water as normal + see what growth pops up. If your potting mix is really dry, you can go ahead + re-pot this sorry looking pot, pruning back any dead roots.

Another common question when it comes to water propagating cuttings is ‘how long does it take?’ ‘when do I pot them?!’ In the photo below, you might be able to spot some tiny roots that have formed in the glass nearest the lens. This is after one week of rooting in water. The time it takes for your cuttings to root is heavily dependent on the environment; temperature, warmth, humidity + light will all play a part. Wait until the roots are between 1—2 inches long before potting up.
7. Potting up your cuttings
Remember that roots in water are different to roots in soil which means they can take some time to adapt when potted. I like to use a well draining potting mix when planting my cuttings; peat free multi-purpose compost with added perlite + orchid bark. Keep you plant well watered as the stems adjust to planting. Don’t be tempted to pull the cuttings out for a look after a few weeks — they will be busy growing roots under the surface + will be happier if they aren’t disturbed! As my nan used to say ‘a watched pot never boils’.

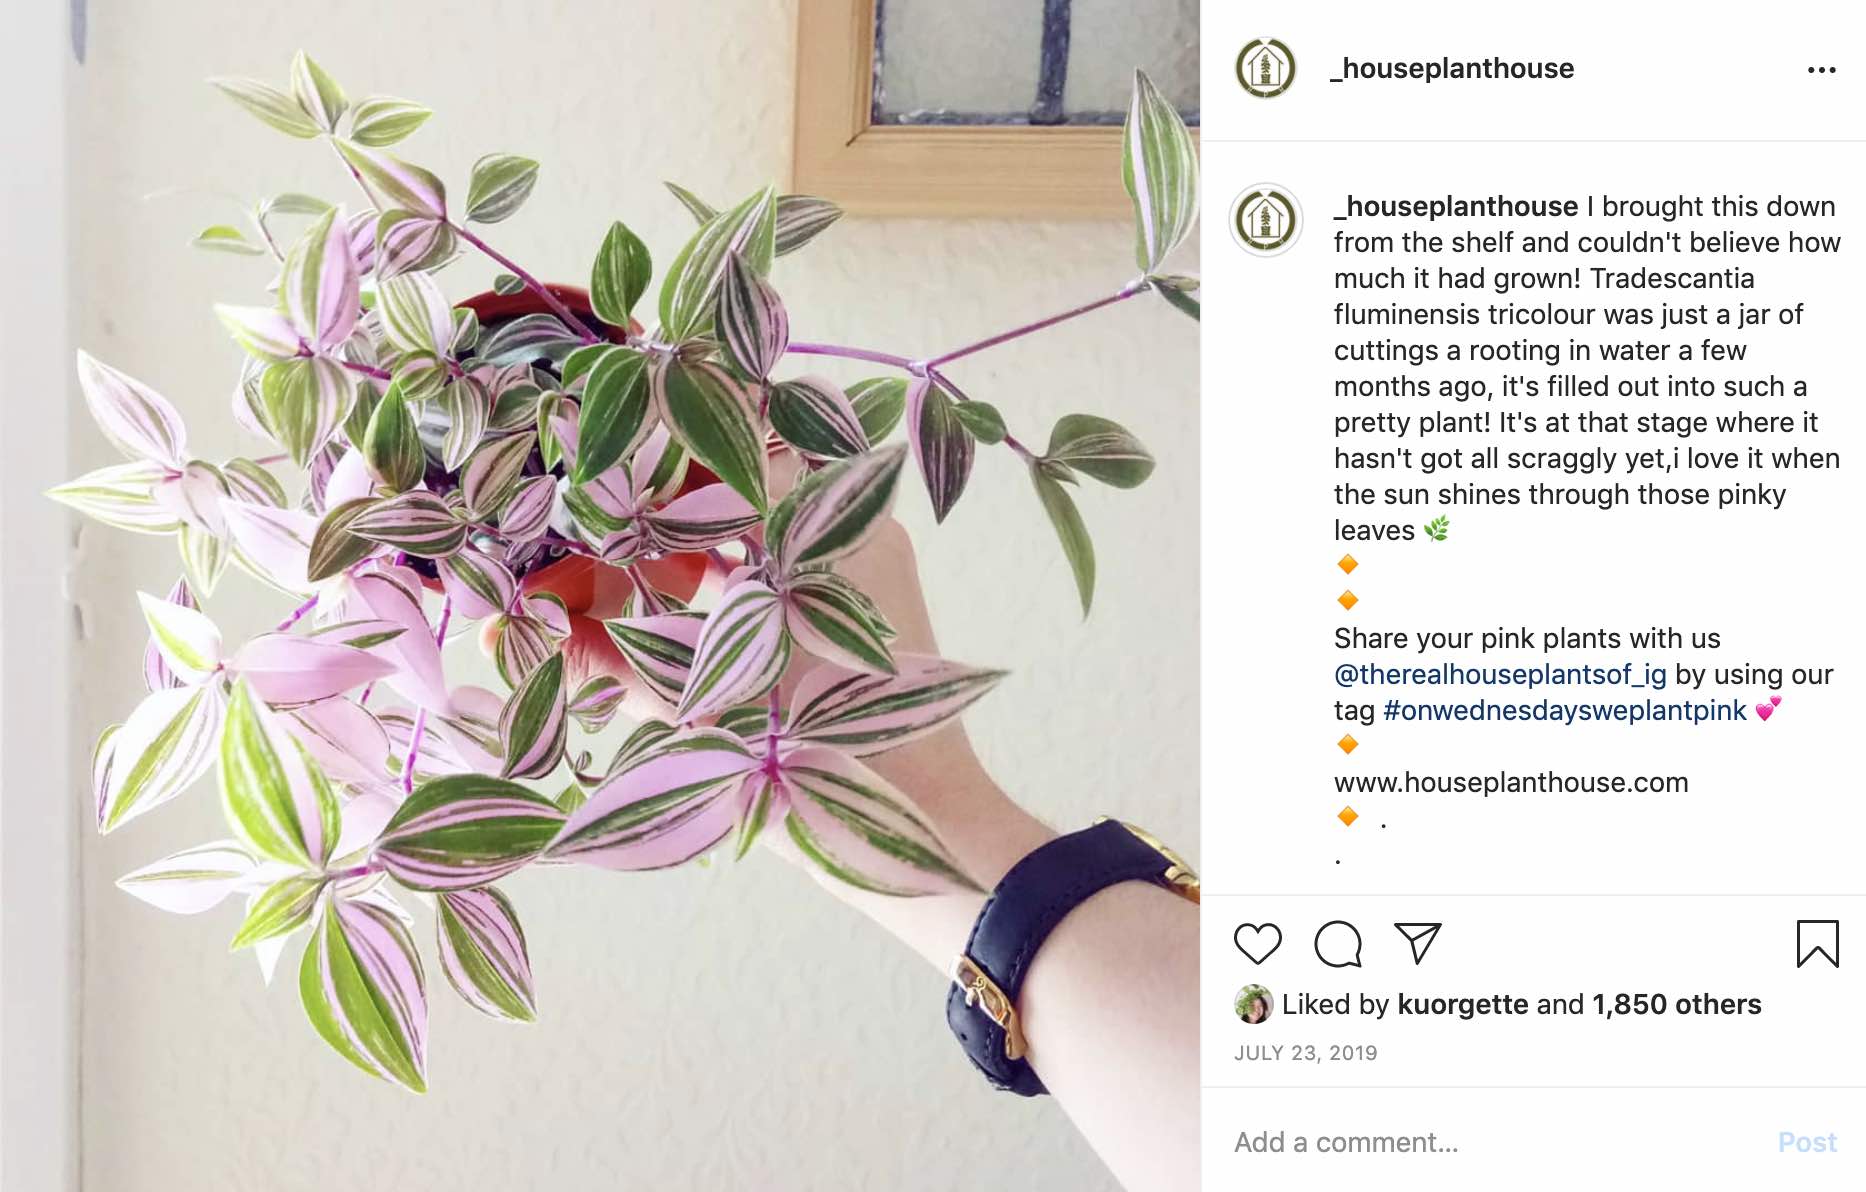
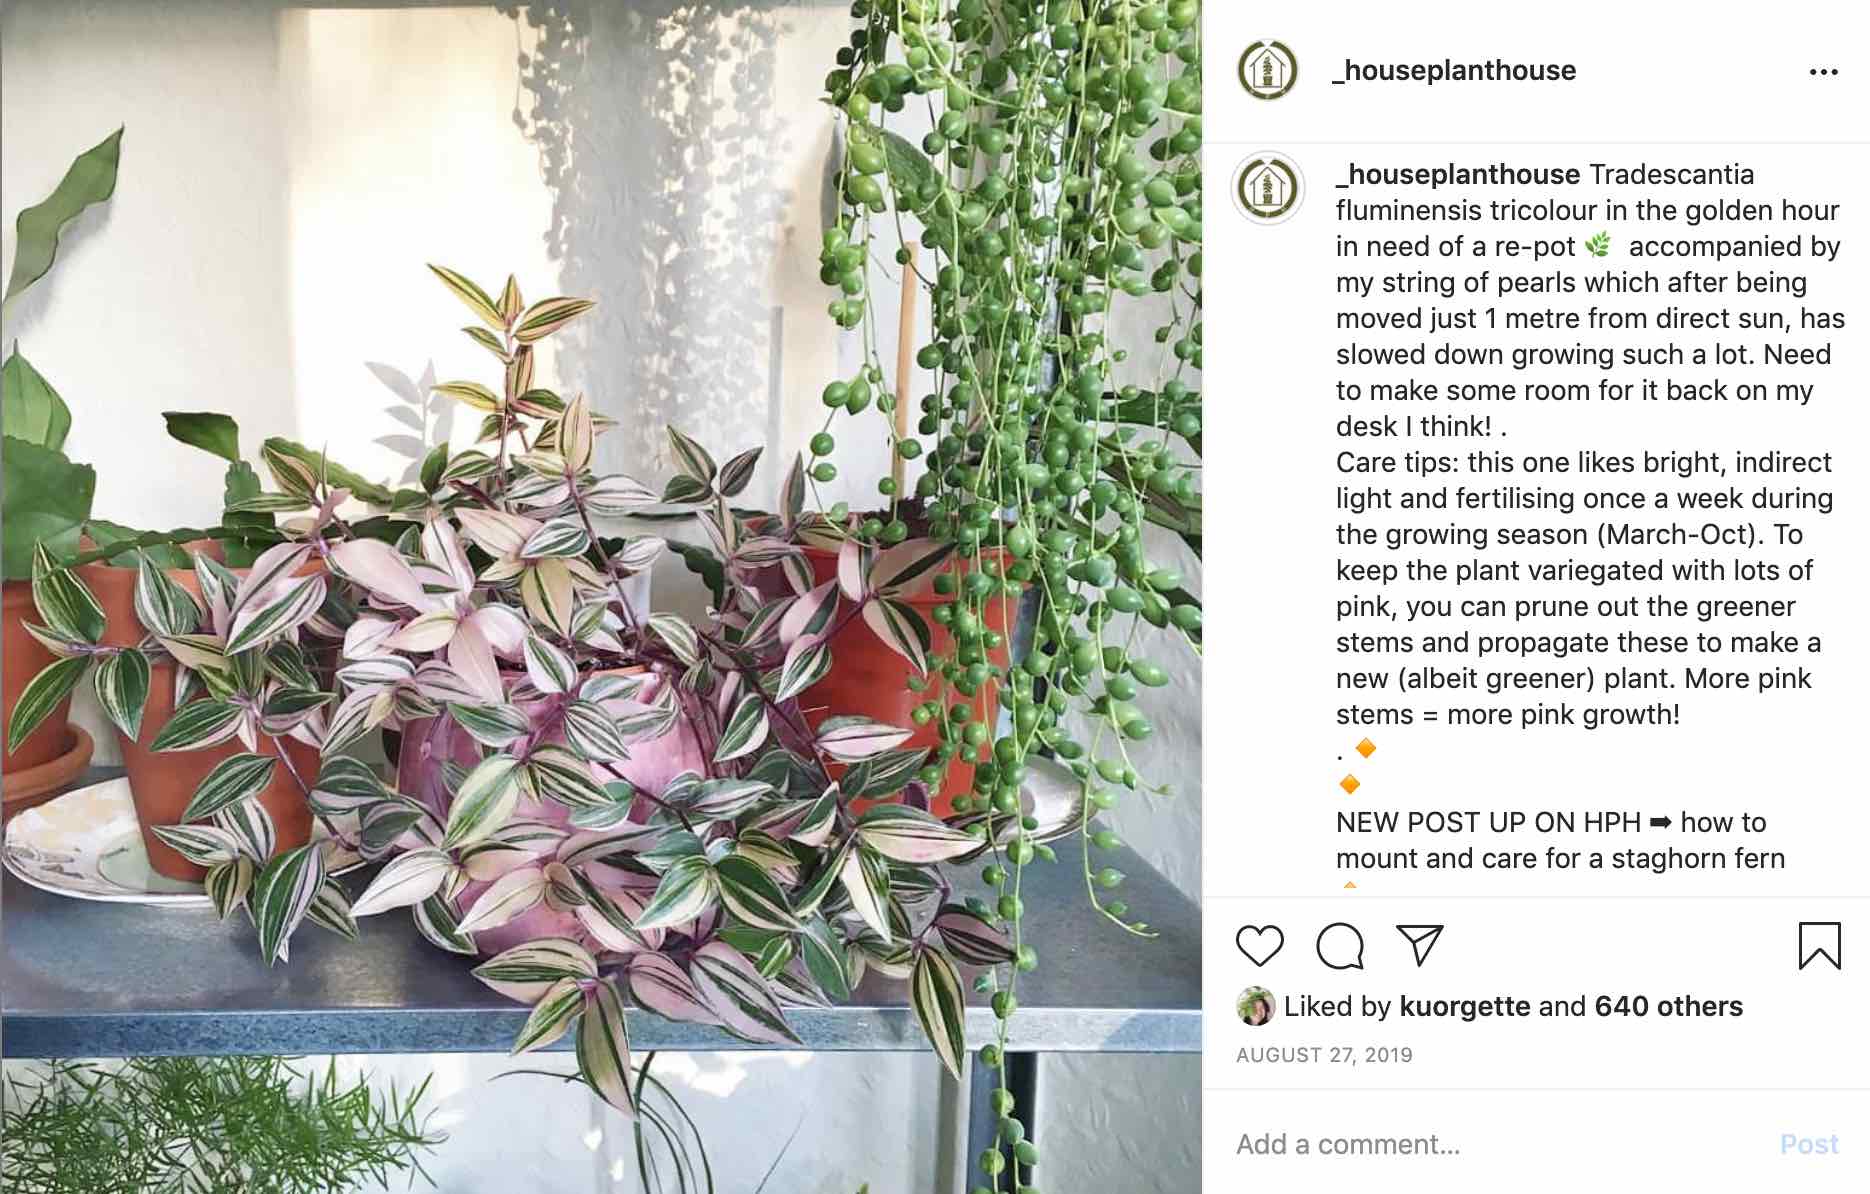
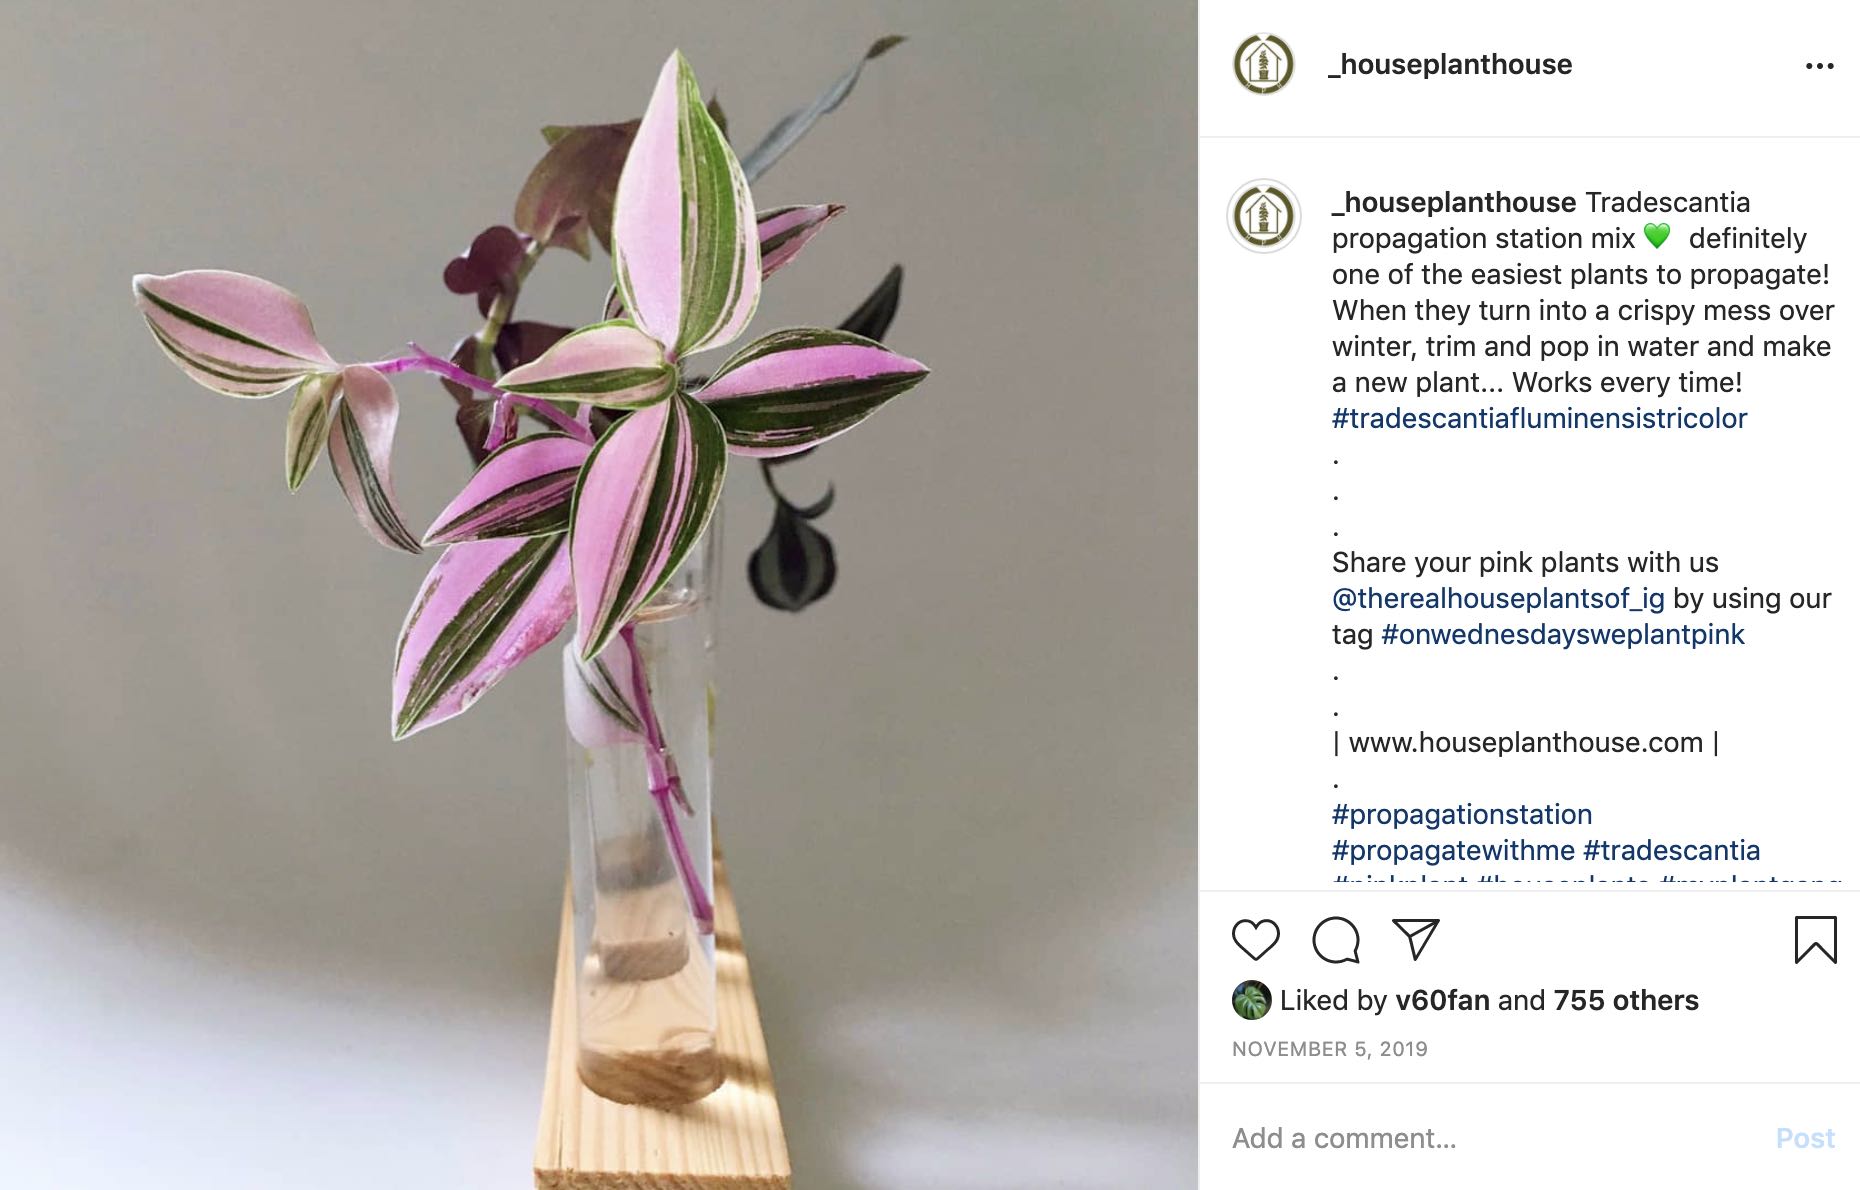
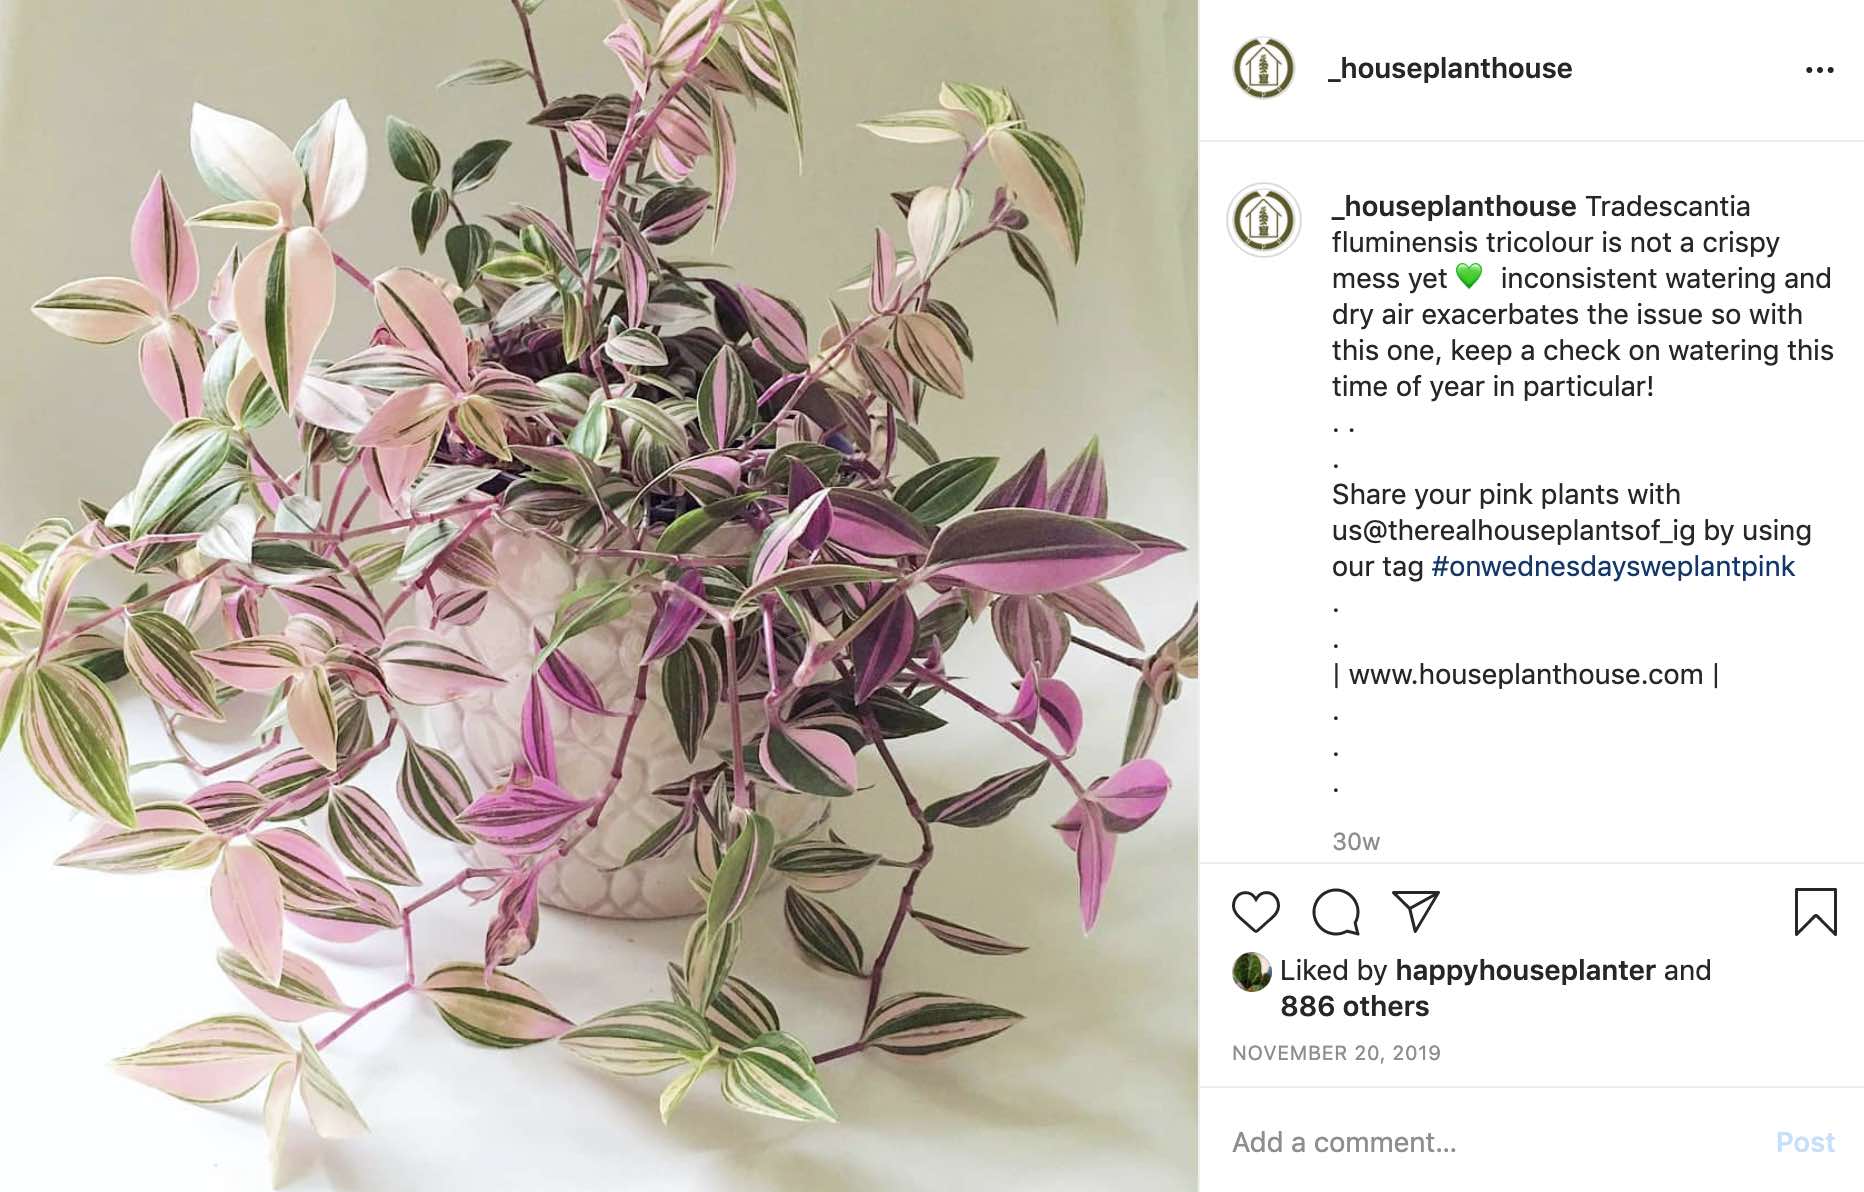
My plant over time…
Lastly, I wanted to show the whole process so I went back through my instagram feed + here is how this very plant grew from cuttings… I think the key is to keep the plant in a small-ish pot + do a few re-pots over the growing season, as opposed to potting the cuttings in a pot that is too large. This means that the plant will be putting energy into making roots + not leaves:


So there we go, that’s a step by step guide to making a new tradescantia plant out of cuttings. I had quite a few requests for putting this together in a post so I hope you find it helpful.
I’ve been doing a bit of repotting over the weekend so I’ll have a ‘repotting diaries’ up as my next post.

Leave a Reply