
One of my favourite things about my apartment is the picture rail. I know it might sound like a relatively small detail to love quite so much, but over the last few years that I’ve lived here, it’s been one of the most useful original features of my weirdly shaped 1930’s place. Since enjoying it so much over this time, I intend on having a picture rail in any future homes if at all possible, because they have really helped me to transform my space in a really flexible way – no annoying picture hanging problems here! Even if you don’t have one, read on to see how you can make one!
Here’s a clickable link to some of the picture hooks I have.
If you like a more minimalist, modern look, these ones are great too!
After a few months of hanging pictures of all shapes, heights and sizes, my thoughts turned to my ever-growing collection of houseplants…
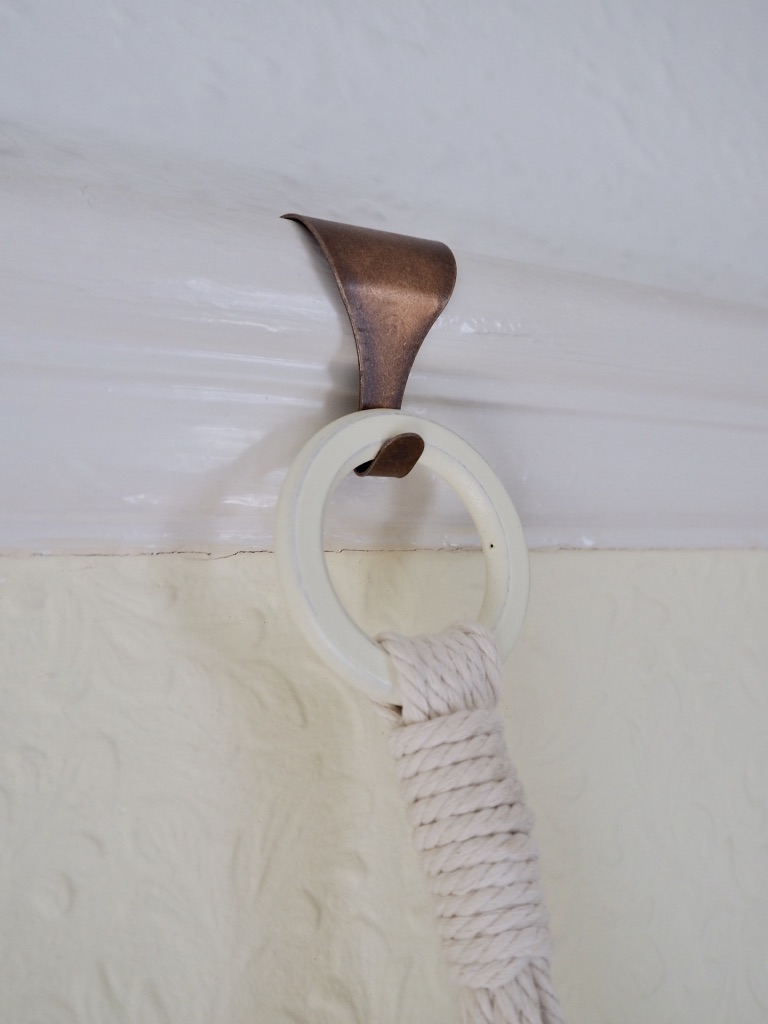
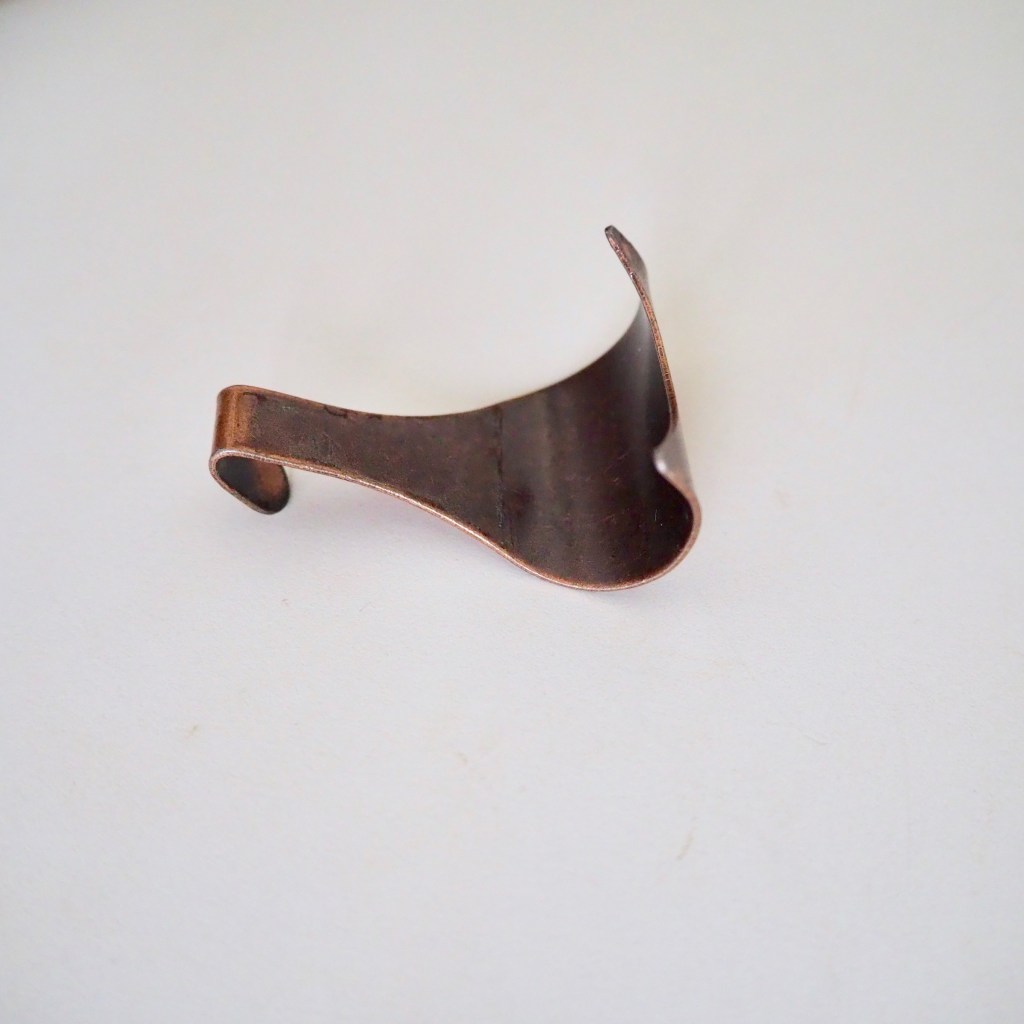
I get a lot of questions on Instagram about these hooks when I post photos of my hanging plants, so if you were wondering what they are and how they work, this post is for you!

Around this time, I had also started to experiment with making macrame plant hangers and for my first few attempts, I made them without the wooden ring – just the cord knotted into a loop. This does work, but I was quite pleased when I realised these wooden rings also sit well on the picture hooks. After some trials, I’d recommend looking for some metal rings, or flattened wooden hoops as you can see in the photograph below left if you intend to hang your plants in this way (and if you want to try your hand at some macrame making!) Some of my thicker round vintage rings don’t hang all that securely so bear this in mind… you don’t want your plants or pots taking a tumble!

| W H A T T O D O I F Y O U D O N ‘ T H A V E A P I C T U R E R A I L |
Picture rails are a feature I see in a lot of older properties here in the UK and much of the time they are not often used for their intended purpose; that is, to hang pictures! If you don’t have one and want one, you can easily install a picture rail for an affordable price – if you don’t mind doing a bit of DIY you can buy the wooden lengths at your hardware store! Depending on the age of your property and the height of your ceiling you’ll want to decide on the correct height for you. Have a look around online before installing, but as a general rule, my picture rail runs at the height of the top of my door frame – 2.1metres (30cm from the ceiling height). For rooms with high ceilings, the picture rail is often 50cm from the ceiling height.

| H O W I U S E M Y P I C T U R E R A I L |
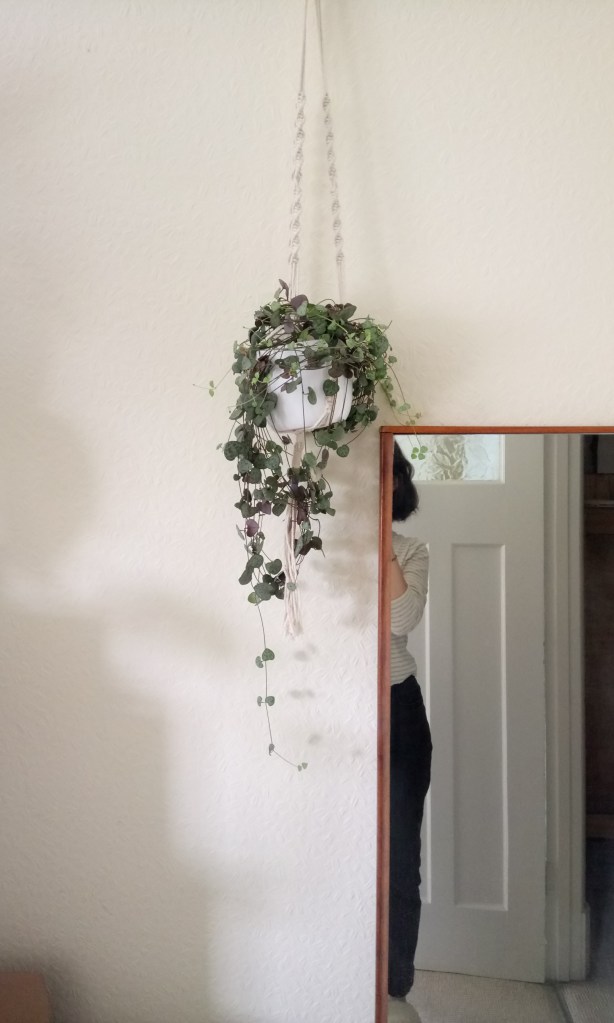
Here is the corner of my bedroom that really utilises the picture rail for hanging plants, it gets dual aspect light from South and West facing windows and all these plants are very happy here! I do switch up my planting here as this is quite a prime-plant location, and using these hooks has made it an extremely easy task. They are easily moveable and re-moveable too! A bonus is that it’s really helped to make my space feel like home as I’m not allowed to drill into the ceilings etc. As you might imagine, houseplants are a big part of my home and I do like a trailing one, so I’d soon run out of room otherwise!


Aside from just using the hooks to hang my plant hangers, I have also utilised them to actually support my trailing plants themselves – the two examples below show my Philodendron ‘brasil’ creeping along the picture rail and next you can see that my string of hearts got a bit long, so I used a secondary hanger as a ‘sling’ to support the drop of the plant. Side note: I will trim this soon but this works well in the meantime! The other photograph shows using fishing line so that the support of the plant is invisible.


| A N O T E O N C U R T A I N R A I L S / C L O T H E S R A C K S |
If you don’t have a picture rail and still want to enjoy some hanging plants, the next best ‘drill-free’ option is to use the curtain pole that is already up. Plants in this position will often get a really nice amount of light but beware of draughts if you open the window a lot, especially in colder weather. If you are able, you can also just mount a curtain rail on the wall to make a plant hanger, this can look really good! Finally, if neither of these options work for you, a free standing coat rack is ideal and moveable too. I did this in my previous flat and it worked really well.

Hope you enjoyed this post and that it has given you some plant styling ideas for incorporating some hanging plants into your home.


*Affiliate links are used in the post which means I can receive a (very) small amount of commission if you make a purchase — thank you for supporting my blog. I often get asked where I get specific items from so have linked these here. I have bought all these products with my own money.

Leave a Reply