
In the previous post, we talked generally about the somewhat daunting prospect of moving with houseplants + focused on pre-move plant care; how to prepare your plants for the move + getting a ‘packing kit’ together in readiness.
PART 2: The move
Here we will get into the process of packing + moving your plants where I will show you some of my packing + how I got everything ready + prepped for the removals van.

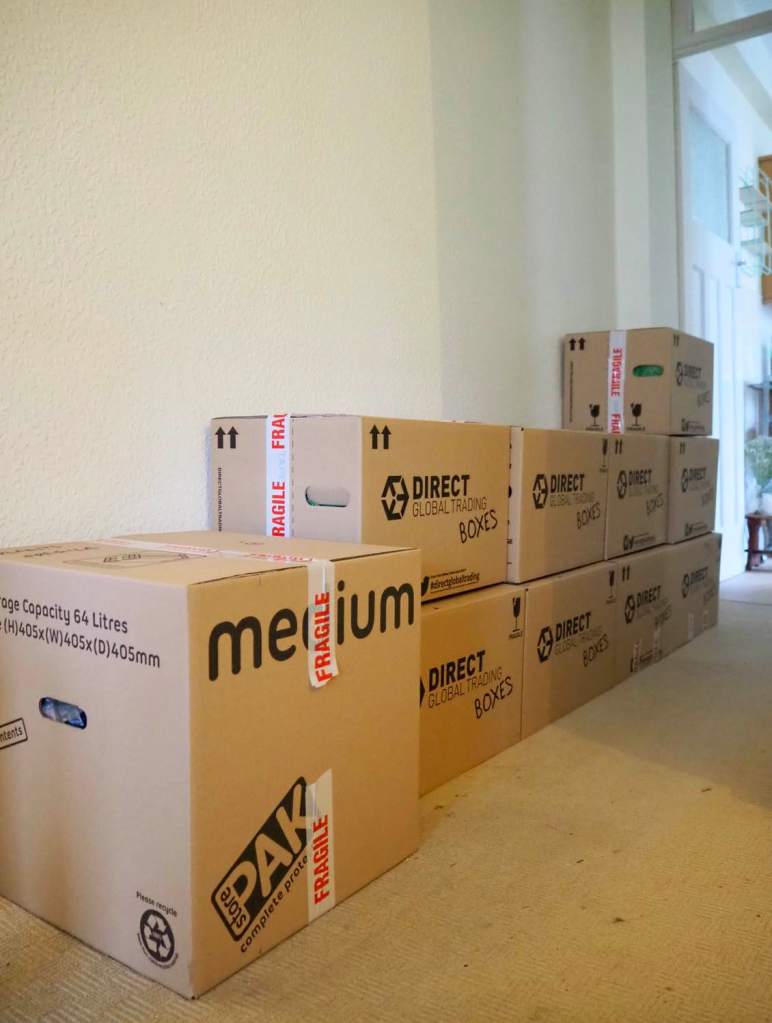
By this stage, you’ll have (hopefully!) pretty much packed up your place aside from your plants. At this point it’s a good idea to have a dedicated space to work on plant packing… if you can empty out a corner + bring all your plants into one area that would be ideal. I used the office room for packing + brought all of my plants here ready to pack. I wanted to keep my plant boxes separate to general moving boxes (which I’d organised by room) so made sure they were clearly labelled. So that your houseplants aren’t in boxes for too long, it’s best to wait until the day before moving to pack. I knew mine would be wrapped up for over 24 hours so didn’t want to do this too far in advance (I had plenty of other things to pack anyway!)


Packing your plants
I tried to document bits of the process of packing 200 plants. Note: it takes time! Make sure you dedicate a few hours to this… it did take longer than I had anticipated + I used more boxes than planned too.
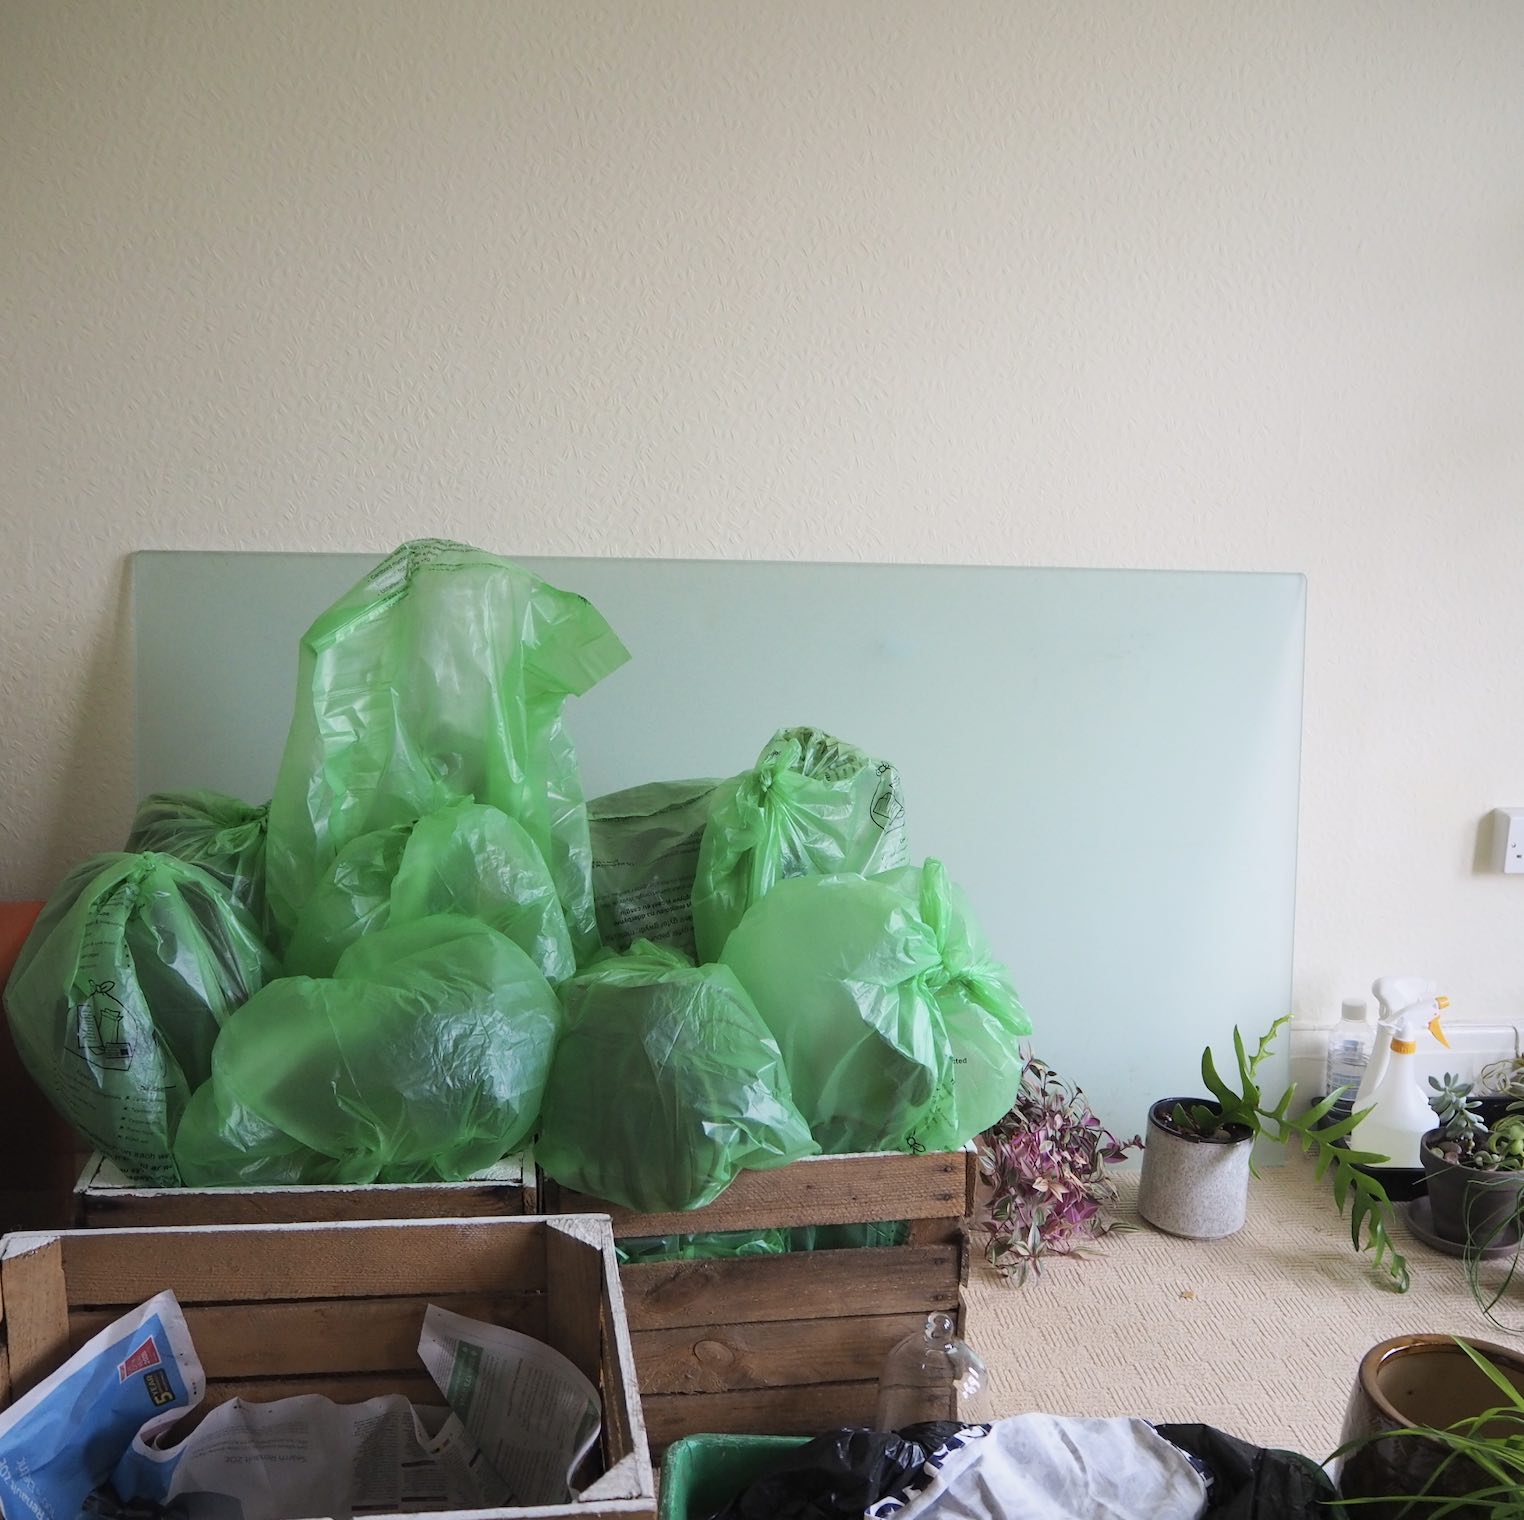
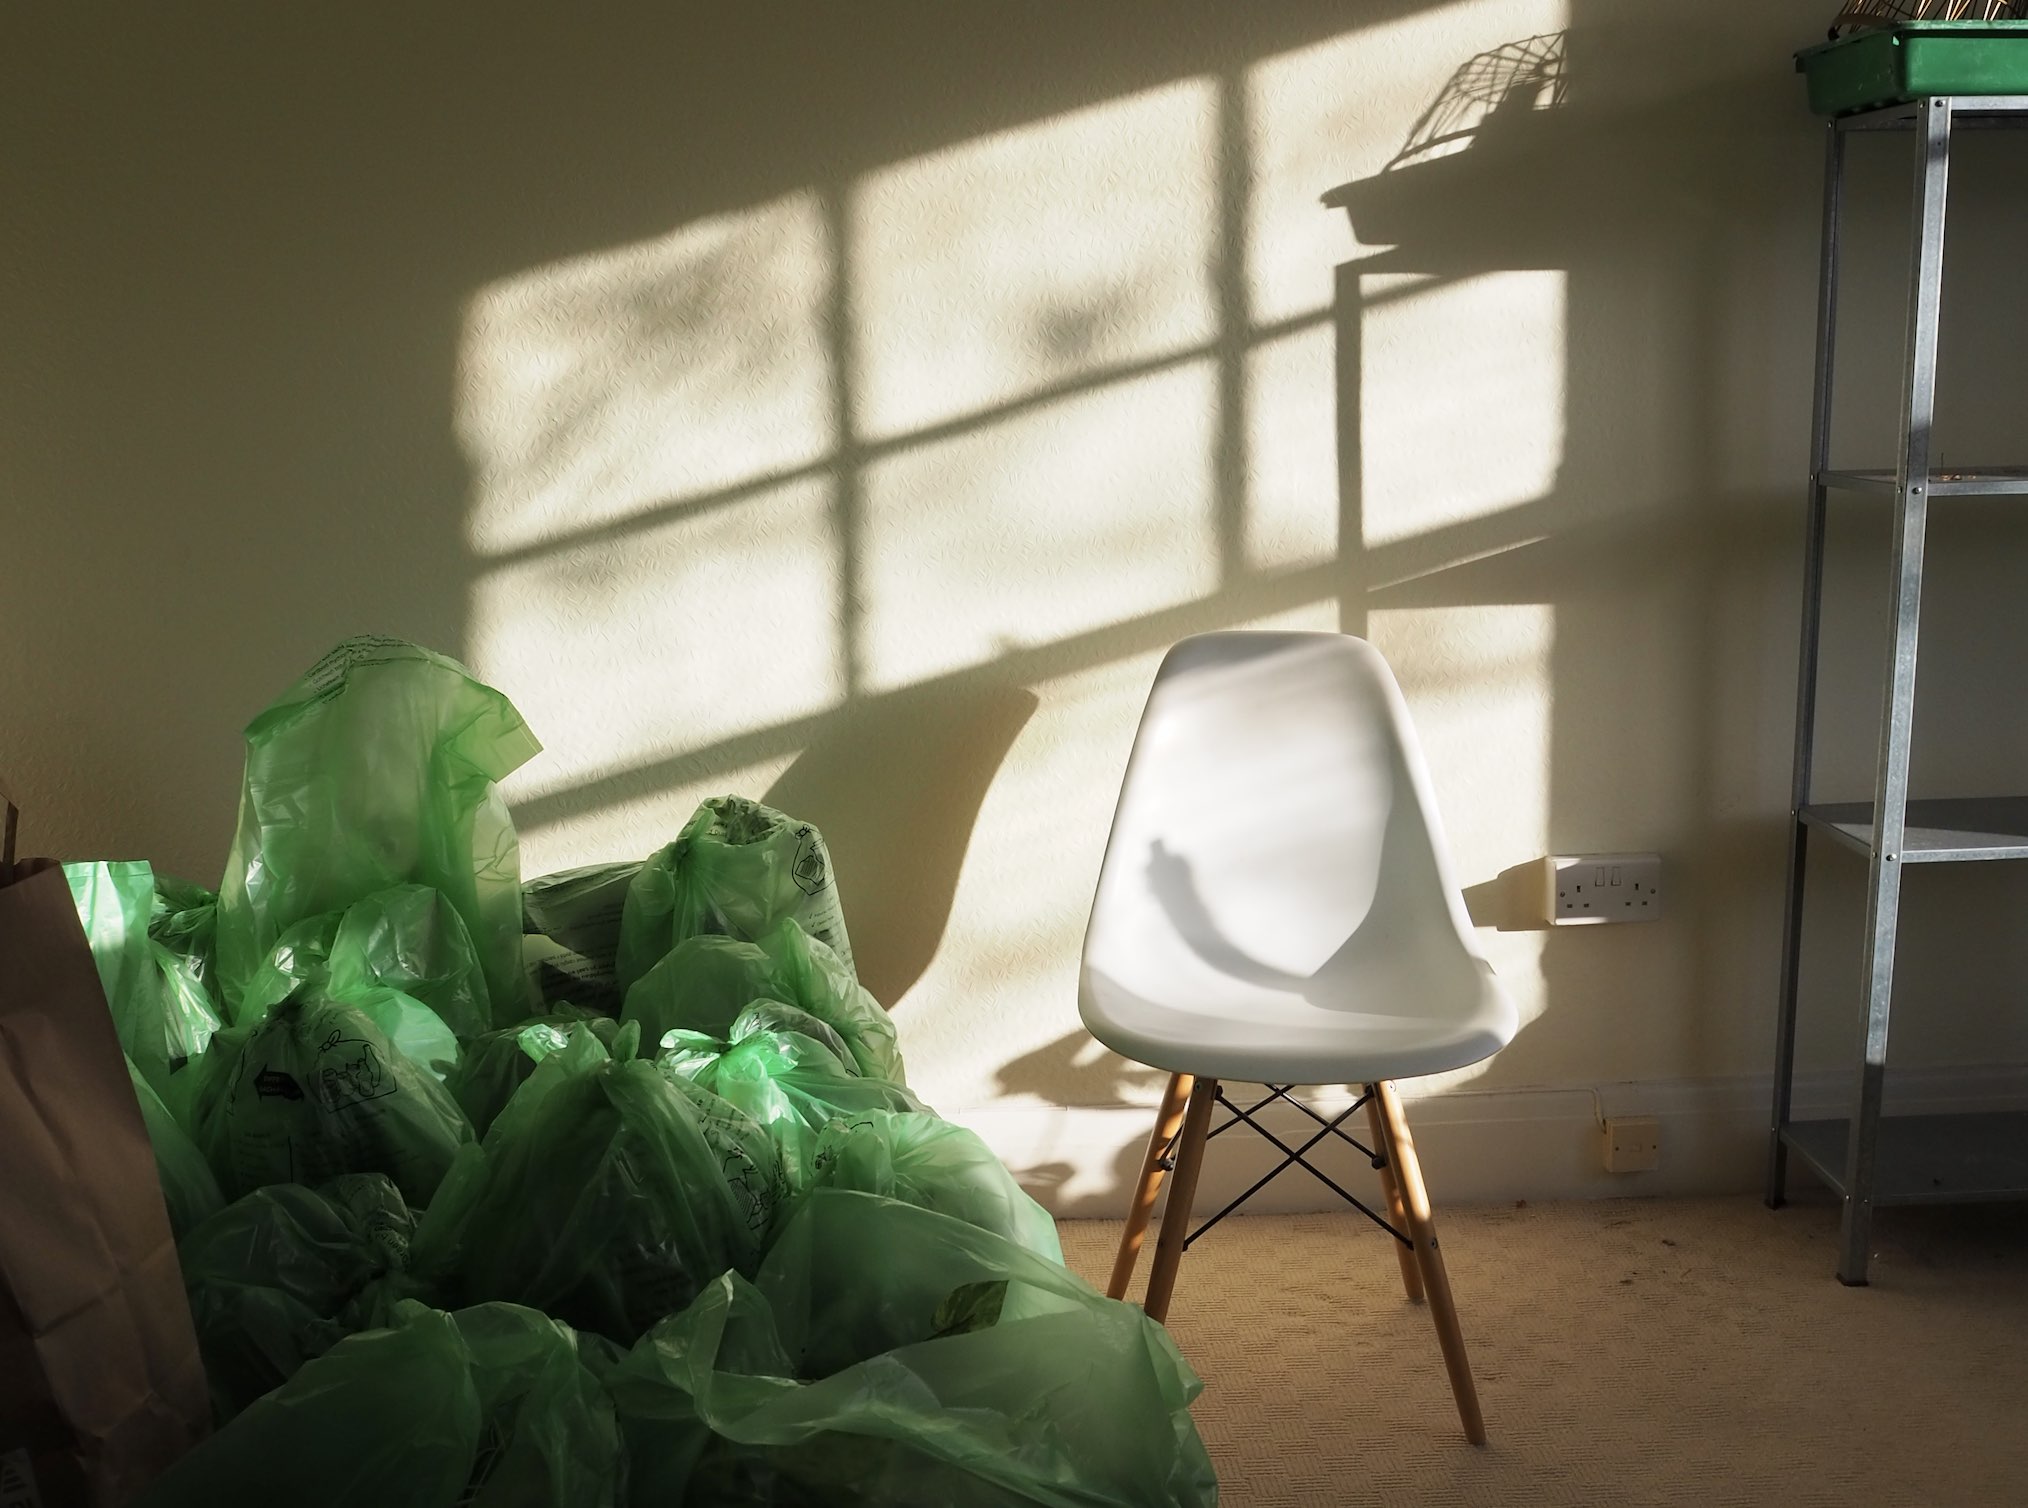
The main thing you will want to achieve is a well -packed box with little room for things to slide around when the boxes are picked up. It’s a good idea to line the base of the box with some newspaper if you can, it stops things sliding + if for any reason the base of the box is weakened, it will add some extra protection. I starting using my recycling bags here + I have to say, they worked a treat. Another reason for using these type of bags is that any moisture (or soil!) from the plants will not leak out into the box… you don’t want the cardboard getting soggy + weakened. Packing in this way also meant that all the boxes were clean + could be used again multiple times. The bags also remained relatively clean + could all be re-used which I was pleased about.
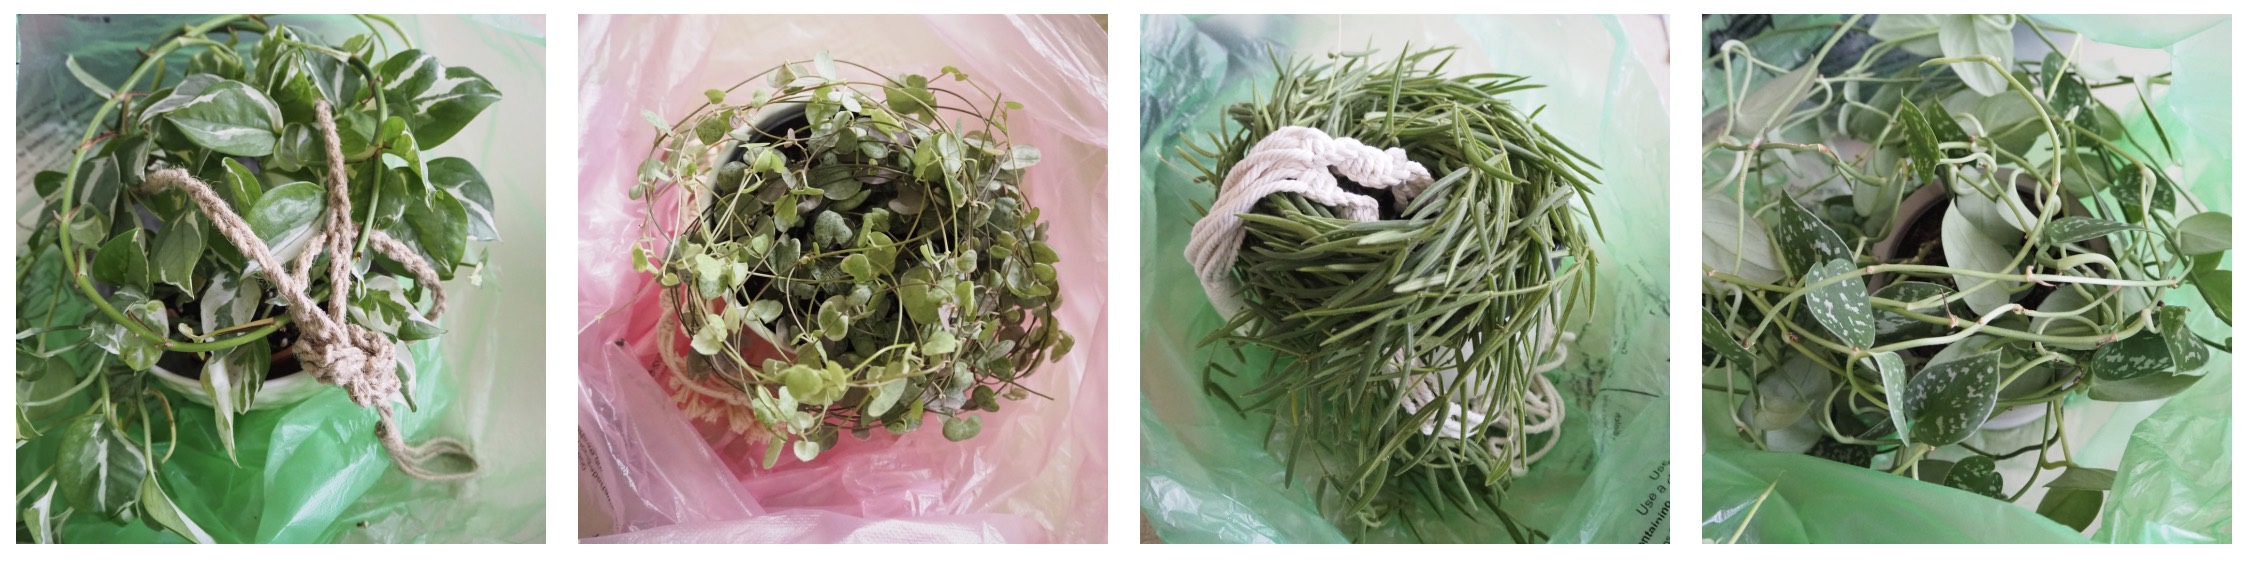
‘THE HANGING ONES’
First I lined the base of the box with 2 sheets of newspaper to give the pots in bags something to grip onto. I opened up the bags, put the base of the plant in the middle of the bag and proceeded to twist the stems around in a circular motion. Sometimes I left them in their hangers to make it easier to unpack the other end (it helped!). I loosely covered the plant with the bag then boxed them up, twisting the tops + folding them over to keep them warm. The bags were quite large but I chose to use these as I thought they would offer some insulation within the boxes and pad the plants out a bit too, so that I didn’t have to add in lots of other packing in between the plants. This made the process quicker + cut down on other packing materials I would have needed to get so ended up being more affordable too!

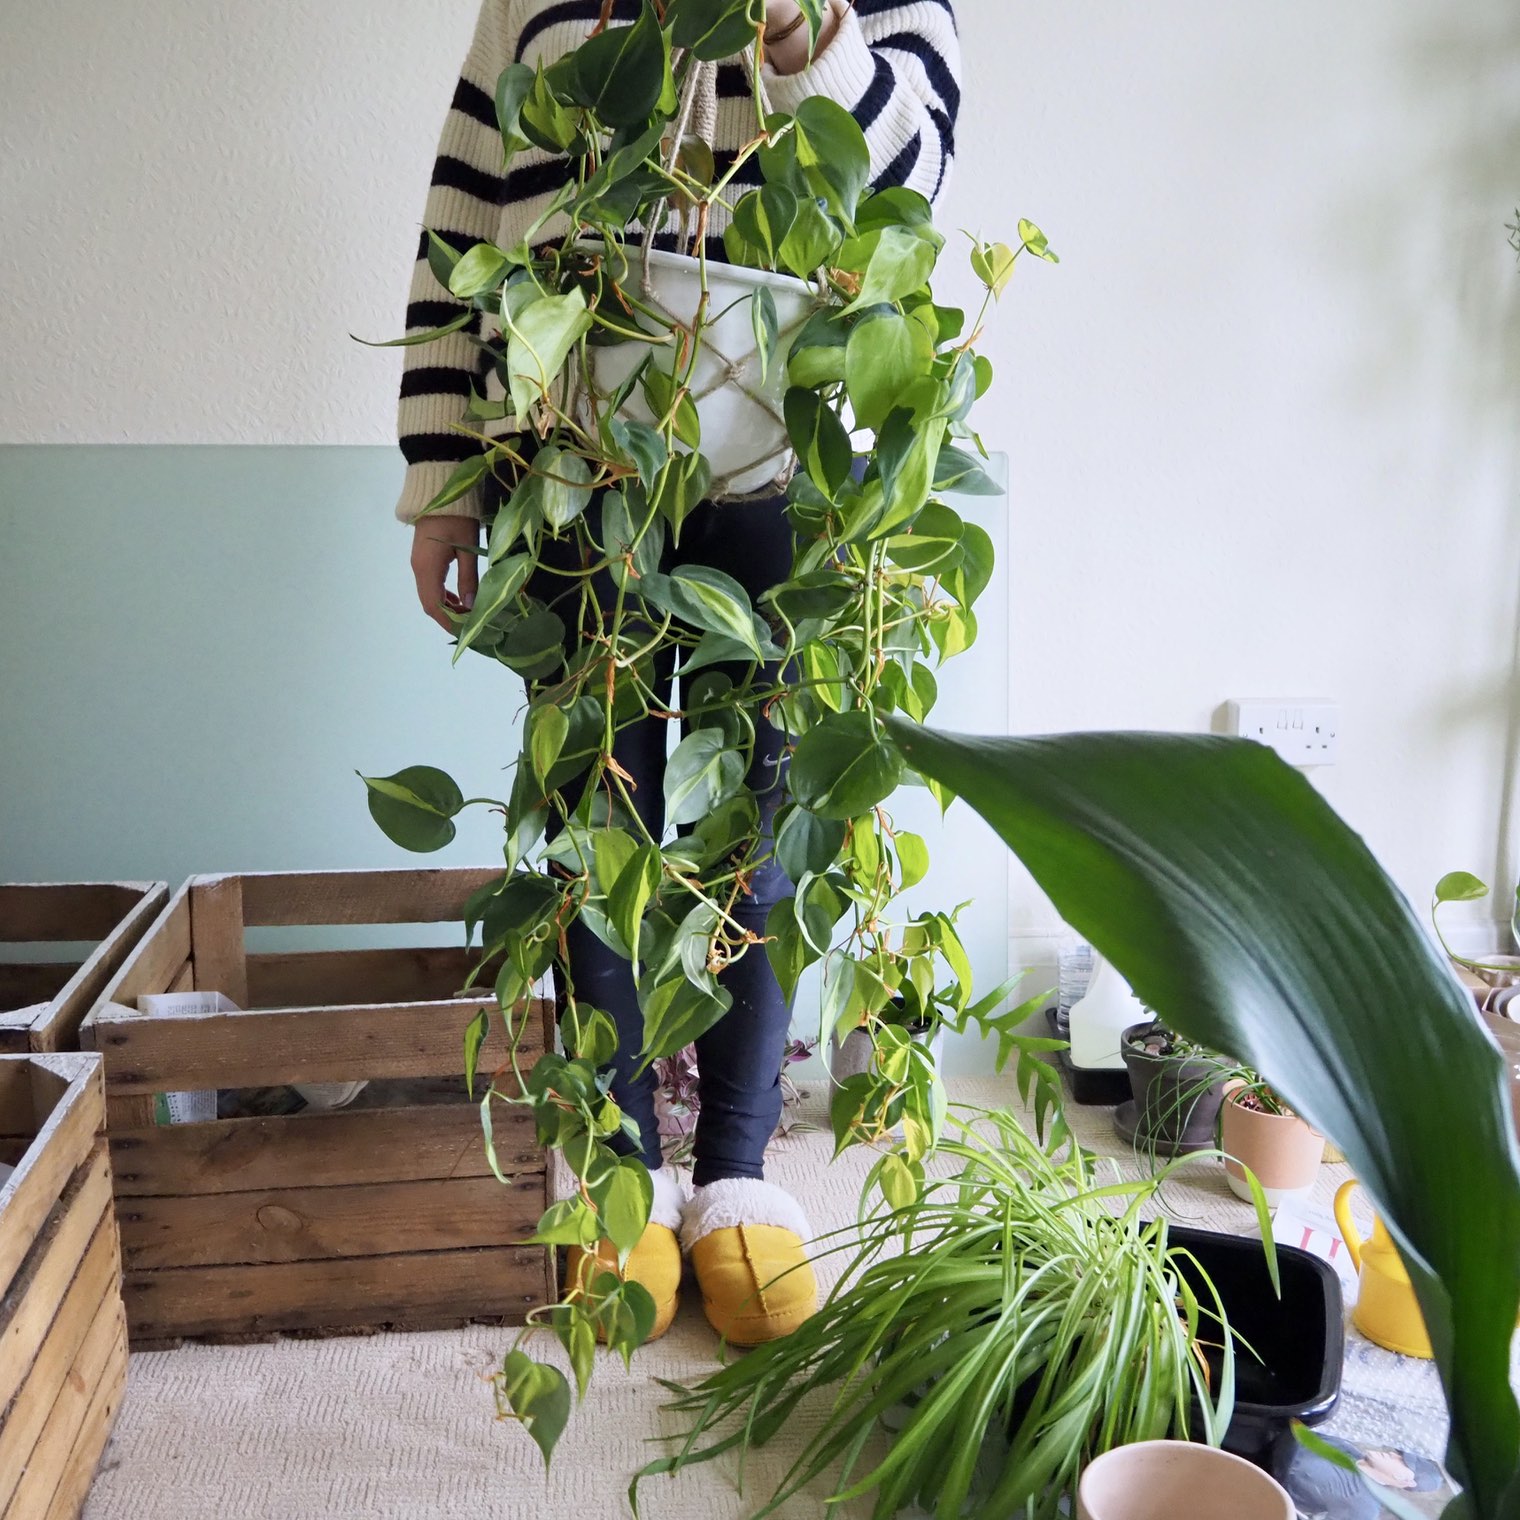
 Depending on the size + type of the plant, I either placed the heaviest plants in the 4 corners of the boxes, or one in the middle of the box, with smaller ones circled around it. If you are using medium sized boxes, try to keep all the plants upright — it’s less messy + things are less likely to get damaged. My marble queen pothos below wouldn’t fit in a bag as it was really long, so I draped it over then added some padding on top like so :

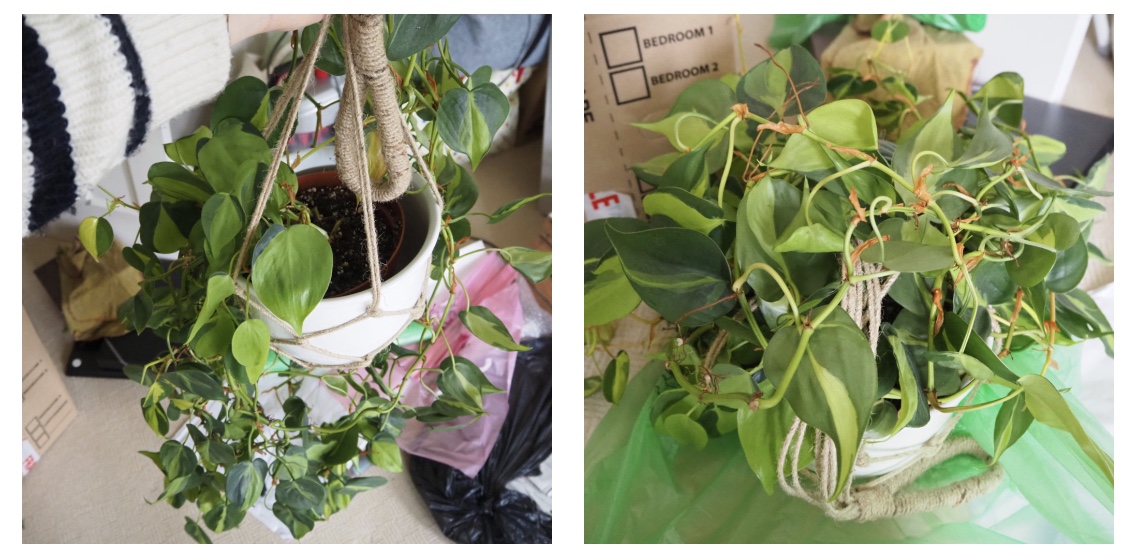
 My philodendron brasil (below) took some patience to pack, that’s for sure…!
 ‘THE LITTLE ONES’
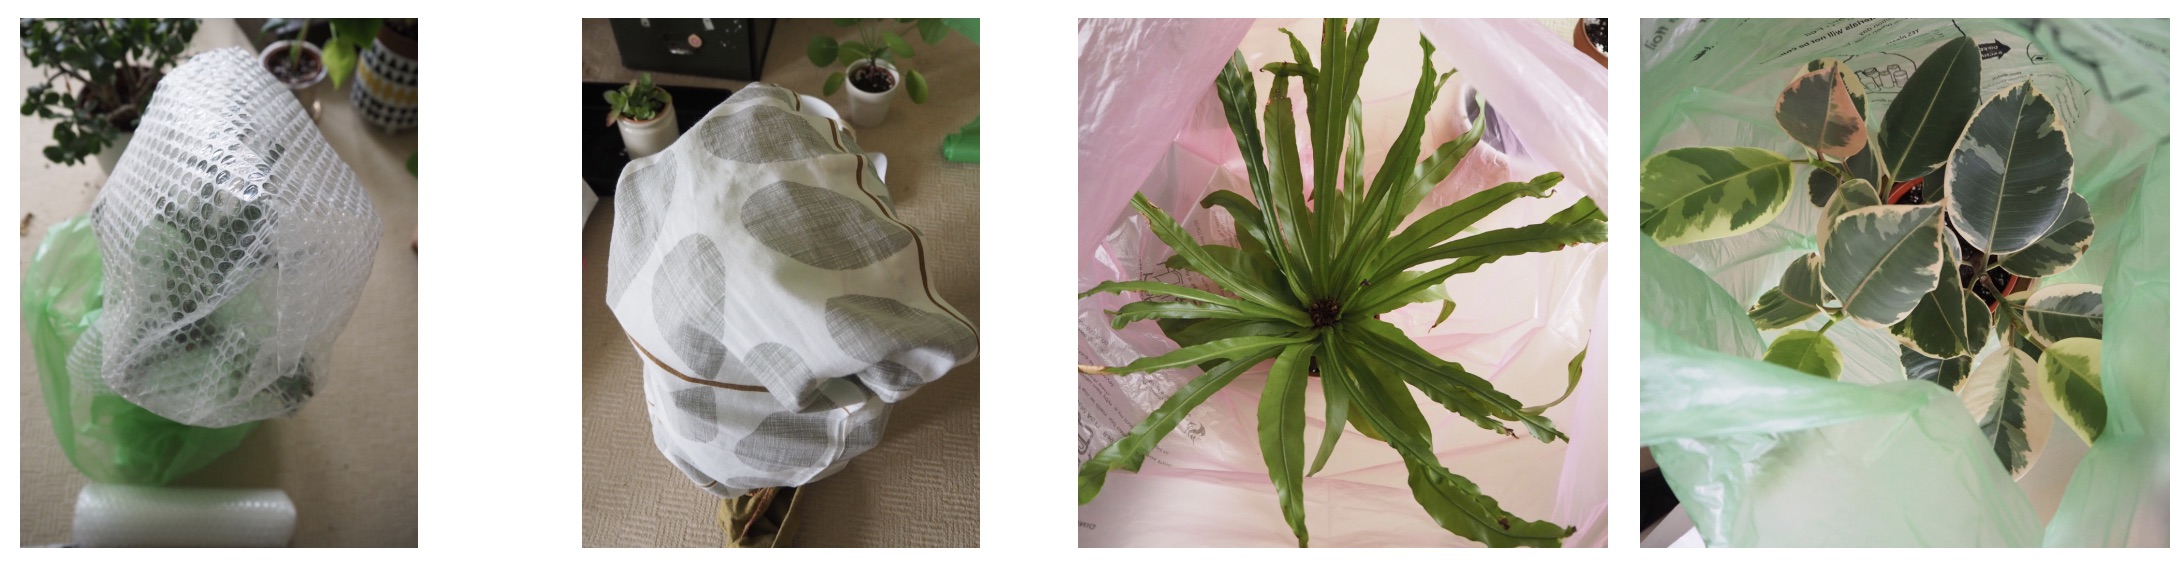
I really hadn’t realised how many small pots I had of cuttings, propagation experiments + all sorts of succulents I had scattered around the apartment until this point! I covered the cacti in bubble wrap (then newspaper in between when packing) + placed the small pots in freezer bags then tied a knot in the top of them. I added some padding where I needed it in between. To pack these little plants, I used two plastic storage boxes that were quite shallow — the plants could stand up but there wasn’t lots of wasted room above them. I stacked these boxes on top of each other + everything was fine.

‘THE MEDIUM ONES’
This was the point I got a little overwhelmed… it had got to that point in the day where I realised I would be going to bed late by the time I’d got through this packing! I went to get a coffee + sat on the floor in another room for half hour so that I didn’t have to look at all. the. plants.
Tackling the medium plants used up a chunk of my packing material as I bagged them from the bottom + then down from the top, joining the bags in the middle where I could. These would be more exposed as they would not be inside other boxes, just huddled together in the van, so I also double-bagged any more sensitive plants that I thought needed it. The apple crates held a really good amount — surprisingly more than I thought… around 5 plants per crate, so that’s 20+ plants packed right there, phew. The cacti got wrapped in bubble, then covered with a pillowcase + bagged again! On that note, bedding sheets + pillow cases are great to wrap things in… I put lots of my wrapped picture frames in them too.

‘THE BIG ONES’
As you can tell by these photos, it was late at night by the time I had got around to the big plants! So sorry the photos are a bit yellow-toned, here’s how I wrapped my plants up…
Whilst taking the plant out of its cache pot, I discovered that my (not so) ‘little’ monstera was in serious need of a re-pot… just look at those roots! I used a wire basket with handles on to put the planter into so that it could be carried easily. I wrapped the fleece around it, + then tied it together at various points. I bagged over the top to keep the warmth in too. 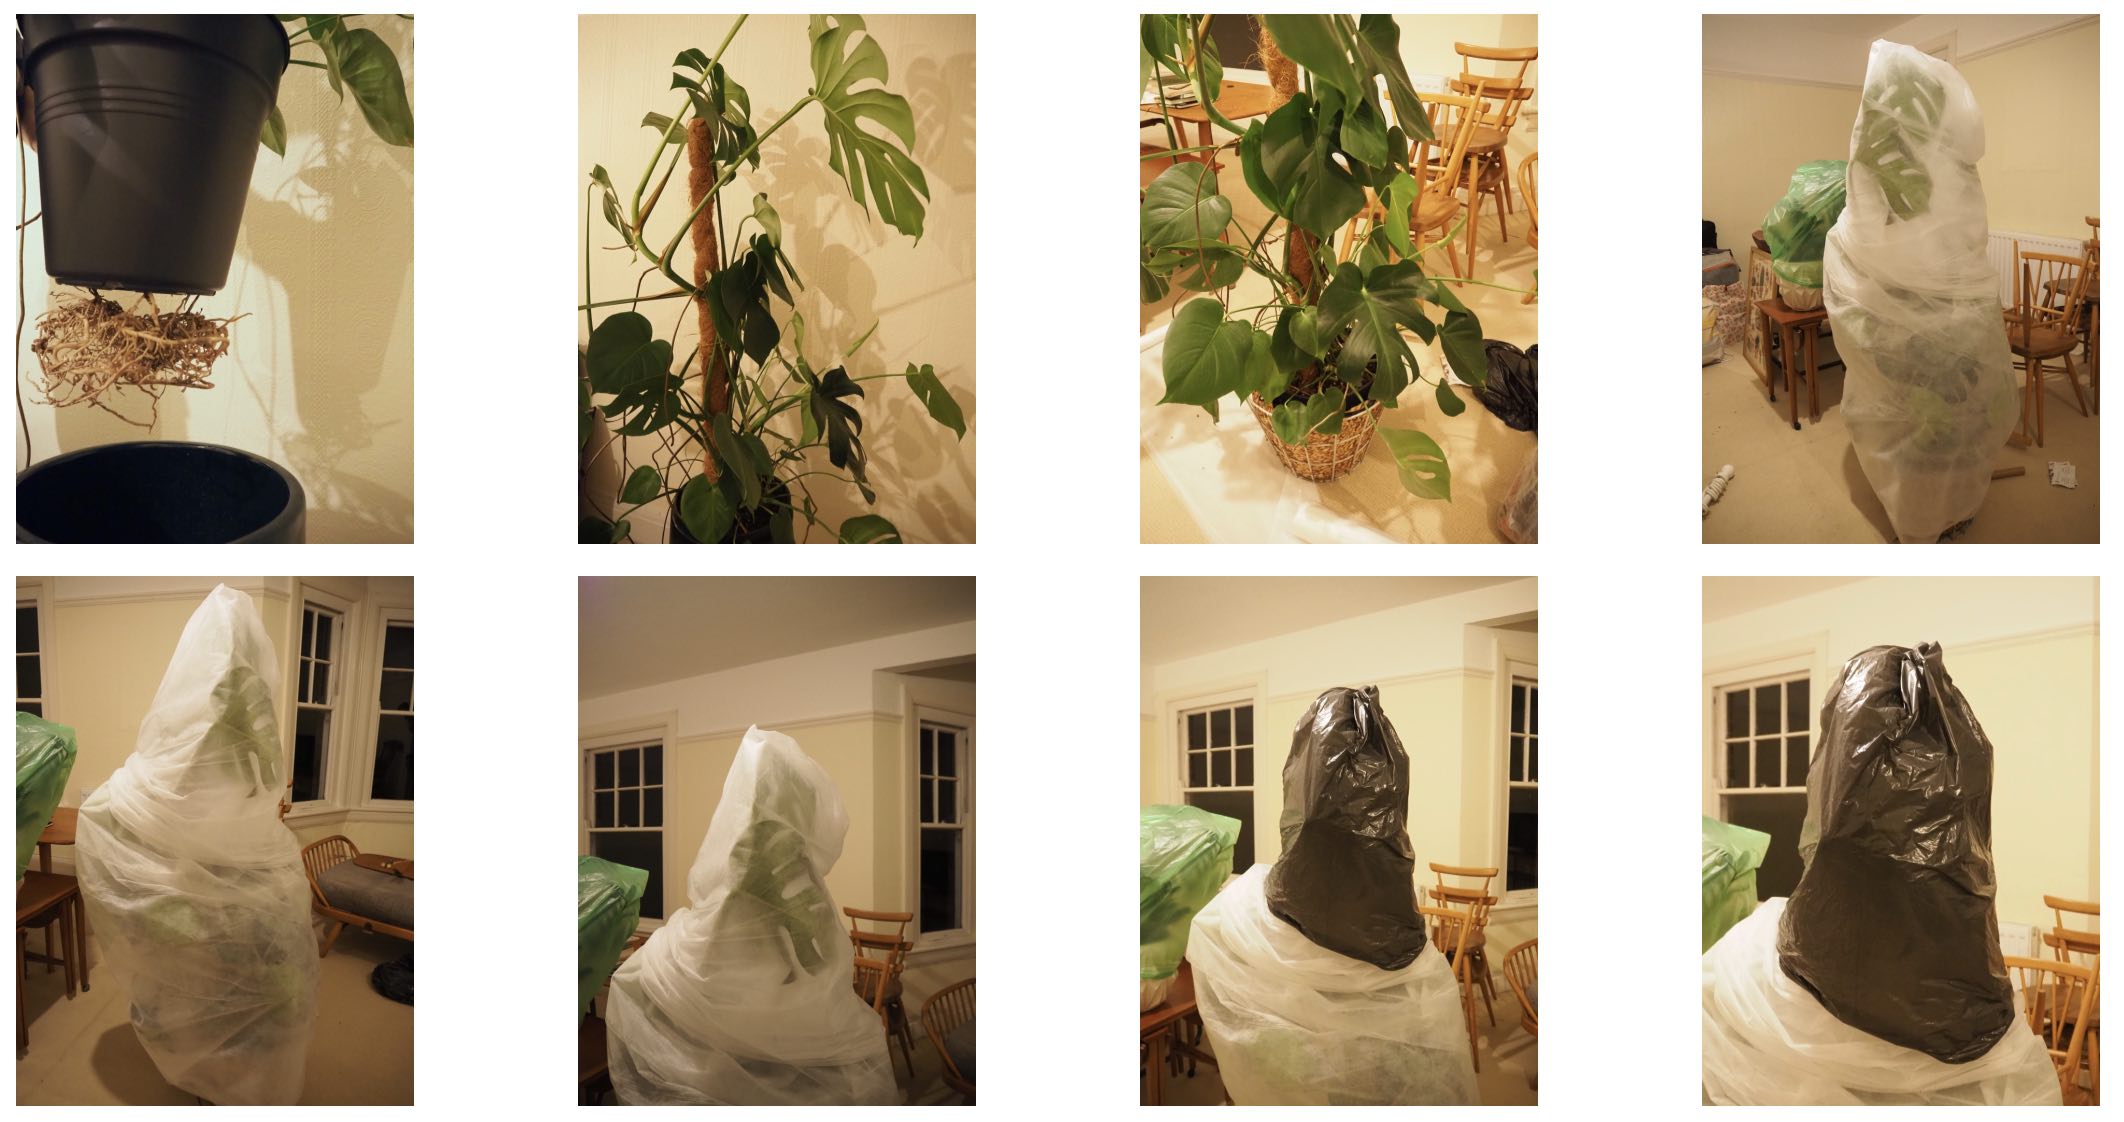 Here’s my biggest ficus getting wrapped…
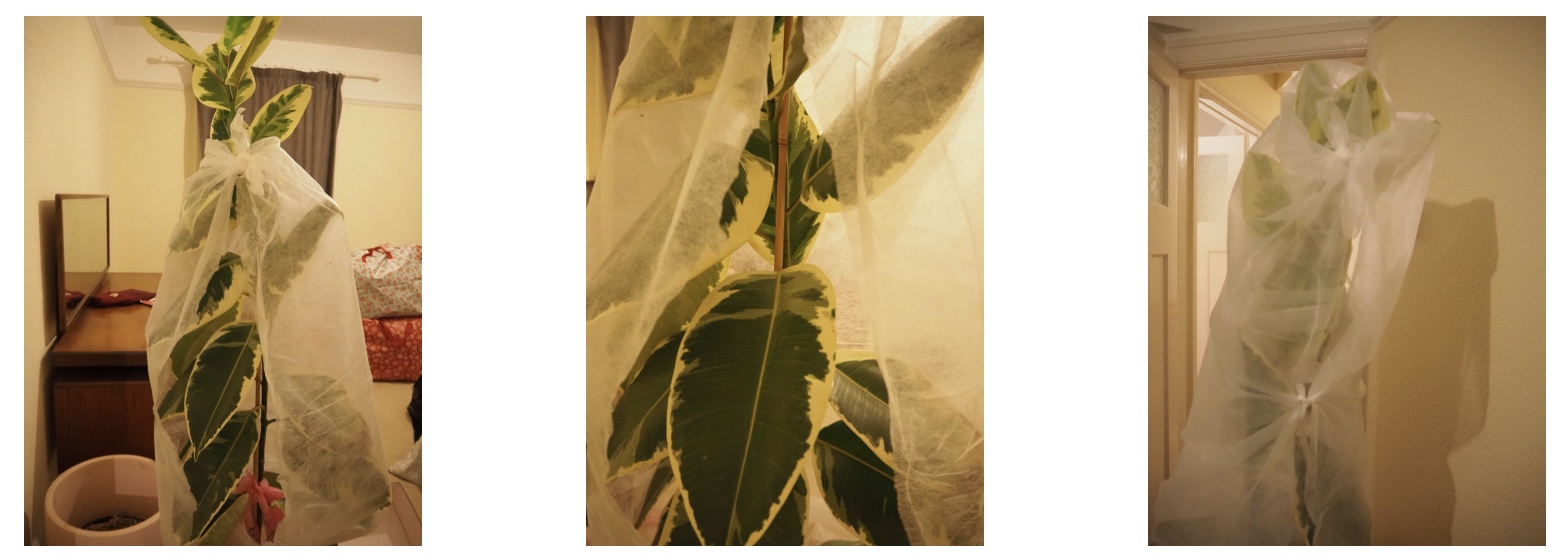 The next morning:
‘THE AWKWARD ONES’


My big opuntia was a bit of a tricky customer to pack, so I used a series of bamboo stakes to support the structure (taping the tops for safety!). It’s a bit battered but it has grown so well! I didn’t wrap this as it was too delicate.
Interlude: Evoking Christo + Jean Claude
I wanted to have a little pause here to take a moment to reference some artists I remembered when carrying out this packing process… Christo + Jean Claude. After wrapping my monsteras in my then empty front room + seeing them shrouded + looming, it reminded me of their wrapping pieces I looked at during my time at art school. I just found out that Christo actually died a few days ago (Jean Claude died in 2009) + they are known as partners + collaborators in large scale site-specific installations.
Here are some of the pieces that I inadvertently evoked when wrapping my plants…!


The materials Christo + Jean Claude used were similar to my fleece — this material is used to protect the trees in Japan in the winter months from snow + frost + as a disclaimer, everything was recycled after the piece was taken down!
Here is a link to the ‘Wrapped Trees’ project on their website if you want to see more. (the photos above are from their website)
The journey
Ok, back to the houseplants!
This part will obviously be dependent on your situation but as I mentioned in the previous post, be mindful of any potential temperature fluctuations; anything really hot or really cold will have an adverse effect on your plant collection. If possible, don’t leave plants in the vehicle overnight.
In terms of packing the car or van, my removals company put the plant boxes in the storage well above the cab which meant they were separate from the other heavier containers + furniture. They took my two monsteras + put those in last so that they weren’t squashed in. This was when we realised that my medium sized plants + apple crates of plants were just not going to fit, as well as my kitchen table! I had sort of prepared myself for this but it was still stressful — it would mean hiring a van + another round trip to get everything. That’s 600+ miles on a plant run!
The removals van was a long wheel-base Luton + the hired van was a long wheel-base transit for the second part of the move. The first leg of the move was around a 6 + a half hour drive to the new place + the removals van got there just before + had started unloading into the house.

Arriving at your new place
I put all the plants in the living space in their boxes + after positioning the furniture, I turned my attention to the mountain of boxes that read ‘P L A N T S F R A G I L E’.
The house had not been lived in for quite a long time + it was really cold with dodgy heating. I opened up the boxes + had a quick check over the plants to make sure none had fallen over or got squashed, then left the plants sitting in the open boxes overnight. I wanted them to acclimatise to the temperature here whilst I did some more unpacking in the kitchen space + bedroom.
As I’d grouped similar plants together in the boxes, I knew that I didn’t need to look at things like my cacti + succulents for a few days — instead, I unwrapped the two large monsteras + got out any of my more fussy, leafy plants. The next day I started taking a few of the trailing plants out of their boxes so that they could get some air whilst hanging off an existing pole. Before I knew it, it was time for the second leg of the journey in a hired van to attempt to rescue the rest of my plants! Before leaving my old flat two days before, I’d pretty much kept the other plants packed… but I did take the bags + wrapping off the ones in the crates so they had a bit of air movement around them.
Here’s how the living space looked when all the plants were eventually reunited!


In the final part of this trio of posts I’ll discuss post-move plant care — what to do … and what not to! The focus will be on how to acclimatise your houseplants over the first few weeks + months so that they adjust to their new home with ease.

Leave a Reply