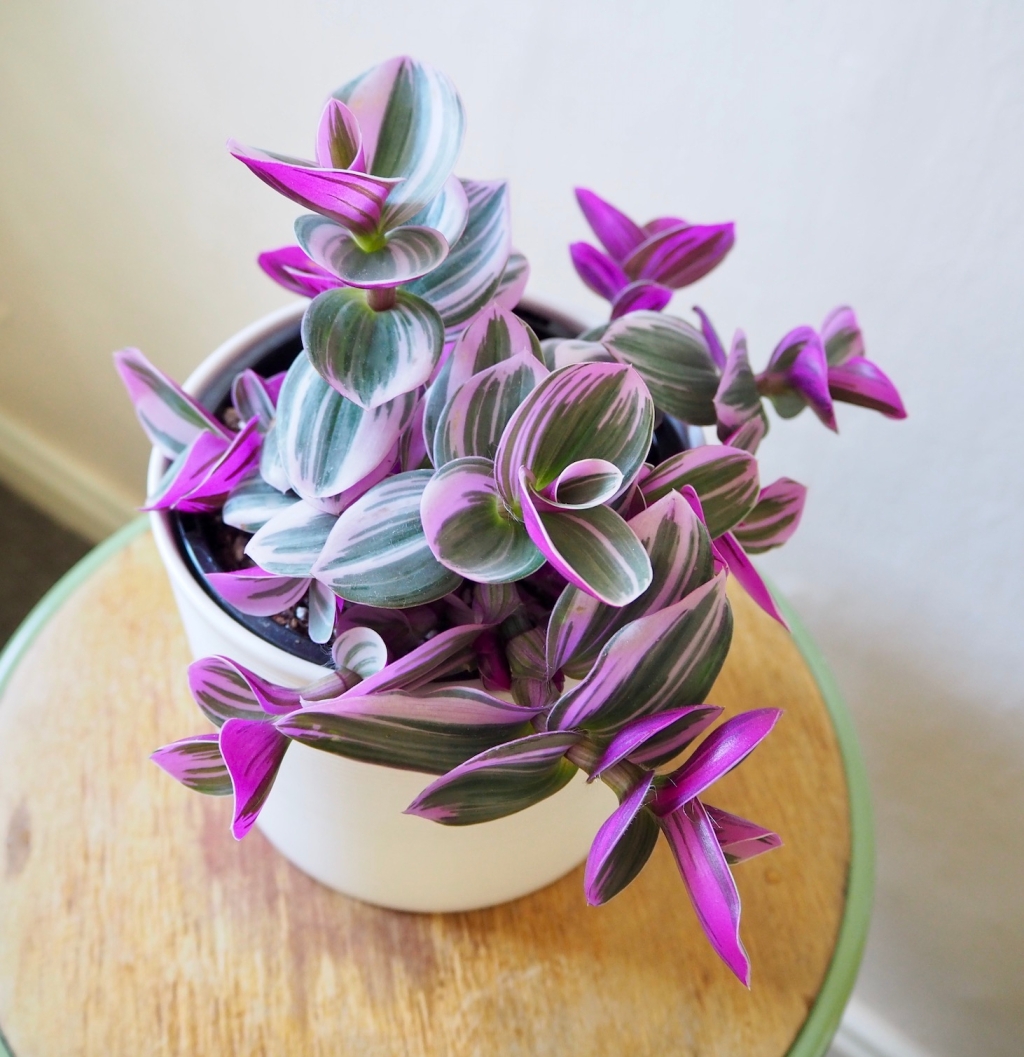
Let me introduce my tradescantia nanouk! I bought this incredibly pretty plant three months ago as a bit of a lockdown treat for myself + as a big fan of my other pink tradescantia — the fluminensis tricolour, I didn’t really know what to expect in comparison. I hadn’t seen a plant in real life so when it arrived, I was drawn to the chunky stems + sturdy, rounded + fuzzy foliage. It wasn’t like any other tradescantia I had + immediately I became fascinated by its form + compact growth habit… oh, and its beautiful colouration is quite something too!

Introduction
I recently posted a photo of my plant on instagram + got lots of questions on care tips so instead of trying to reply to all the individual messages, I have put this post together for you. I’ve had a few months to get to grips with its likes + dislikes so I hope you find my care guide helpful. If you know anyone that is struggling with this plant, please share this post with them!
I thought it would be beneficial to show how my plant has grown since I have had it. For reference, here’s how it looked when it arrived on my doorstep on the 3rd April:


Quarantine new plants
To houseplant newbies this might seem like pretty extreme behaviour, however it is good practice to take precautions when introducing new plants into your home. I’ve written about this before but when bringing home new plants it’s important to closely inspect your new purchase in very bright light, carefully. If your new plant has been huddled in a plant tray with some overwatering + little ventilation (which can sometimes happen in stores) it could be carrying pests. Check the underside of the leaves for any markings, webbing, sticky marks, speckling or white fluffy deposits. In terms of potting mix, be wary if it is very wet, or there are damaged roots. Once you’ve carried out an initial check, its a good idea to shower down your plant to give it a clean. It’s best to keep your plant in quarantine for 2-3 weeks before introducing to the rest of your houseplant family. Be diligent + check every few days during this time. I will often also change the potting mix to my own ‘blend’ I like to use for my houseplants at this stage, before giving it a new spot amongst my plants.
Light
Positioning is important when it comes to keeping these plants happy — if your tradescantia is not getting enough light, the stems can start to stretch + the variegation can turn more green in colour. This is a much more compact variety so this is not as obvious as say, the zebrina. Over the last few months, the best position I have found for my plant is around 1 metre from a south-east facing window. In a bright spot, your tradescantia might bloom too! Avoid any harsh, direct light for very long as it might start to make the leaves a little crispy. Bear in mind that these are the conditions that are personal to my current environment + are used as a guide for you to compare with your own home. It’s important to also remember that windows can be pretty different in size + if you live in a built up area, with other buildings close by, or if there are obstacles like trees outside, this all has an impact on the intensity of light.
Humidity and leaf care
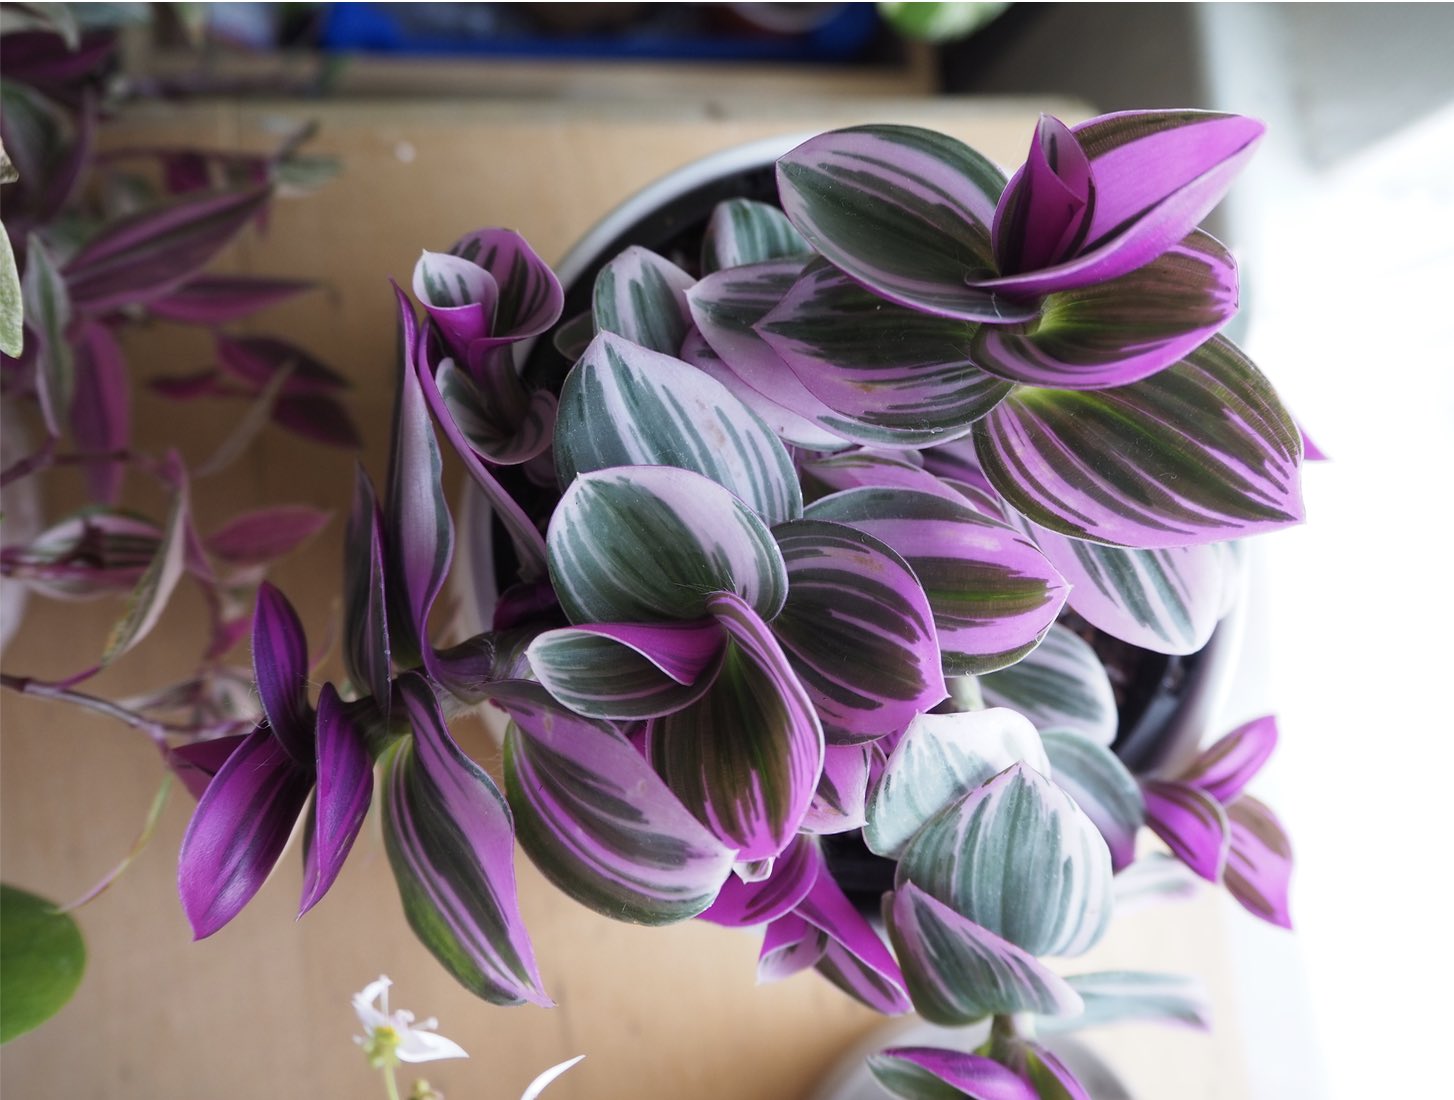
As I said above, this cultivar of tradescantia has quite a different type of leaf to the zebrina + especially those very fine leaves of the fluminensis. Here’s a care guide for that plant if you have one too. This foliage is quite rigid + the leaves hold their shape well because of the way they are attached to the stem…they sort of remind me of a series of curled up pieces of paper, or some sort of origami! Due to this thicker leaf the nanouk is less likely to be sensitive to humidity than its thinner-leaved relatives. Therefore, I’ve not found it necessary to add any additional humidity or shower my plant often. Because of the leaf shape, I was aware that the water would sit at the base of the leaves + could lead to rot if it didn’t dry out quickly enough. Regular household humidity seems to be keeping my plant happy + growing quickly.
Watering
There’s no avoiding the fact that watering this beauty can be quite tricky! As you can see from the photos in this post, the stems branch out + cover the top of the pot — great if you don’t like looking at potting mix in your houseplants (though this doesn’t bother me at all) but not so great when you want to water. I’ve found I’ve been able to water really well from below on a drip tray — use tepid water + let the plant sit for an hour to soak up what it needs. If your nanouk is not as full as mine, you might find some space to be able to water from the top! I have tried to avoid getting the top wet when the stems are almost resting on it because this can sometimes be problematic if there is not a lot of air movement + could cause damage to some of the foliage + a bit of a fungus gnat problem. In short, don’t over-water!
During Spring + Summer I’ve been watering my plant once every 7-10 days which allows the top layer to dry out between waterings. Check by sticking your finger in the potting mix; I wait until the top few centimetres is dry. Another way of checking is the weight of the pot — my inner pot feels light to pick up when the tradescantia needs watering. Always remove from the cache pot before watering so that the plant isn’t sitting in water.

Fertilising
Tradescantia are pretty easy to grow plants that I find respond really well to regular fertilising during the Spring + Summer months though it is not essential. Feeding them once or twice a month with houseplant feed diluted to half the recommended strength works well for me when the plant is actively growing. Giving your plants a bit of additional support by way of nutrients + other elements will help to keep your houseplants robust + more resilient to pests. Just be sure to check if your potting mix has any sort of slow release fertiliser already in it — too much fertiliser is bad for your plants. You also don’t want to be fertilising immediately after repotting. More on that below…


Repotting
This plant is a fast grower! That means you will need to be prepared to give it some attention + quite possibly re-pot multiple times during the growing season. I’ve repotted once in the three months I have had it. Over Autumn + winter you can pretty much leave it alone but when it’s actively growing, you’ll want to be on root watch. Roots circling the bottom of the pot, or growing out of the drainage holes are all things to look for.
Potting mix
In terms of keeping your plant happy, I use a houseplant potting mix with added orchid bark, perlite + a little bit of horticultural grit/sand. This works well for my tradescantia nanouk to create good drainage. A very dense soil can cause root rot + create a whole manner of problems.
Pests
Compared to some more tricky plants, tradescantia are generally quite resistant to pests but if your environment is quite warm + dry, watch out for mealy bugs. Spider mites can attack a very weak plant that has been severely dry too. Consistent over watering can often cause an issue with fungus gnats (as with all houseplants). Prevention is better than cure — get into a groove with a care routine that works in your setting; regular watering + feeding as detailed earlier in the post is good plant care practice.
Propagation
The best way to grow your plant collection for free is to propagate cuttings. Pruning your plant is a good way to keep it looking its best but when you are new to houseplants, this can feel very counterintuitive. One of the easiest things to do with these types of plants is to add cuttings back into the same pot to create a fuller pot. Tradescantia varieties like the zebrina + fluminensis are perhaps the easiest of all to experiment with this, alongside golden pothos stems + spider plant babies. These nanouk stems are thicker so will perhaps take a little longer to root, so patience is key.
For an in-depth step by step guide, have a read of my recent post — How to make a new tradescantia plant from cuttings, the process of rooting these stems is exactly the same.
Thanks for those that asked for this post + thank you for visiting my blog. You can sign up to receive an email alert when I post if you would like.

Leave a Reply