
For today’s post, I thought I’d share some of the post-move houseplant care that I’ve been working through this week here at house plant house. I’ve spoken to a few of you since I posted about moving over on instagram recently who are also either about to move or are in the process of moving with your plant gang. So I wanted to share this process if you are also in the same boat as me + feeling slightly overwhelmed by the prospect of getting your plants looking their best again! On that topic, last time I moved house, I put together a trio of posts about the process of re-locating with houseplants which I’ll link here if you or someone you know is doing a move with a hearty plant collection too!
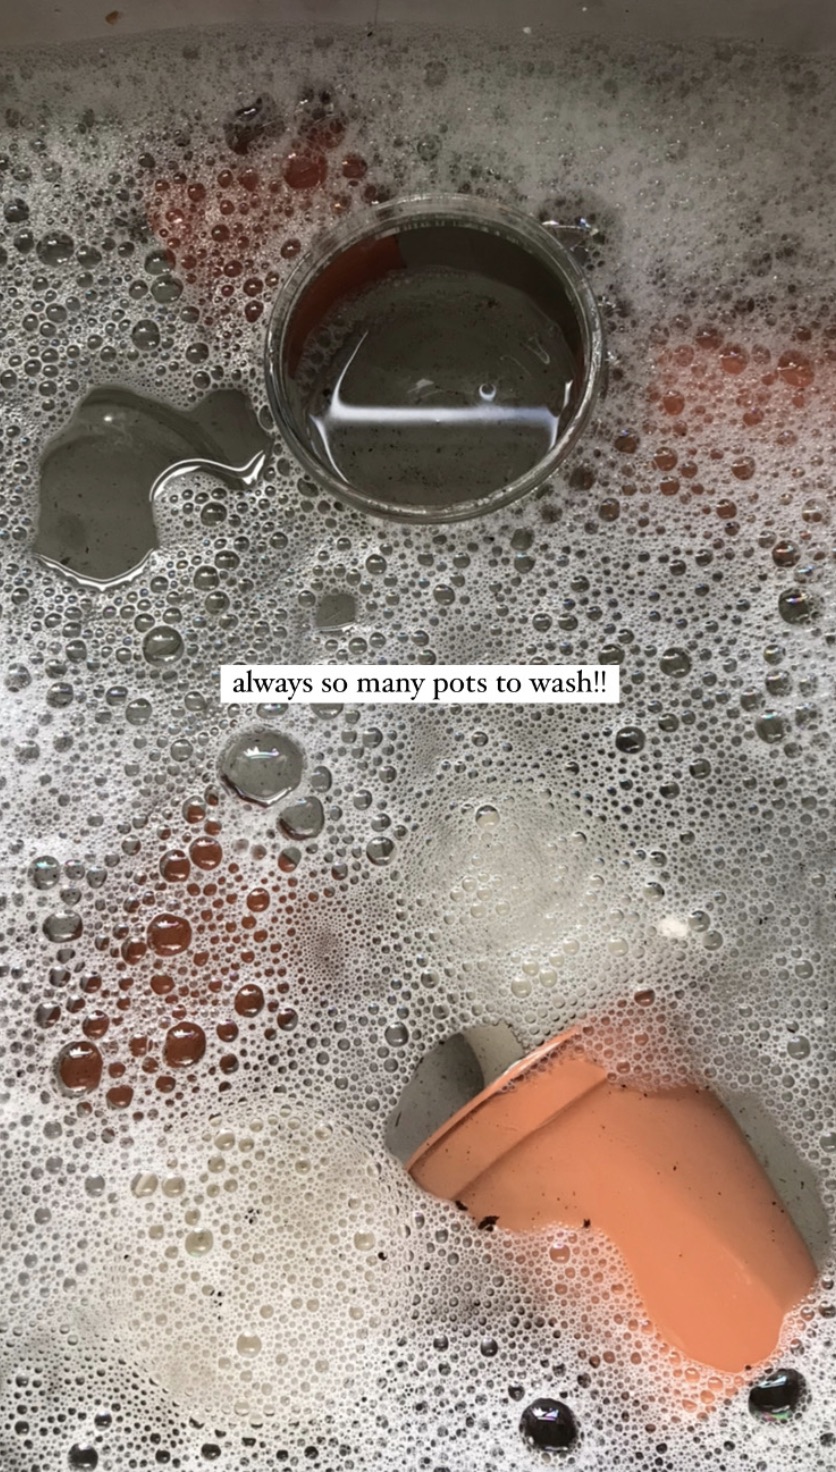
But before we get into the plants, aside from the actual plant-moving aspect, the other part of that is POTS! I always wonder how on earth I have accumulated so many planters + it’s only until I see them together do I realise that I really need to edit down my collection somewhat. Something I’ve been doing a lot of this week is pot-washing — the mixture of dust + the dregs of old potting mix can leave things looking a little lacklustre so I’ve been working my way through giving everything a good clean. Warm soapy water works wonders (as opposed to a cold hosepipe) + I leave to dry on an old bath towel, as below:

If this is the first post in this series that you’ve seen, these posts are intended to be short + ‘behind the scenes’ in style; showing a more everyday + relaxed view of what it is like to live with a lot of plants. In addition, if you have any of these plants it might help to see how I’ve repotted mine + things to look out for. Have a browse through the other posts in this series if you want to get in the mood for some plant care: there’s a tab at the top of the homepage called repotting.
Strelitzia reginae
My Strelitzia hasn’t been the happiest of late, but since moving, a new leaf has unfurled + there are signs of another on the way — what a relief! I can start to see signs of roots near the drainage holes, which is always a positive sign too, but I’m going to hold off repotting this one for a while + let it settle in here. Seeing as this plant is commonly called a bird of paradise (BOP for short), I thought I’d add in this vintage water vessel that used to belong to my grandparents that surfaced in the move — I think it looks quite cute here!


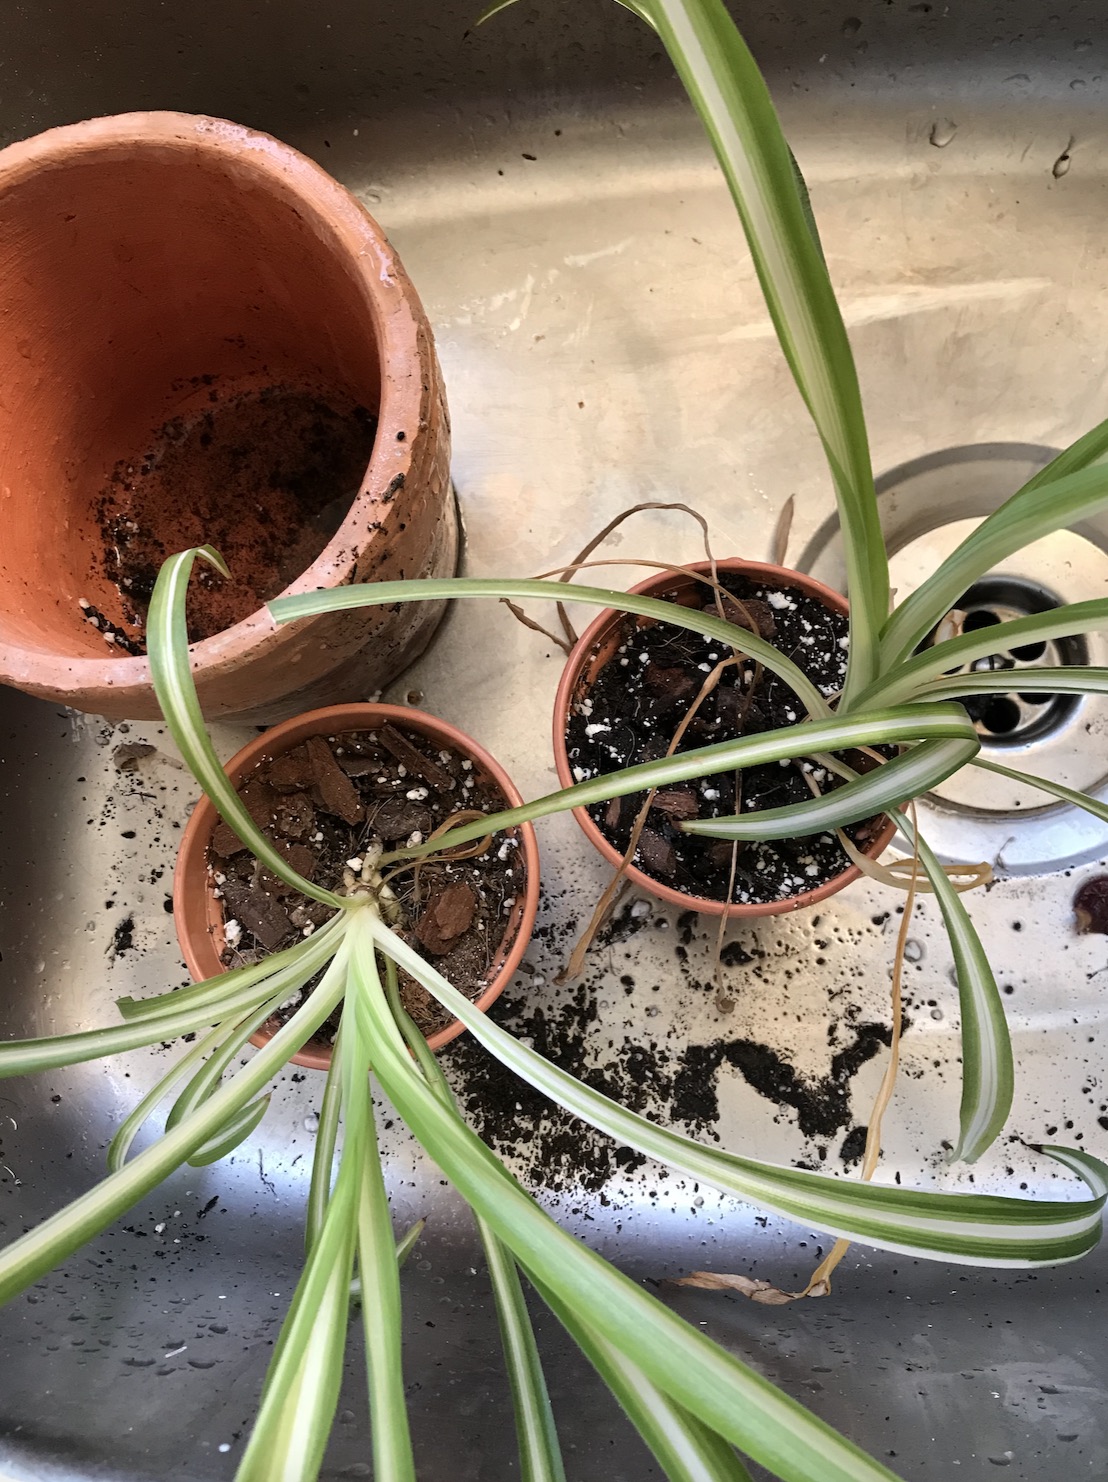
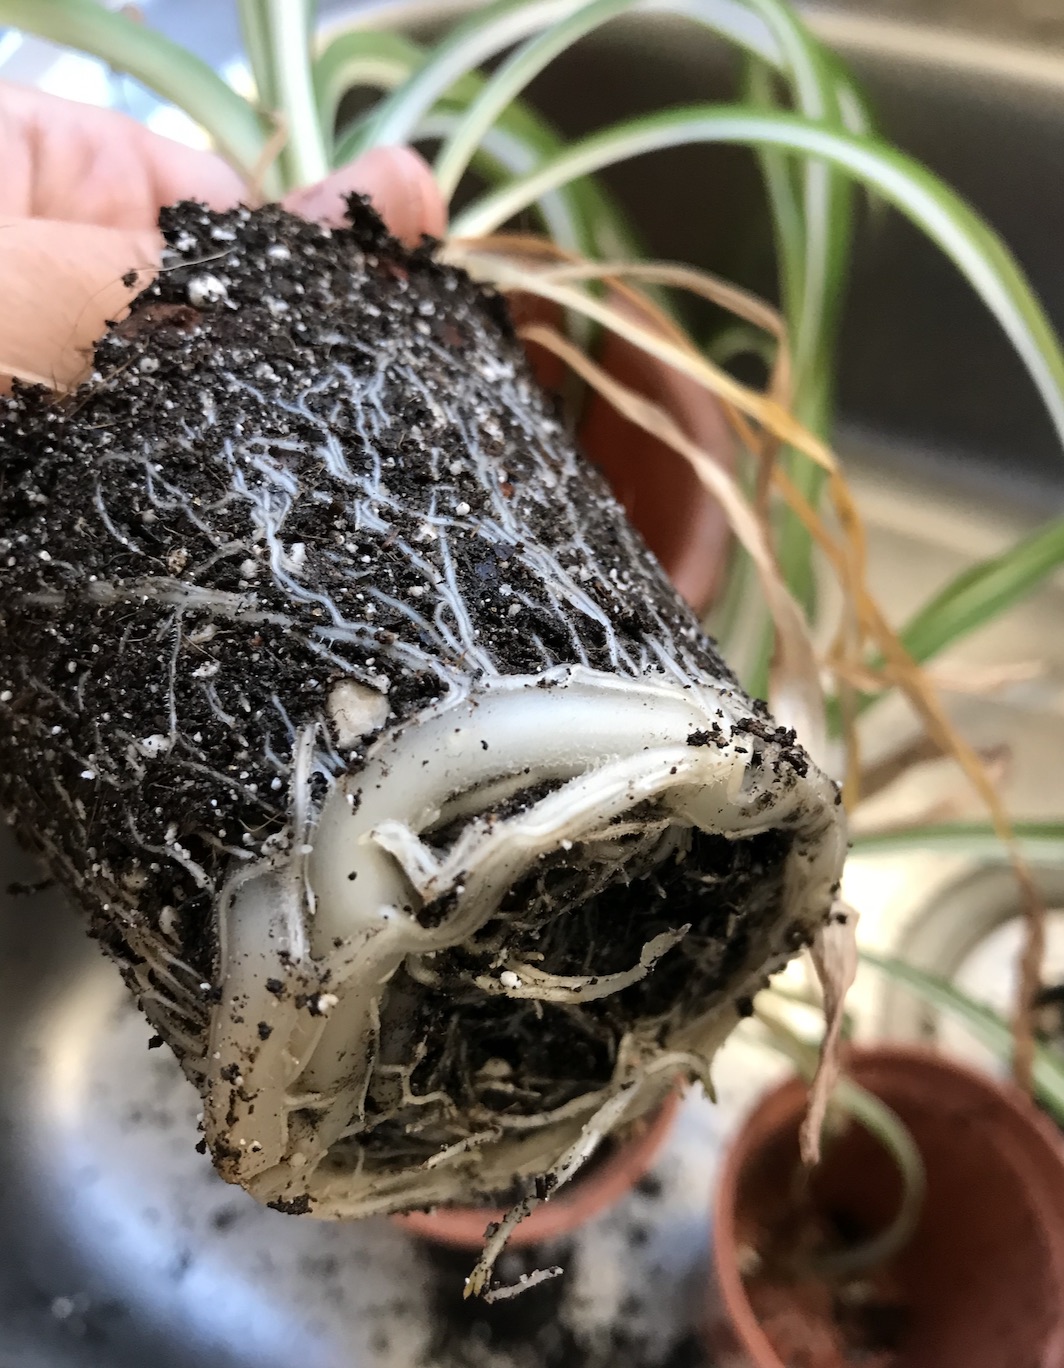
Chlorophytum comosum — spider plantlets
Oops… these two little spider plants certainly enjoyed life on the north-west facing kitchen windowsill in the cottage because their roots have really developed a lot since I potted these up a few months ago! I actually got rid of one of my large spider plants when I moved because I didn’t have room for it + it had got to the point where it was looking bedraggled after 18-months of a dark position. So I saved a couple of plantlets (of which these are two) + I’m going to start over + grow these on.
Crassula ovata — jade plant
This jade plant division from my main plant has been with me for many years + it also really enjoyed my north-west facing windowsill + had roots growing right out of the planter! The succulent leaves were also starting to wrinkle, which can be a tell-tale sign that your plant might need more frequent watering, or repotting (or both — as was the case with mine here). After a few days the leaves were looking much more juicy + I gave the plant a good shower as it had got pretty dusty with the renovations.


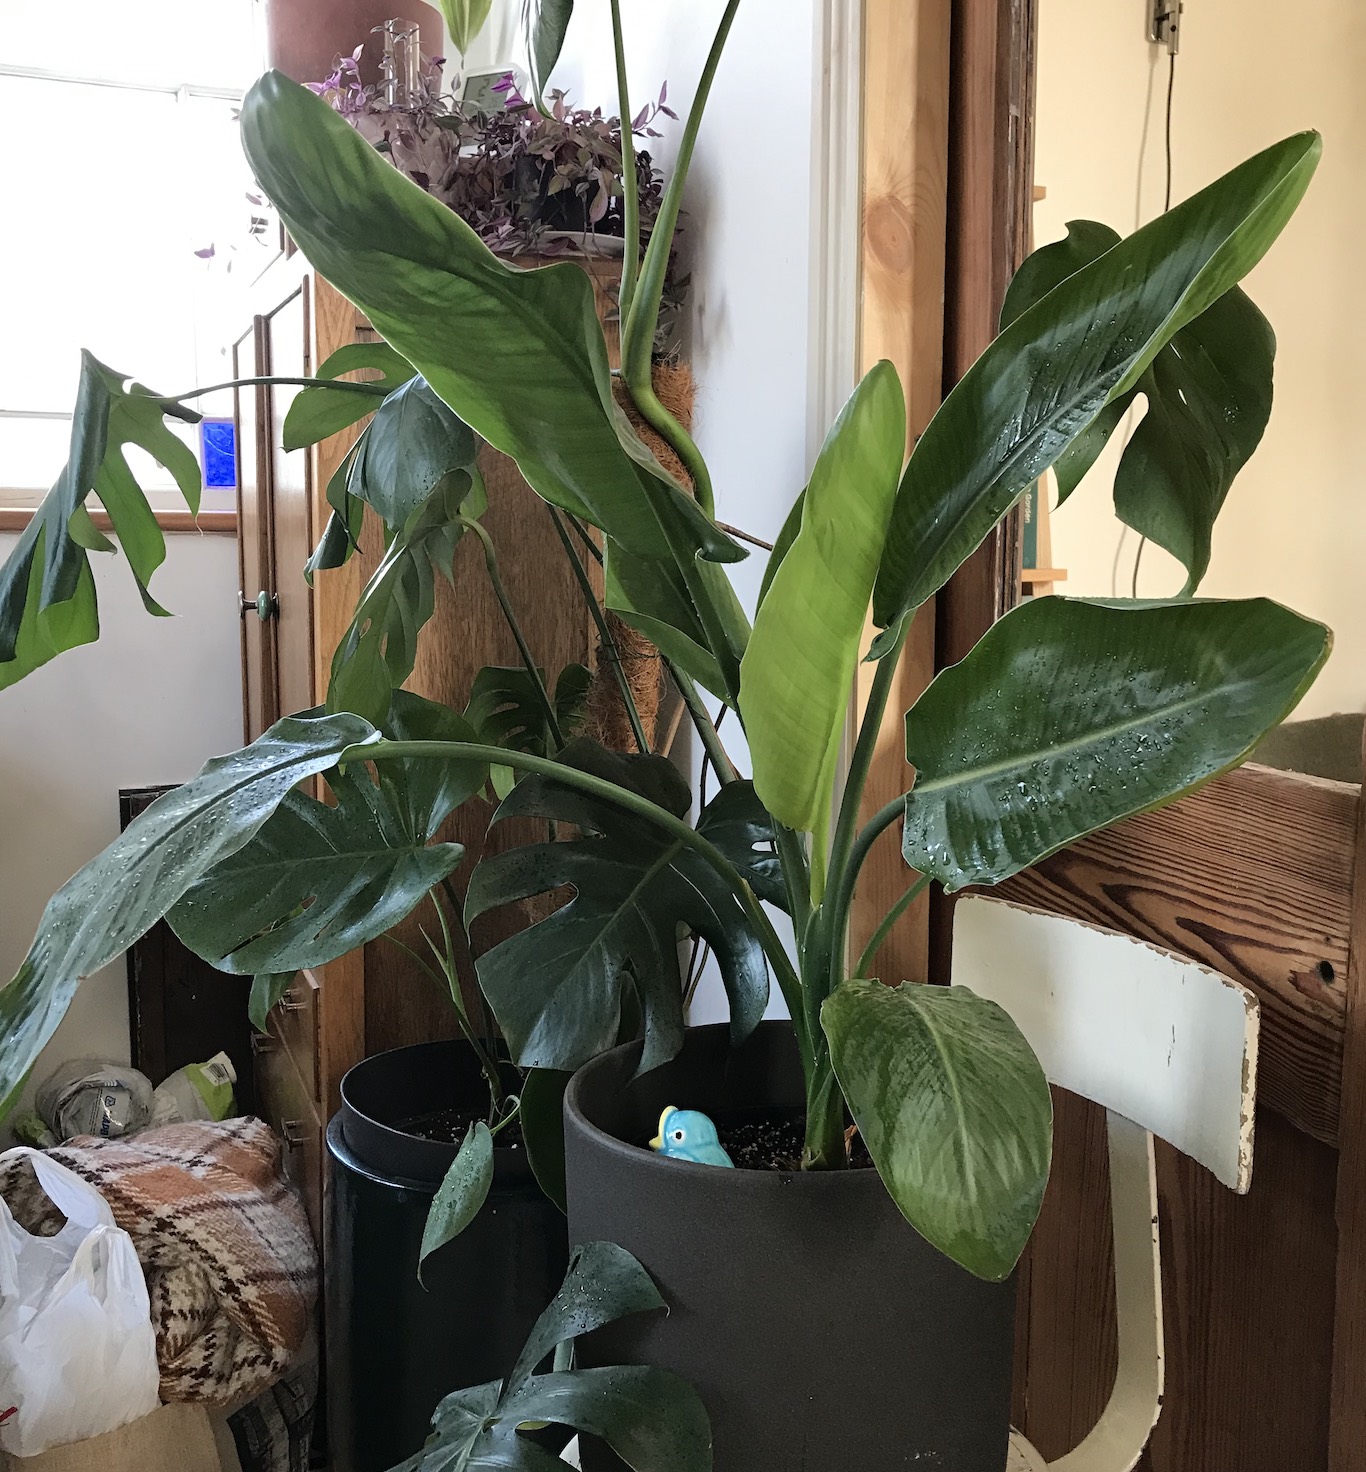
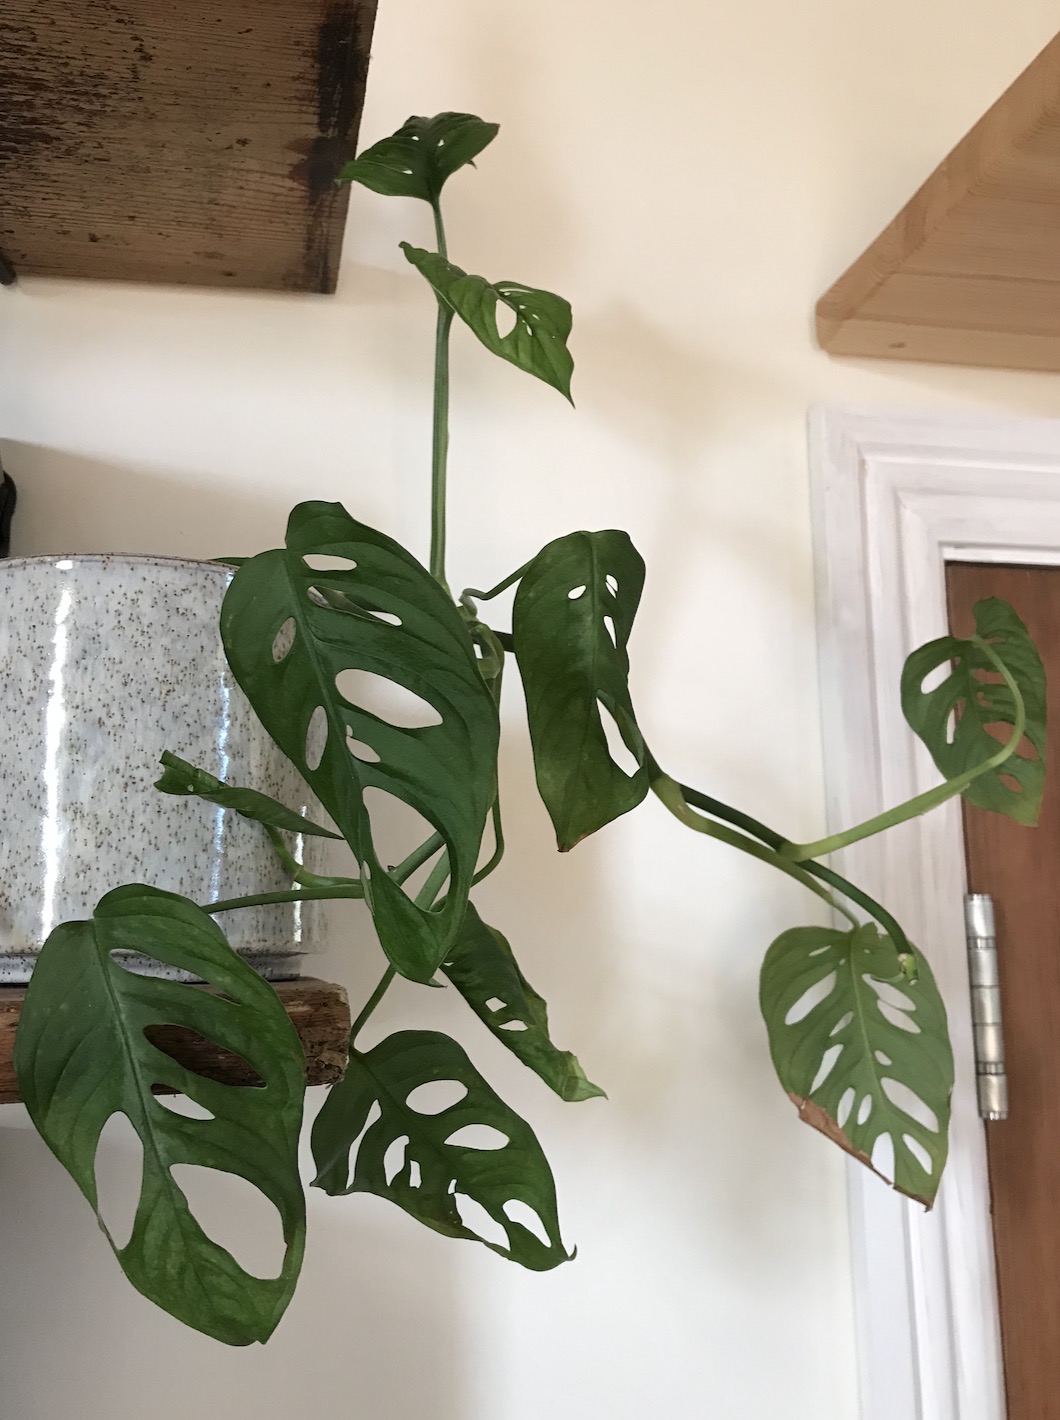
Monstera adansonii
I have a load of Monstera adansonii propagations I’ve been chopping up over the last few months which were getting a little wild, so I decided to save space with these two pots that were long + leggy now + combine them to pot up together. The plant still looks eccentric as it hovers off the corner of my bookshelf but I like it when plants have personality like this! I think it’s always a good idea to plant multiple pots up together if you are short on space, or if you have a few plants that are looking a little sparse like mine were.


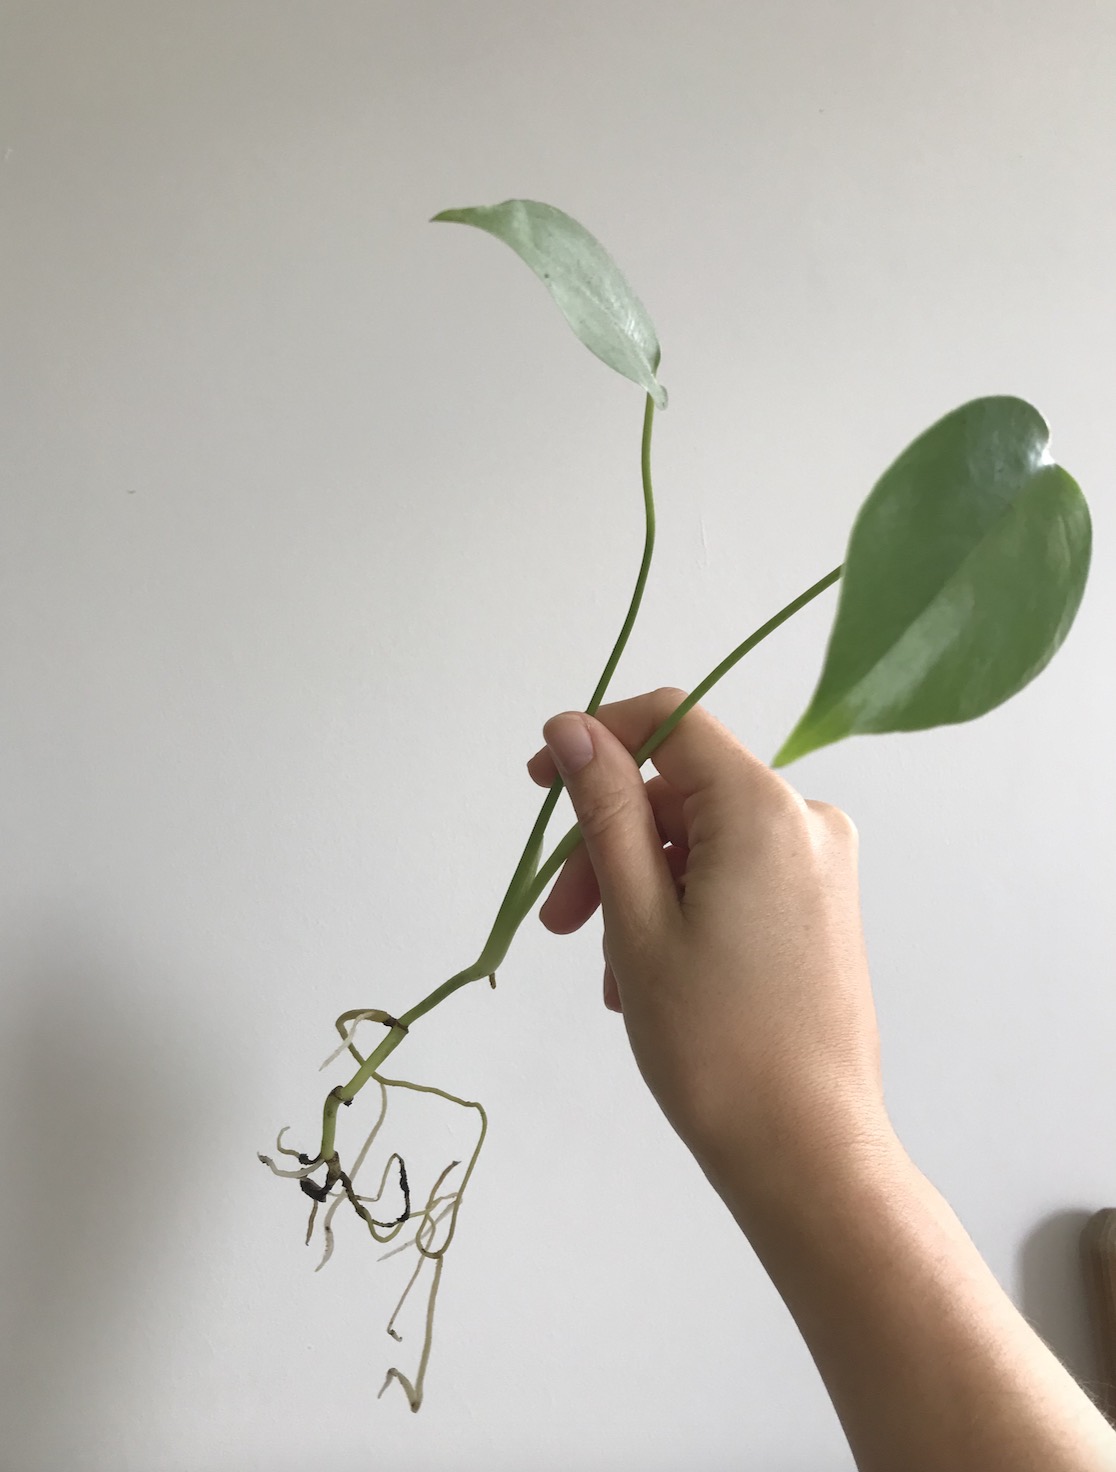
Monstera deliciosa propagations
In the same way as above, I had these two juvenile Monstera deliciosa propagation experiments hanging around — the small cutting I had been rooting in water + the small, wild pot of leaves that had roots growing out of the bottom (below left) was a division from one of my large plants when I repotted last year. It was only two leaves big when I planted it — you know those smaller leaves that can often be found around the base of monstera plants? Well that’s what this has grown into over a year or so. I’m looking forward to seeing when the foliage develops it’s characteristic fenestrations (splits), so I potted the little water prop in with the other plant + added a cane support to keep it standing tall.


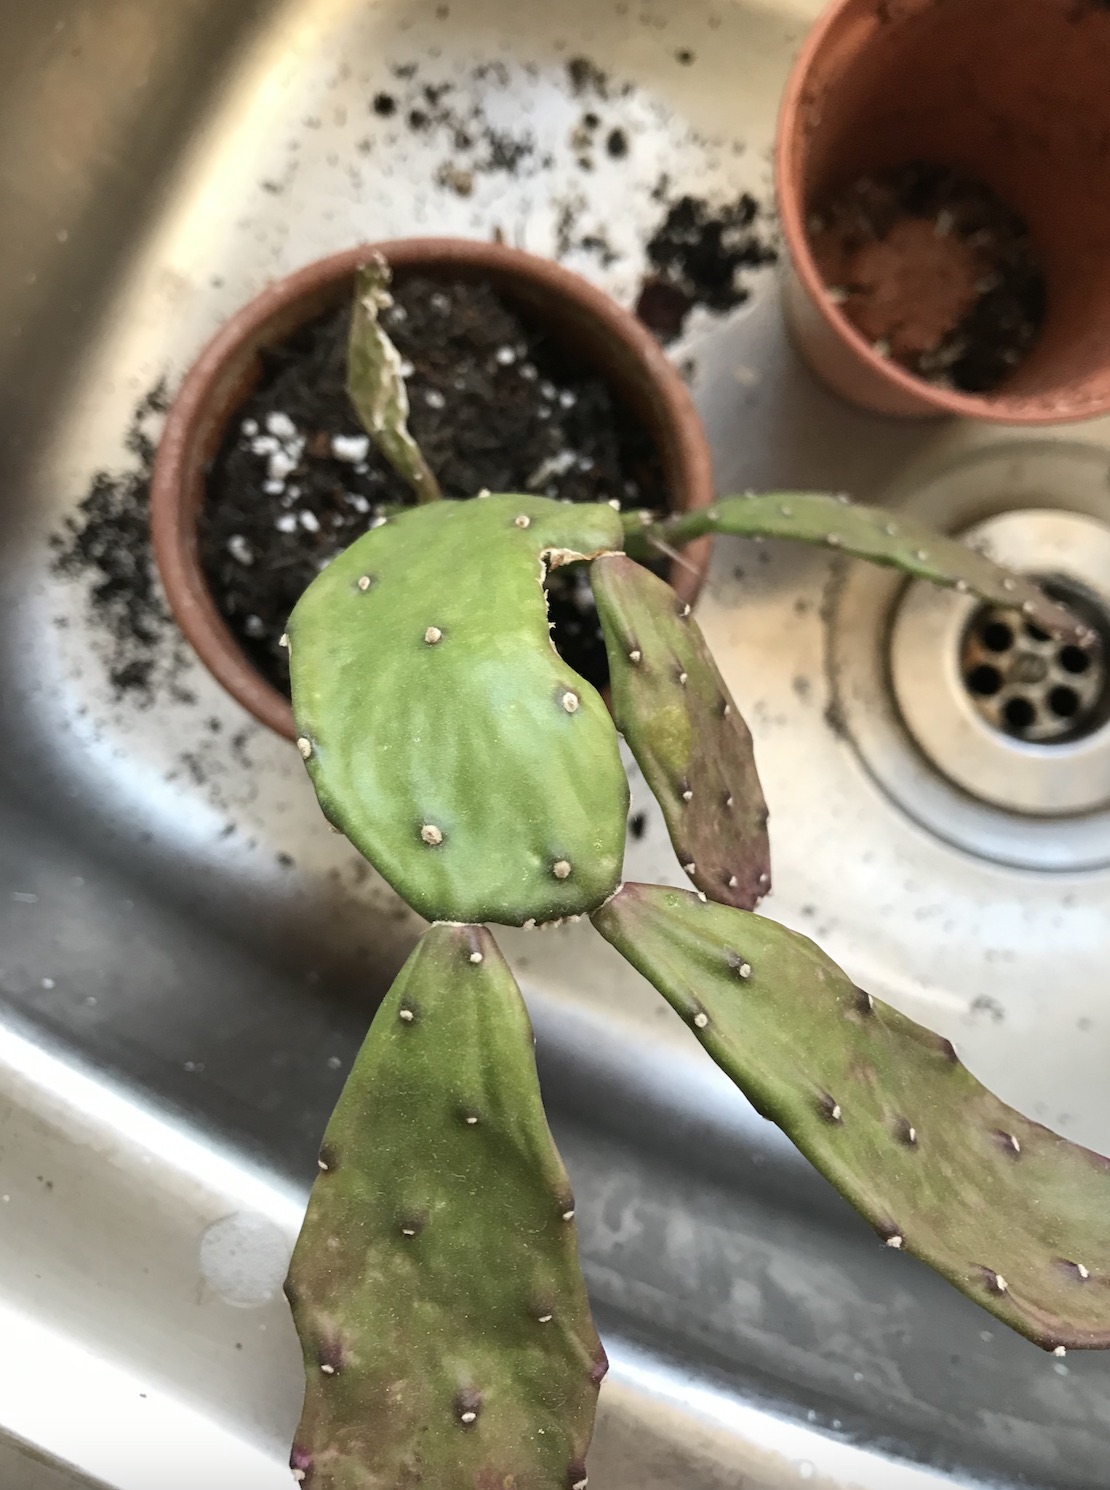
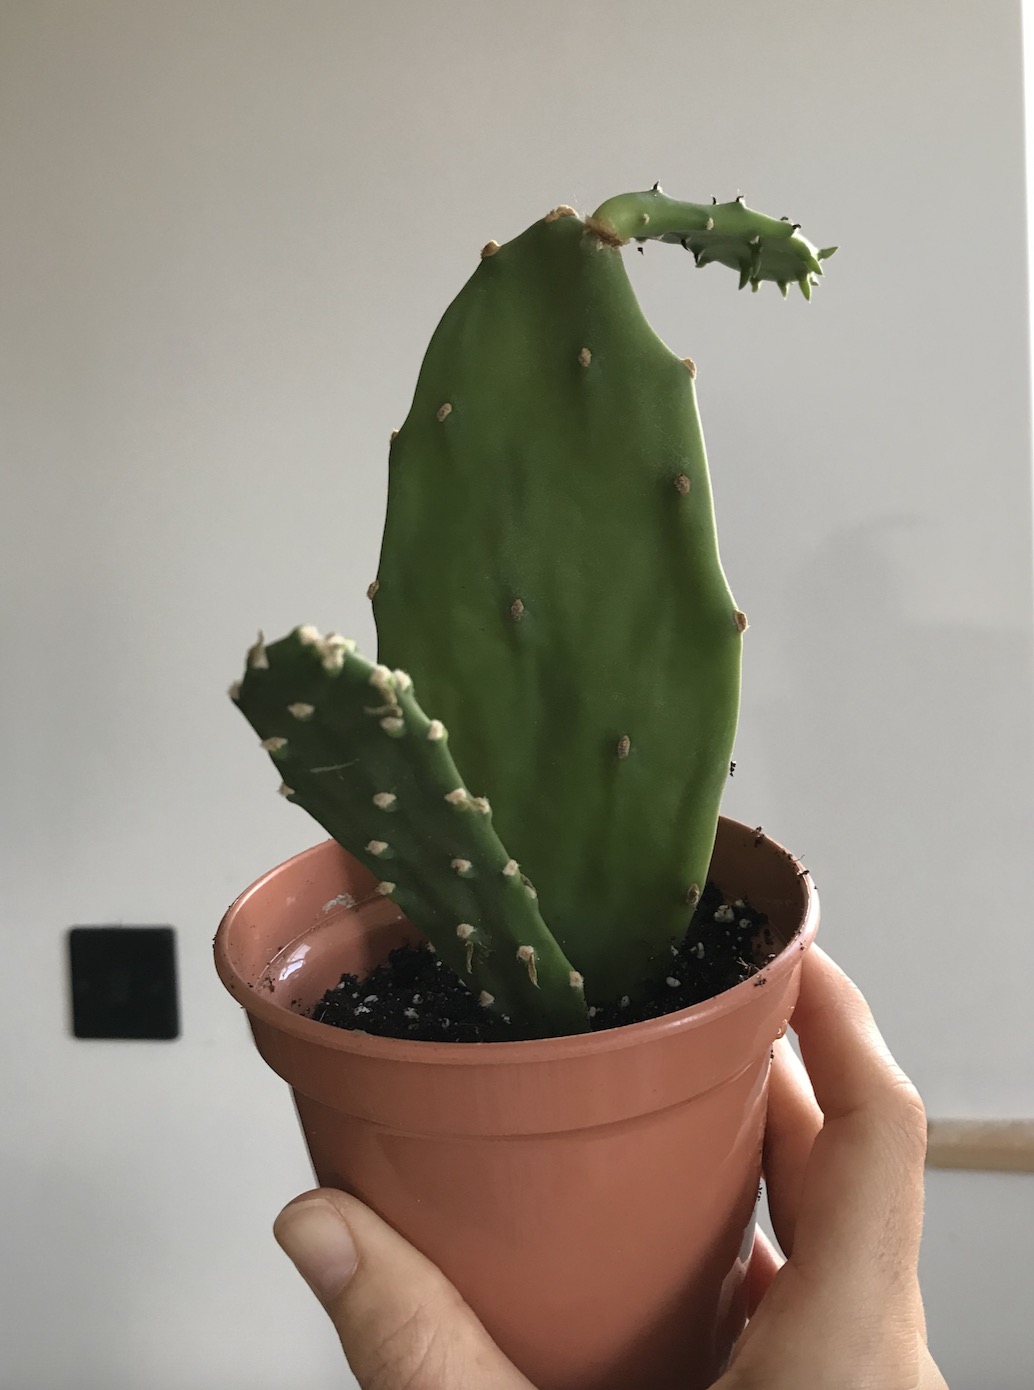
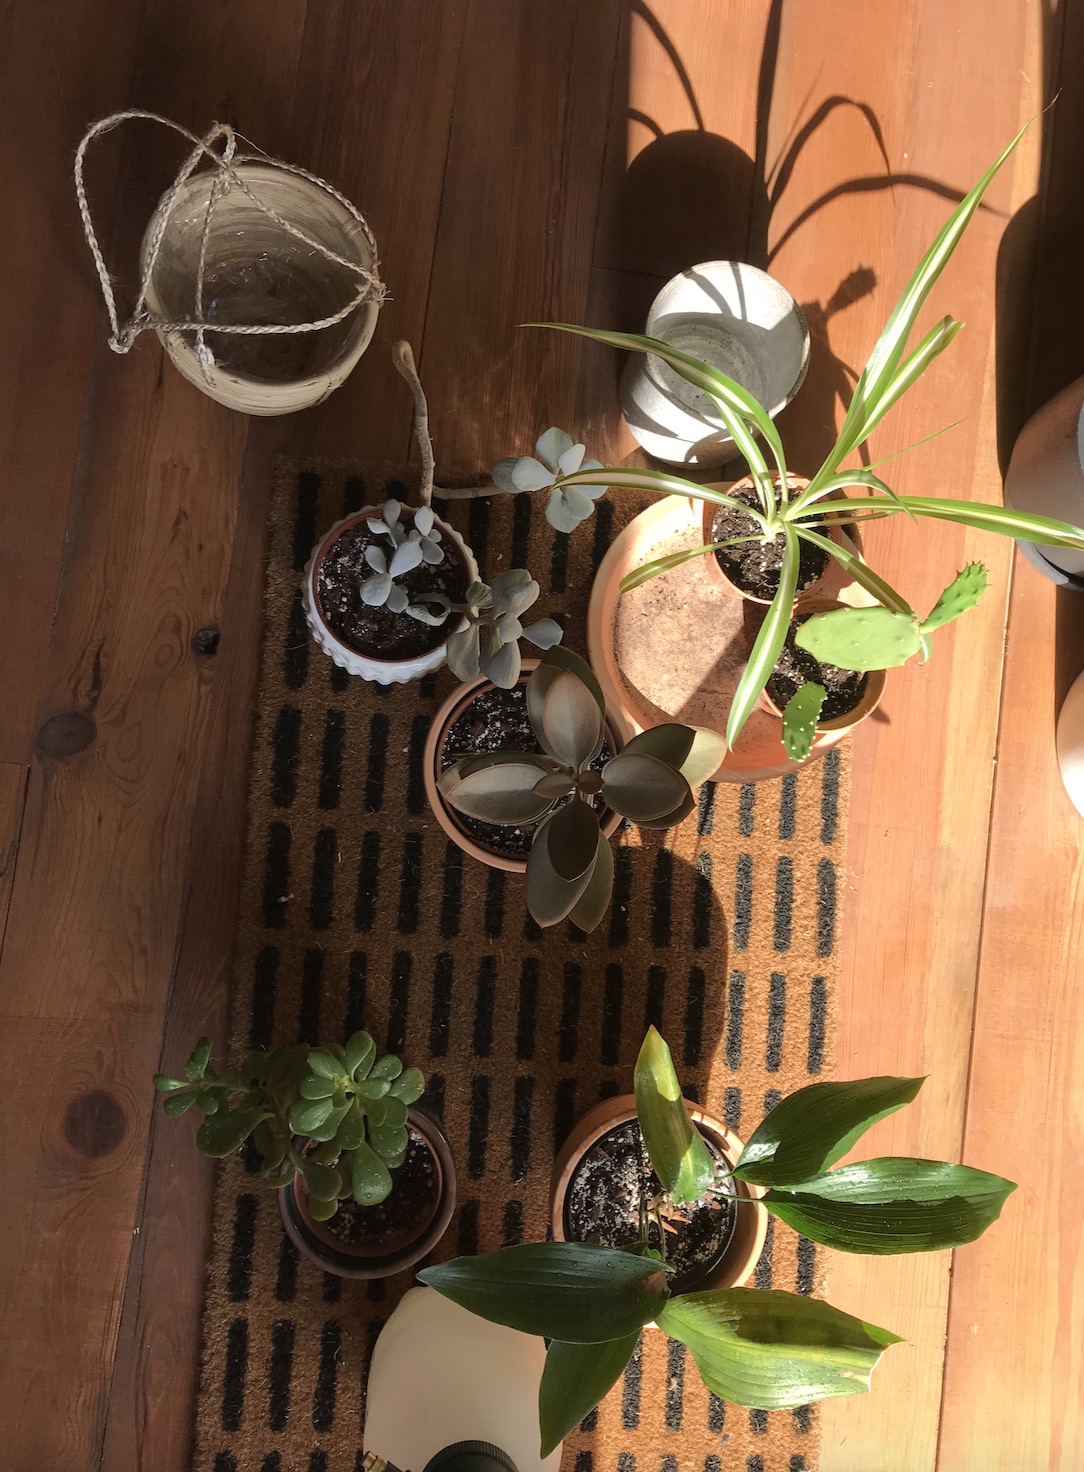
Opuntia propagations
Here are two other propagations at different stages — here you’ll see my little prickly pear cactus that I rooted from a cutting a couple years ago now… I must admit I had left it in a bright position + it got a suntan! It was also very root-bound so I planted it in a pot that was one size larger, gave it a good clean under the shower + have been keeping it out of direct light as it recovered. In the space of two weeks I’ve been happy to see it get it’s green hues back + there are multiple growth points appearing too on a few of the pads!


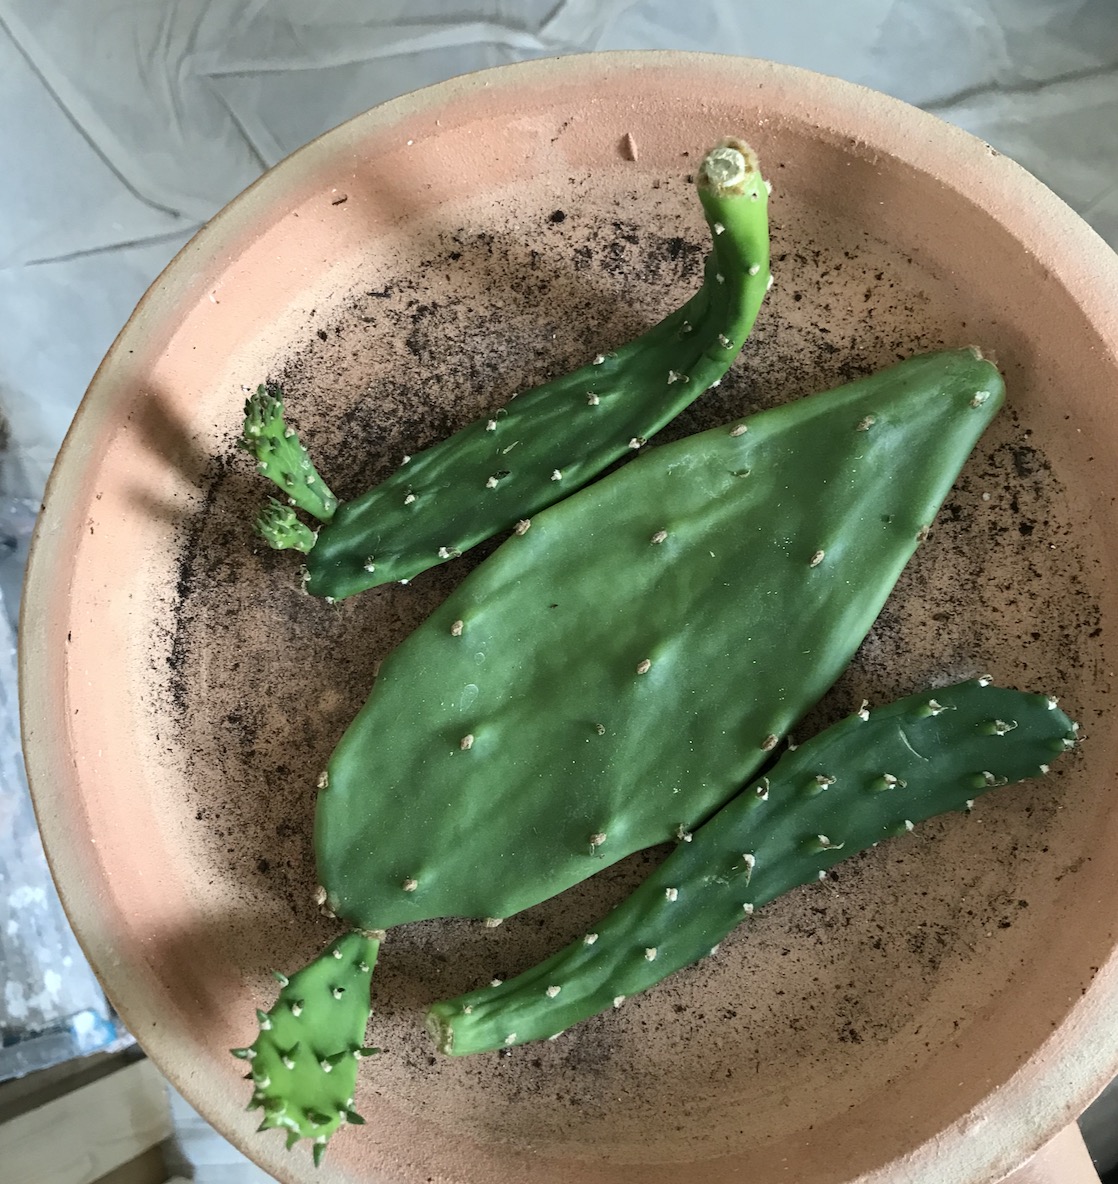
Below are some cuttings of another larger Opuntia that had been growing etiolated due to lack of light in the cottage. I chopped off some of the pads with a sterile blade + left them to callus over for a few weeks during the move (blogpost on that here). I potted them up yesterday + here they are. Let’s see if they root… I’ll keep you posted!

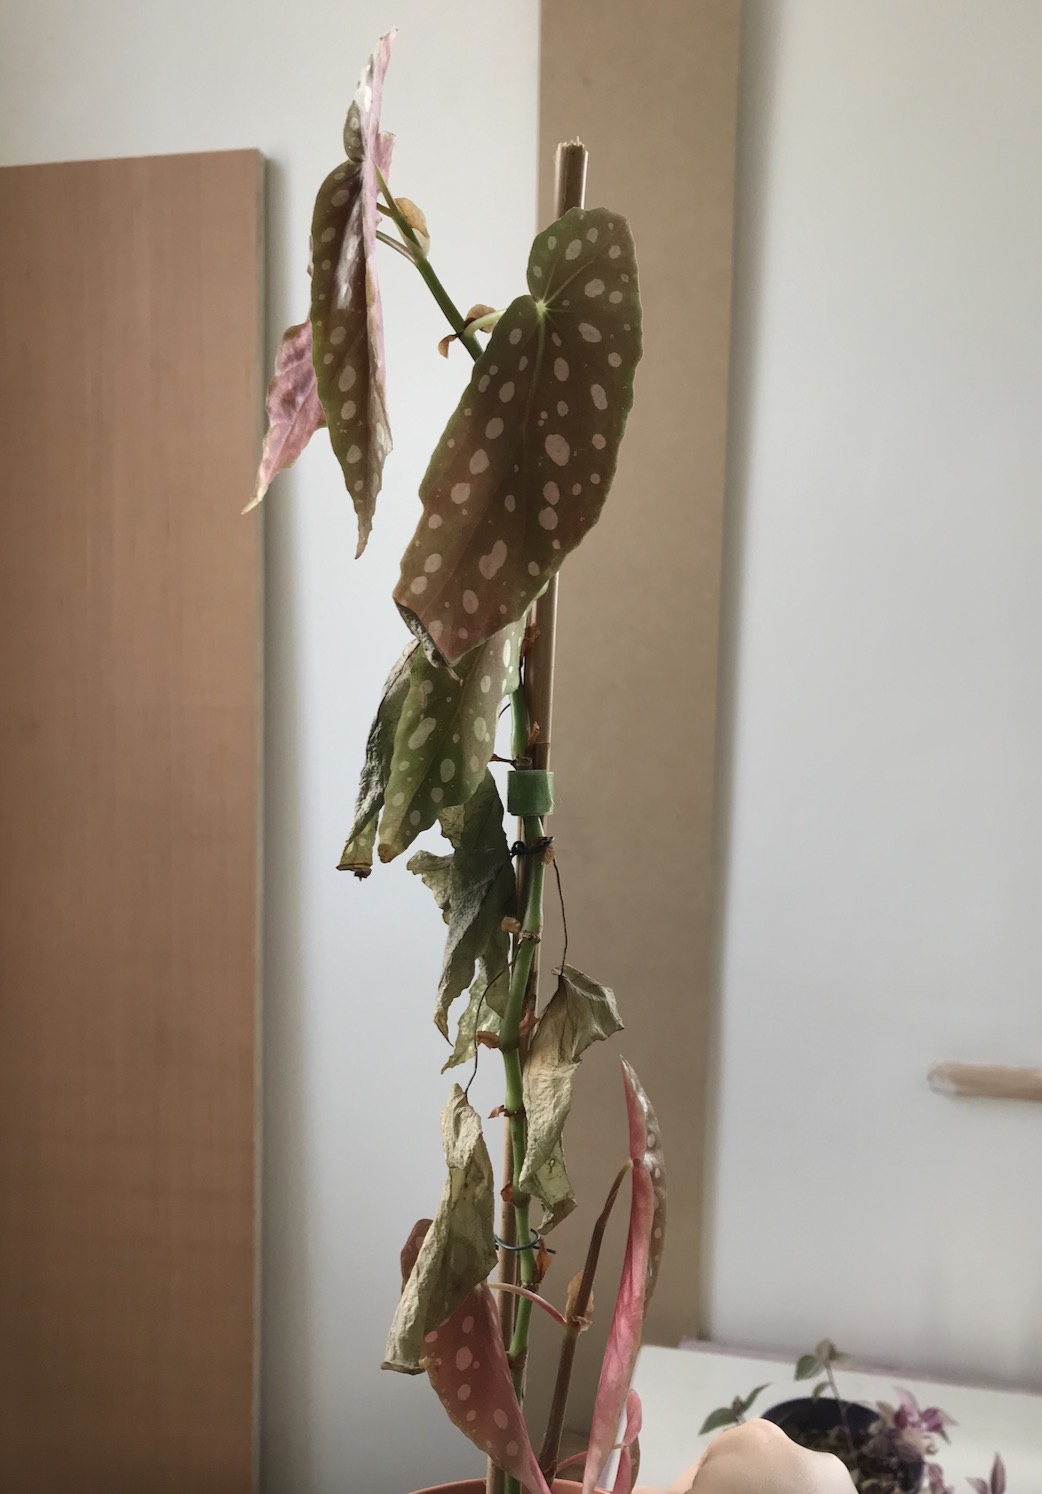
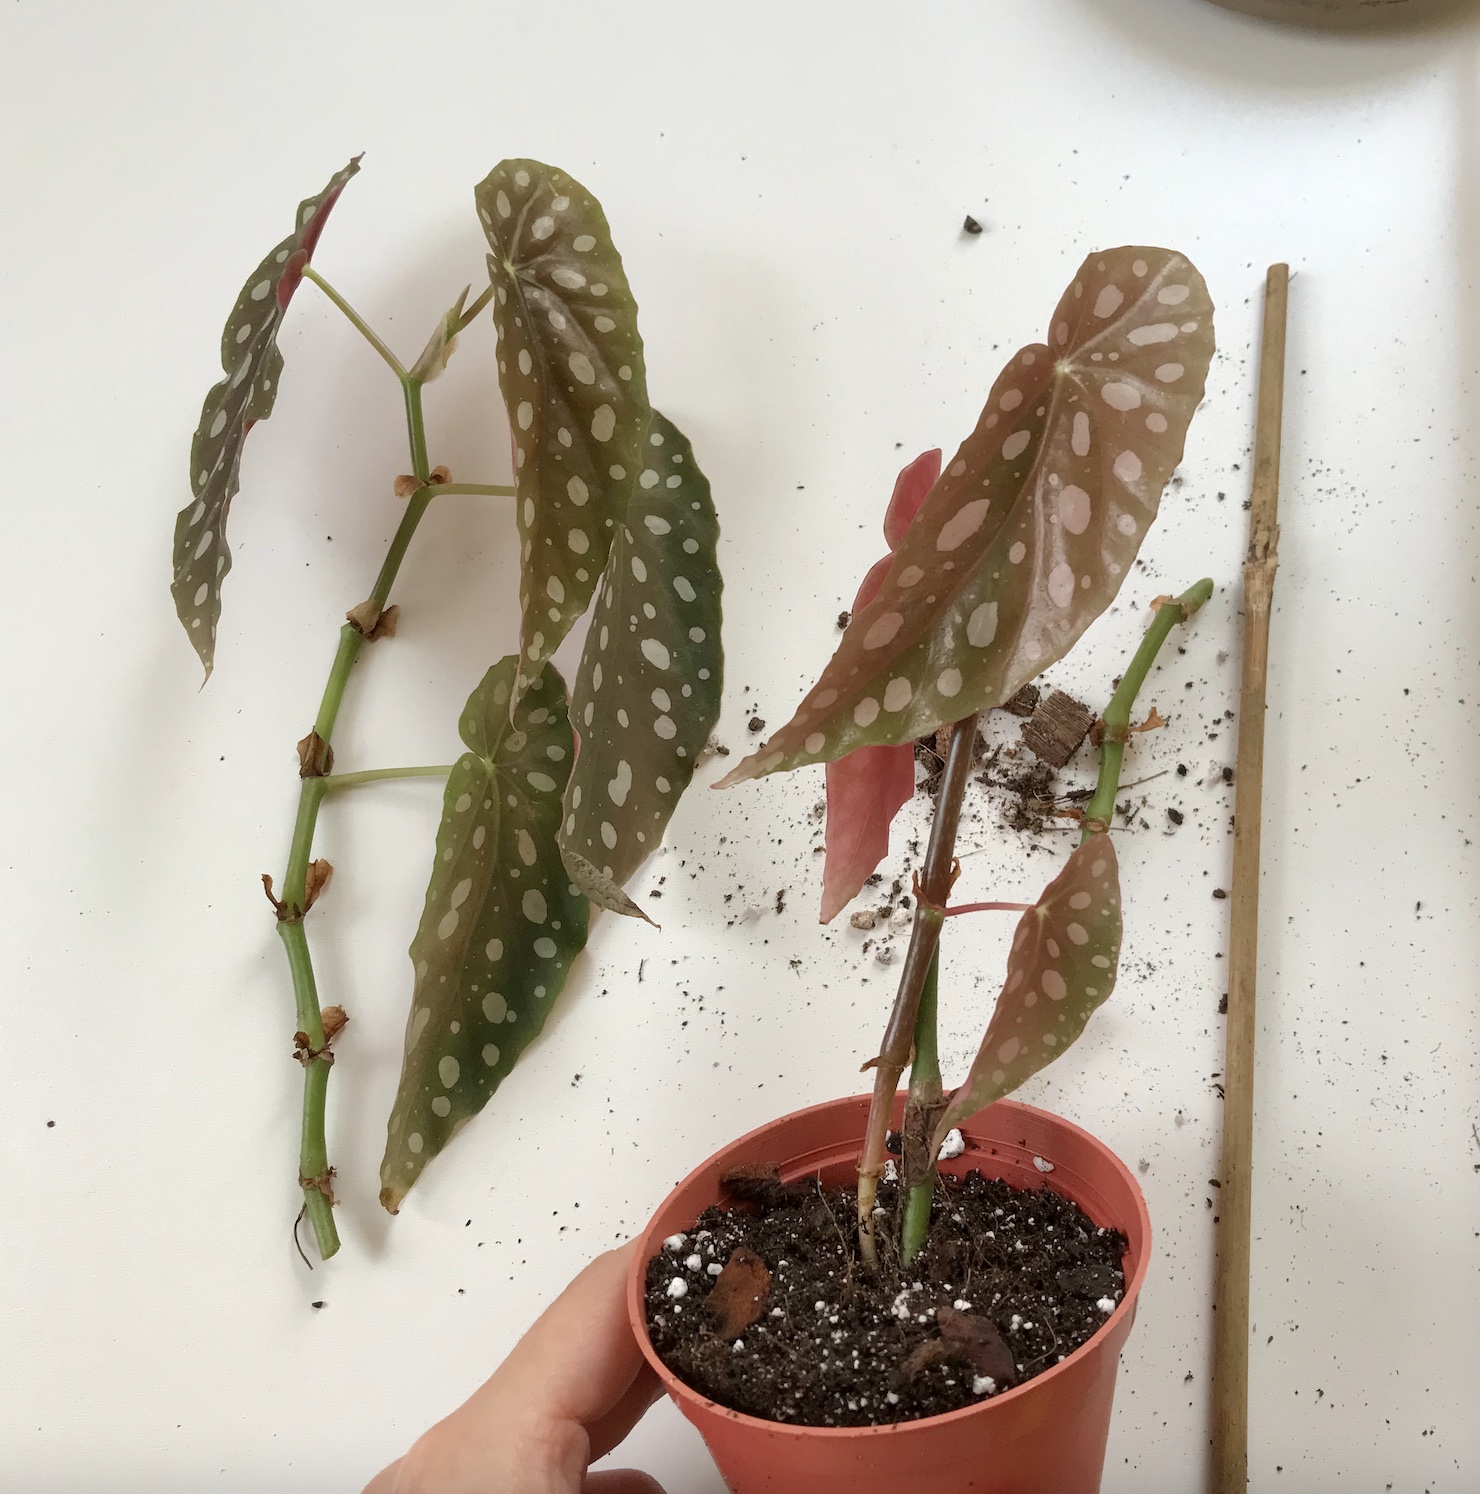
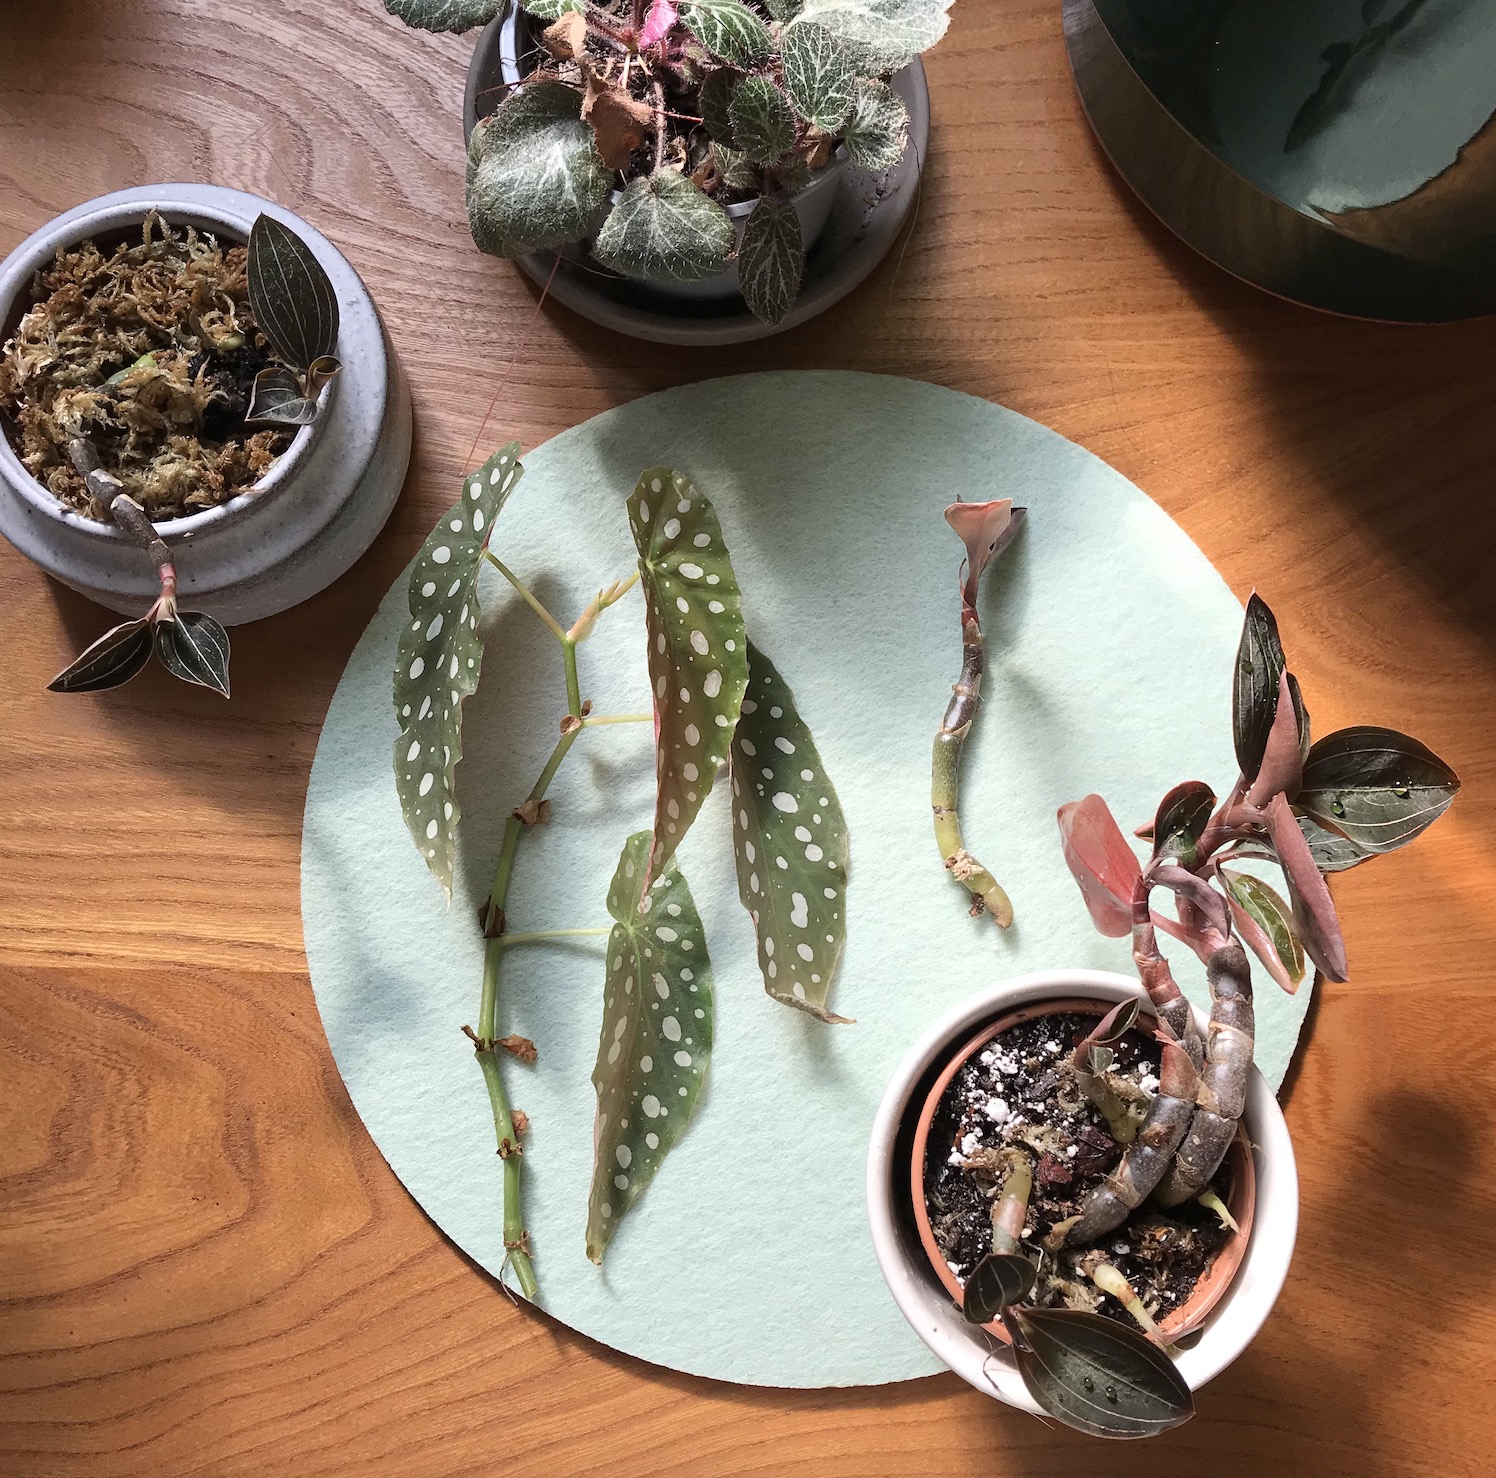
Begonia maculata wightii — polka dot begonia
This polka dot begonia started life in my house as a cutting a few years ago, but was another of my plants to suffer from a lack of light over the winter. But when Spring arrived, a new stem popped up at soil level, so I opted to re-pot this into a little pot as it already has roots + be-headed the top of the plant so that I could root it in water. I’ll then pop this back into the little pot to create a fuller begonia maculata wightii. You’ll have probably guessed by now that I do love a propagation experiment + smaller plants are a great way of figuring out the conditions that particular plants enjoy!

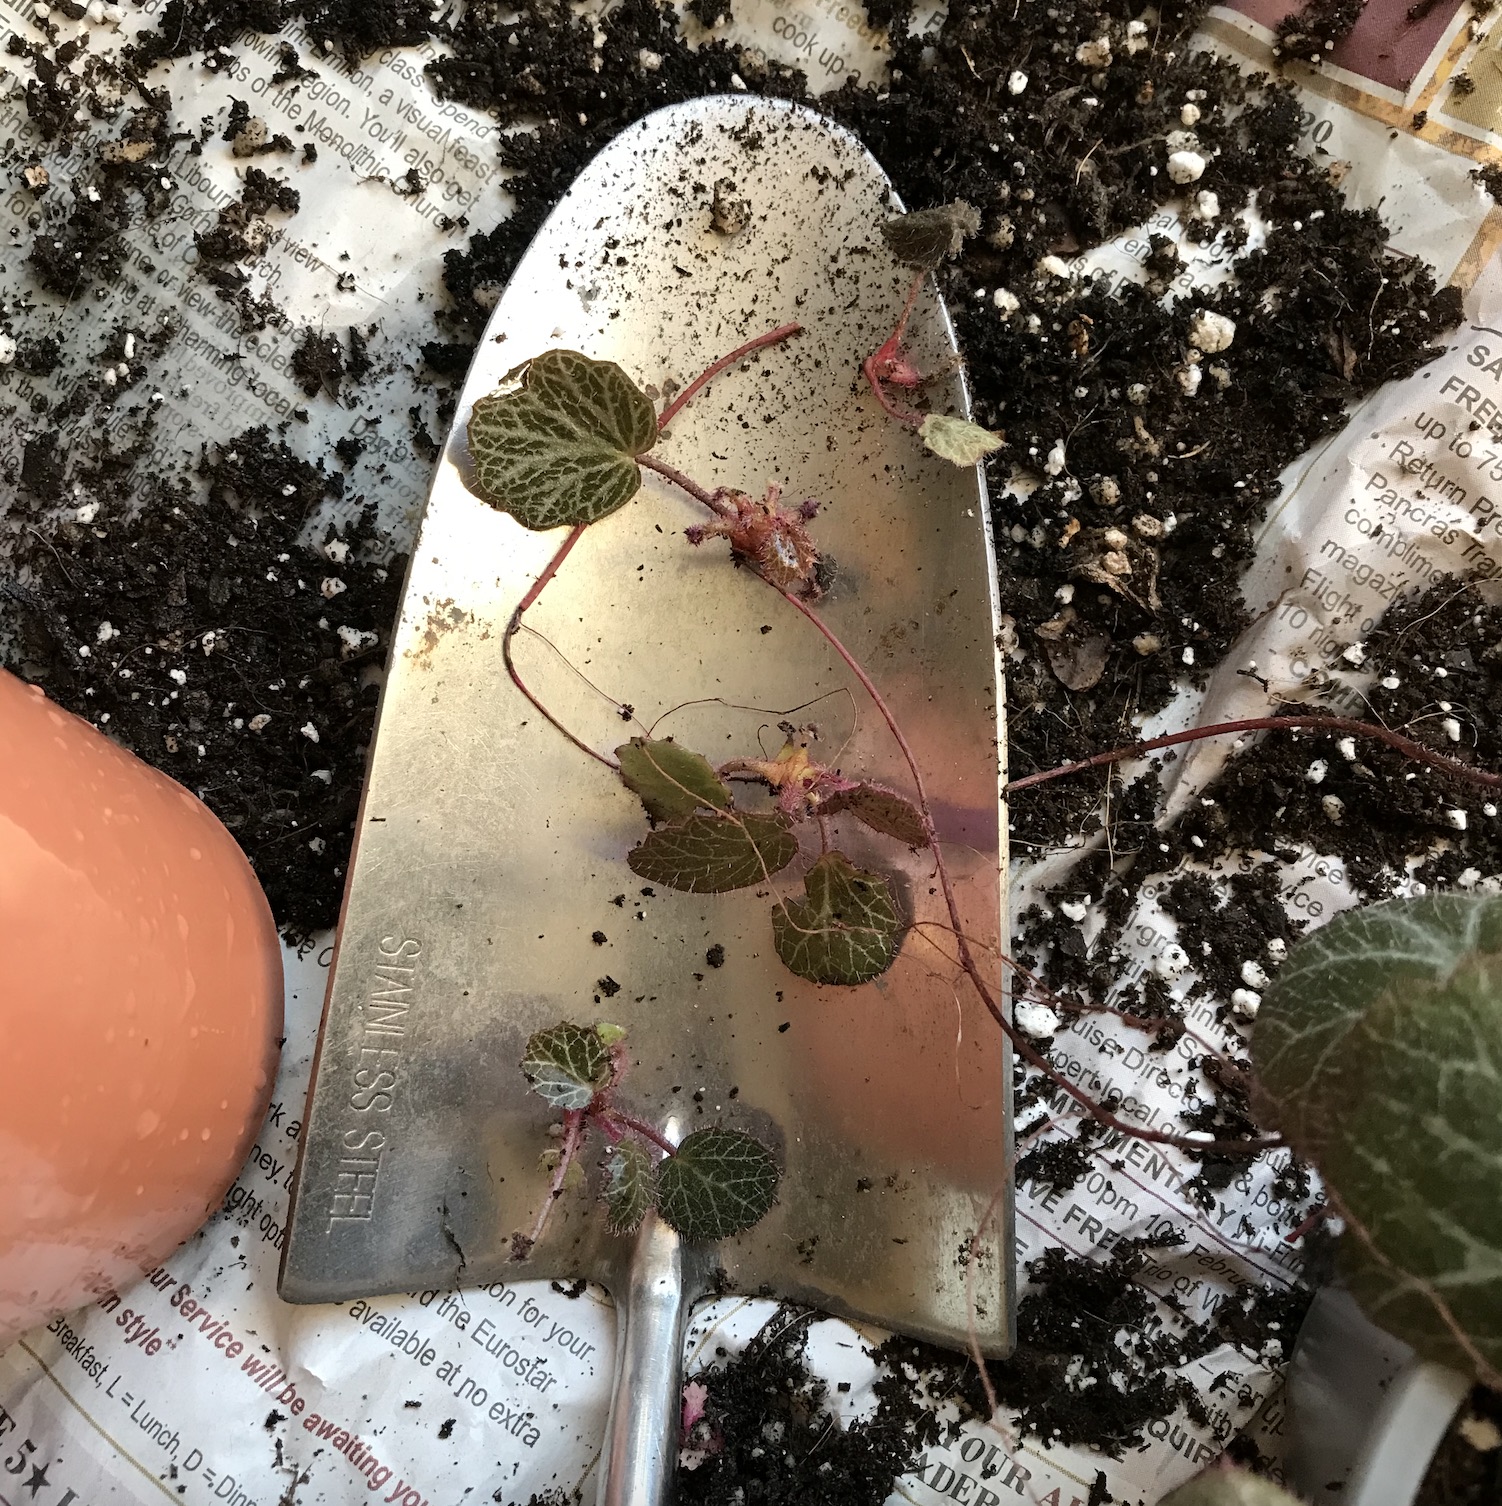
Saxifraga stolonifera
My battered saxifraga was not doing so well after accidentally having fallen off the table…! So I took the plant out of the pot, chopped the dried up leaves off around the base, separated the smaller plantlets to root (post on that here) + repotted the plant in fresh potting mix. After a few weeks there has been some improvement + there are signs of new growth at the heart of the plant + a few pink runners are appearing too. I just need to find a place to keep it happy in the new place to allow it to flourish.


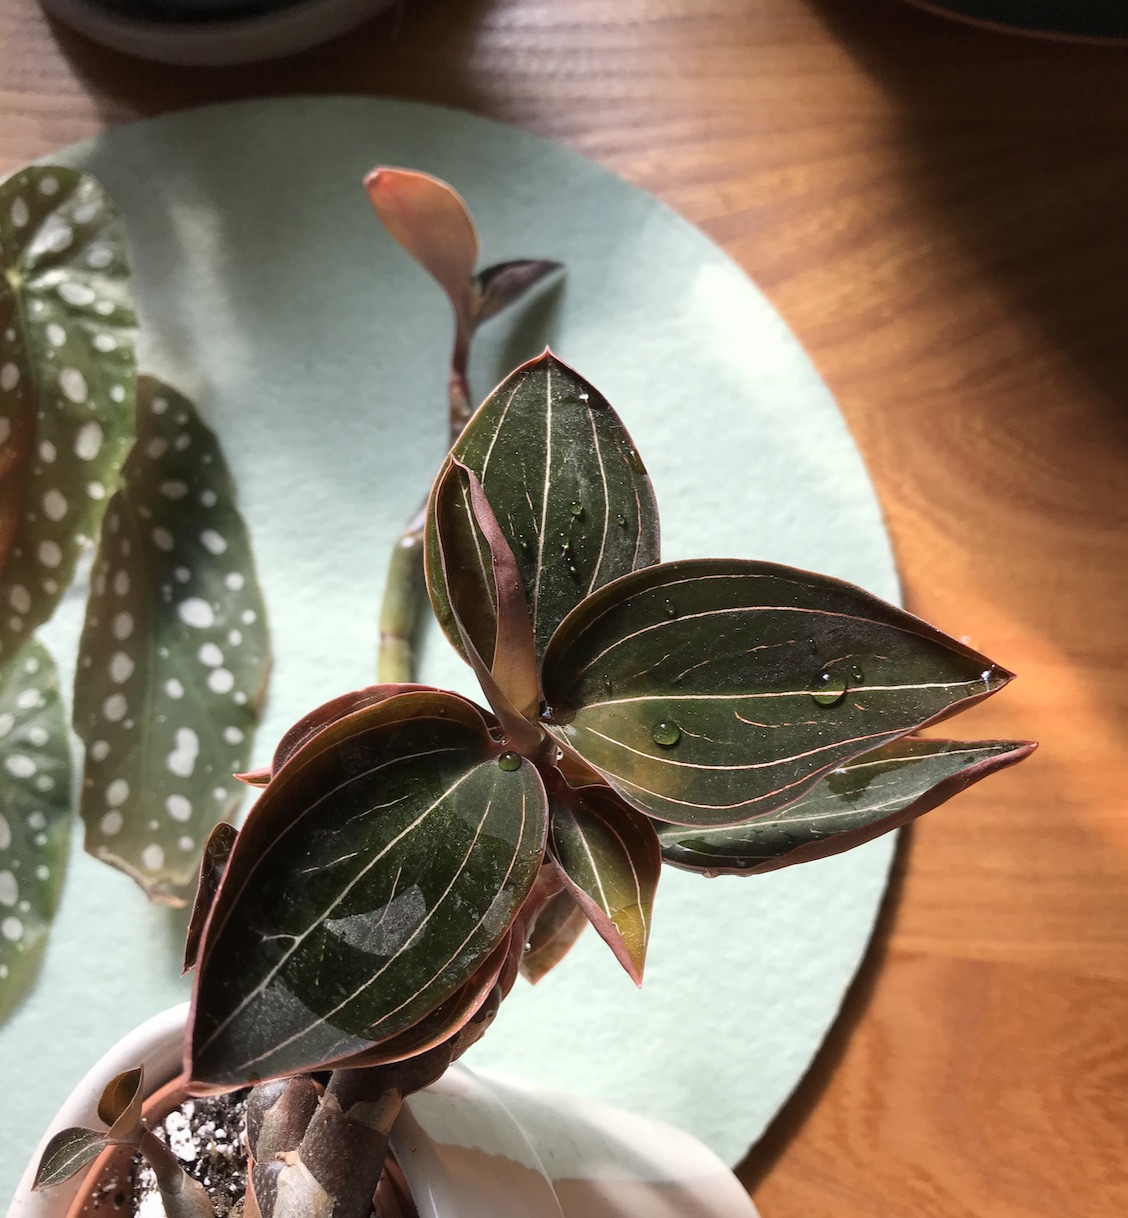
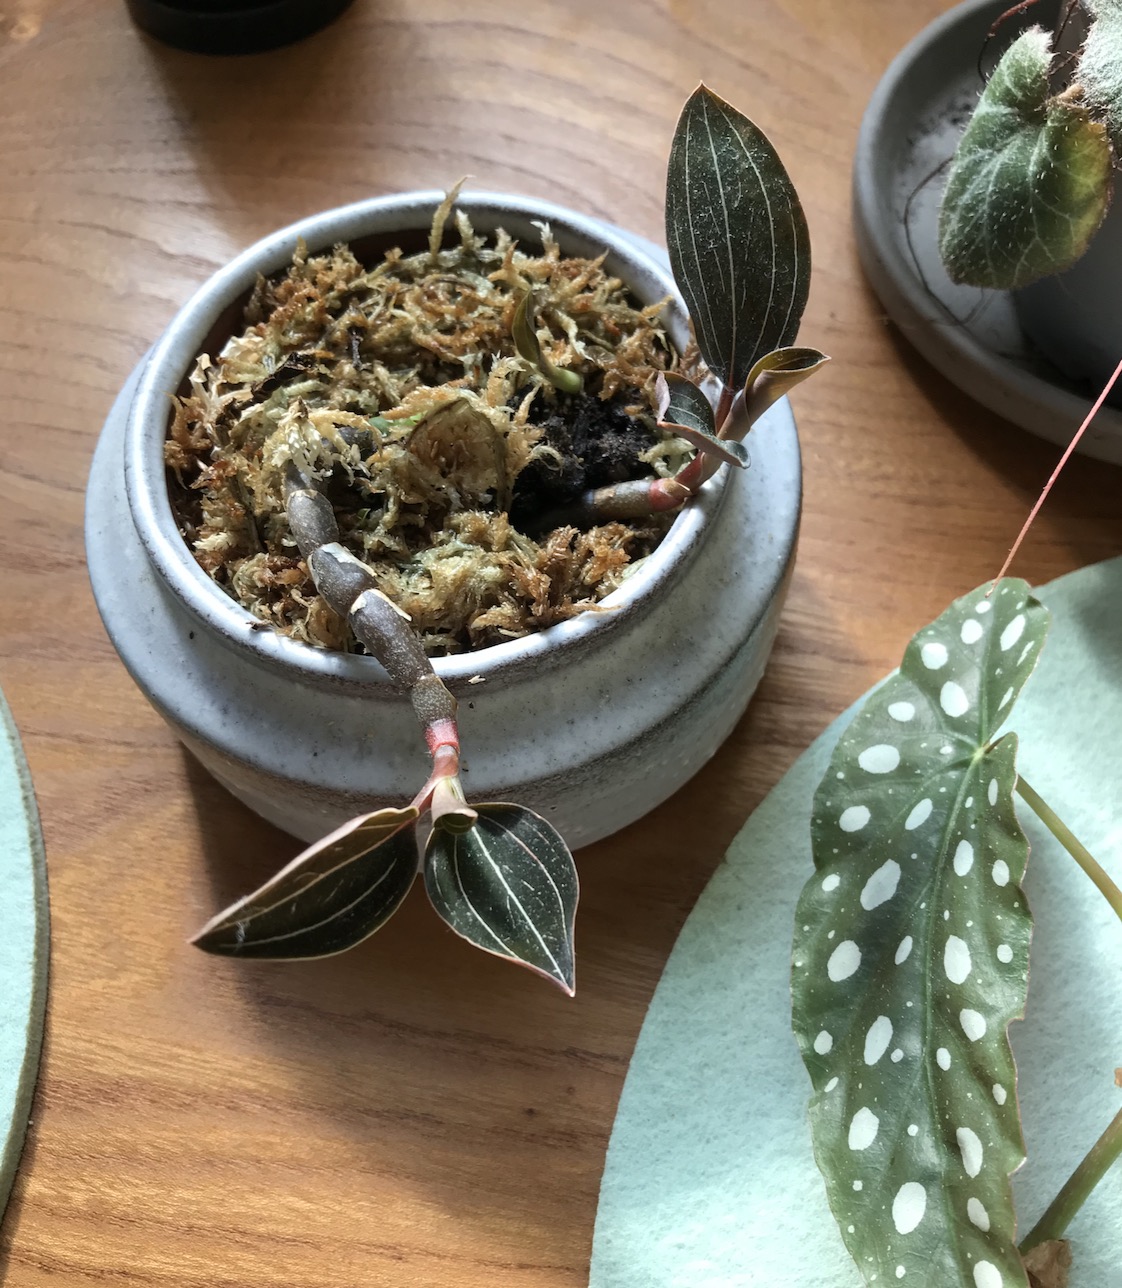
Ludisia discolor divisions
These are a couple of smaller jewel orchid divisions that I had been meaning to plant up for a while, the plant on the left was growing well until a slug crawled all over it in the cottage (there were all sorts of pests in there which was pretty grim) + the foliage took quite a while to recover. I ended up cleaning it with an old soft toothbrush! I’m planning on putting the smaller pot on the right into a propagator as there are some small growth points appearing in the sphagnum moss that would appreciate increased humidity.
Bits and bobs —
Finally, here are some photos of the miscellaneous cuttings, repotted plants + tidy-ups as I was working through the process. As you’ll be able to gauge from the photos, the place is still very much a renovation in progress, so I’m just working the best way I can for now until I get more settled over the next couple of months…


Whilst these plant-y jobs have predominantly been smaller in scale in today’s post, in the next repotting diaries (that’ll be up in a few weeks), I’m planning on tackling some of the larger scale houseplants that need help. I’ve got a huge old marble queen pothos (longer time readers might know the one I mean) + two Scindapsus pictus plants that I might have accidentally left in the car for 3 weeks in a bag…! I’ll document the process of what to do when your once-beautiful trailing plants outgrow themselves + end up looking out of control + just downright messy in all honesty! This can happen over about 5 years + at this point, I always opt to cut them back, prune the roots + re-plant the newer growth, alongside also taking cuttings to propagate.

I hope you enjoyed this post here are some pins to share or save. I’ll edit together some accompanying video of aspects from this post over on pinterest + instagram over the next few weeks too if you want to see more:

Leave a Reply