
Spring has sprung! According to the astronomical calendar, in the northern hemisphere March 20th marks the first day of Spring. The Spring equinox, or vernal equinox as it’s also known, celebrates the seasonal shift towards lighter days and warmer temperatures. For nature lovers, the Spring equinox inherently brings with it much optimism for new life and growth. For those of us nurturing plants at home too, the start of Spring can feel equally as exciting.
After their winter rest or dormancy period, some of my houseplants are starting to stir here at House Plant House. Winter windowsill propagations waiting patiently. A new leaf here, some roots growing out of the drainage holes there. With that in mind, today’s post is the first Repotting Diaries of the year – Spring equinox edition.
Welcoming the Spring equinox
As a way of welcoming the Spring equinox, I have a few plant-y plans lined up for this weekend. To kick things off, I’m carving out an hour or two between renovating to have a meander around my houseplants. Nothing fancy or complicated, just a walk-round with a cuppa. With any seasonal shift it’s beneficial to notice if any plants need moving to a new location, which is what I will be considering here. There might be some plants that need to be moved further back from the window as the days are brighter for longer, and the suns rays will be incrementally increasing in intensity. Conversely, some of your plants that have been dormant or resting in a cooler/darker position might want to move closer to the light.
Following that, I’m going to focus on identifying the ones that need repotting. I generally like to start with the smaller plants, which is what you will see in this post. There are also a few of my larger pots that really need an upgrade, but I need to psych myself up for that! I have some pretty big plans for my Monstera gang which requires some logistical planning first…
Outside I’ve found a pot large enough for a little cherry tree I got given on my birthday last month so I’ll be potting it up. It’s still a building site out there but at least one pot is somewhat moveable! It does feel strange not tending to outdoor plants this time of year. Hopefully they will materialise next year. Looking at rubble is not quite the same…!
Hopefully this post will serve as a little reminder to spend some time with your plants if you can. I encourage you to take a closer look at your pots this weekend too if this is a task you’ve been neglecting. Take your time and enjoy it! Finally, I’m going to go outside and have a walk. There is a particular place nearby I have a hankering to explore this Sunday as I know the crocuses are in full bloom now!
Repotting Diaries…
First up, remember that you don’t need to routinely re-pot your plants if they don’t need it. I’ve got a specific post about Spring plant care here. For today’s post, these are plants that have really needed some attention in recent months. I like to wait until I see signs of active growth before commencing my repotting sessions. Just because it’s the Spring equinox, it doesn’t mean everything just springs to life! There are a few plants like my Ficus which are still resting, so it’ll probably be April until I tackle those pots.
It really does feel great to be getting my hands dirty with some repotting again… (I’ll link my potting mix I like to make up here for reference) So let’s get into it!
Tradescantia fluminensis tricolour propagations
It’s that time of year again – tidying up the Tradescantia fluminensis tricolour always makes me feel like Spring is here! After winter, these plants can notoriously look a little bedraggled. For ease, I wanted to amalgamate a couple of bunches of cuttings I’ve been water and soil propagating over the last few months into one pot.


Whilst these plants have a tendency to look quite tangled up when they first get repotted, they do relax a bit after a few weeks. I prefer to not disturb the roots too much during the planting up process so leave them do their own thing as they adjust to their new pot. In terms of pots, I like to keep them fairly small in size and do a number of re-pots throughout the growing season. I plant a number of stems together in one pot like I have in this instance. This seems to keep the plant looking nice and full!


If you are new here, I’ve written a dedicated post on this process which you can read here: How to make a new Tradescantia plant from cuttings. You might also want to check out How I stop my Tradescantia fluminensis tricolour from looking like a crispy mess!
Chlorophytum comosum / Spider plant rescue
This poor spider plant was in the corner of a space with the building materials for too long and looked positively grey. When chlorophytum are excessively dry, their foliage can de-saturate which can be quite alarming to see! But after some water therapy, a week later, this little plant perked up again and was now ready to plant. With this one, I chose to remove it from it’s old planter as the potting mix was very dry and compacted. It hadn’t been repotted in ages either. So I rinsed off the roots and popped the plant in a jam jar of water for a few days. Then I potted it up!


As you can see, there’s a runner with two tiny plantlets attached so I was extra careful not to knock these. Spider plants will often produce runners as a result of a period of stress. The plant can experience stress through being root bound, or being starved of water, light or nutrients. By withholding these elements, the plant will produce offshoots as a survival mechanism. There’s an in depth blogpost on Success with spider plants here.


Marble queen pothos / Epipremnum aureum propagations
I shared the photo below of my beloved plant shelf from my old apartment on Instagram the other day. And it got me thinking about how much I’m looking forward to designing my new space with plants. After a few years of living in limbo and trying to keep the plants alive, I’m so ready to settle into a (hopefully!) more permanent space. Anyway, this beast of a Marble Queen Pothos took centre stage on my Ikea Hyllis shelf! It survived in the cottage and was getting so large I took some cuttings when we moved to propagate.
These plants started life as individual leaves and once these had rooted, I planted them up into a few pots. Fast forward a few months, they’ve now grown a few new leaves of their own. I’m really favouring planting smaller pots of cuttings up into one larger pot at the moment so I think it’s time to pot them up together now…

It still looks a little wonky but I didn’t want to disturb things too much as there are new leaves on the way:

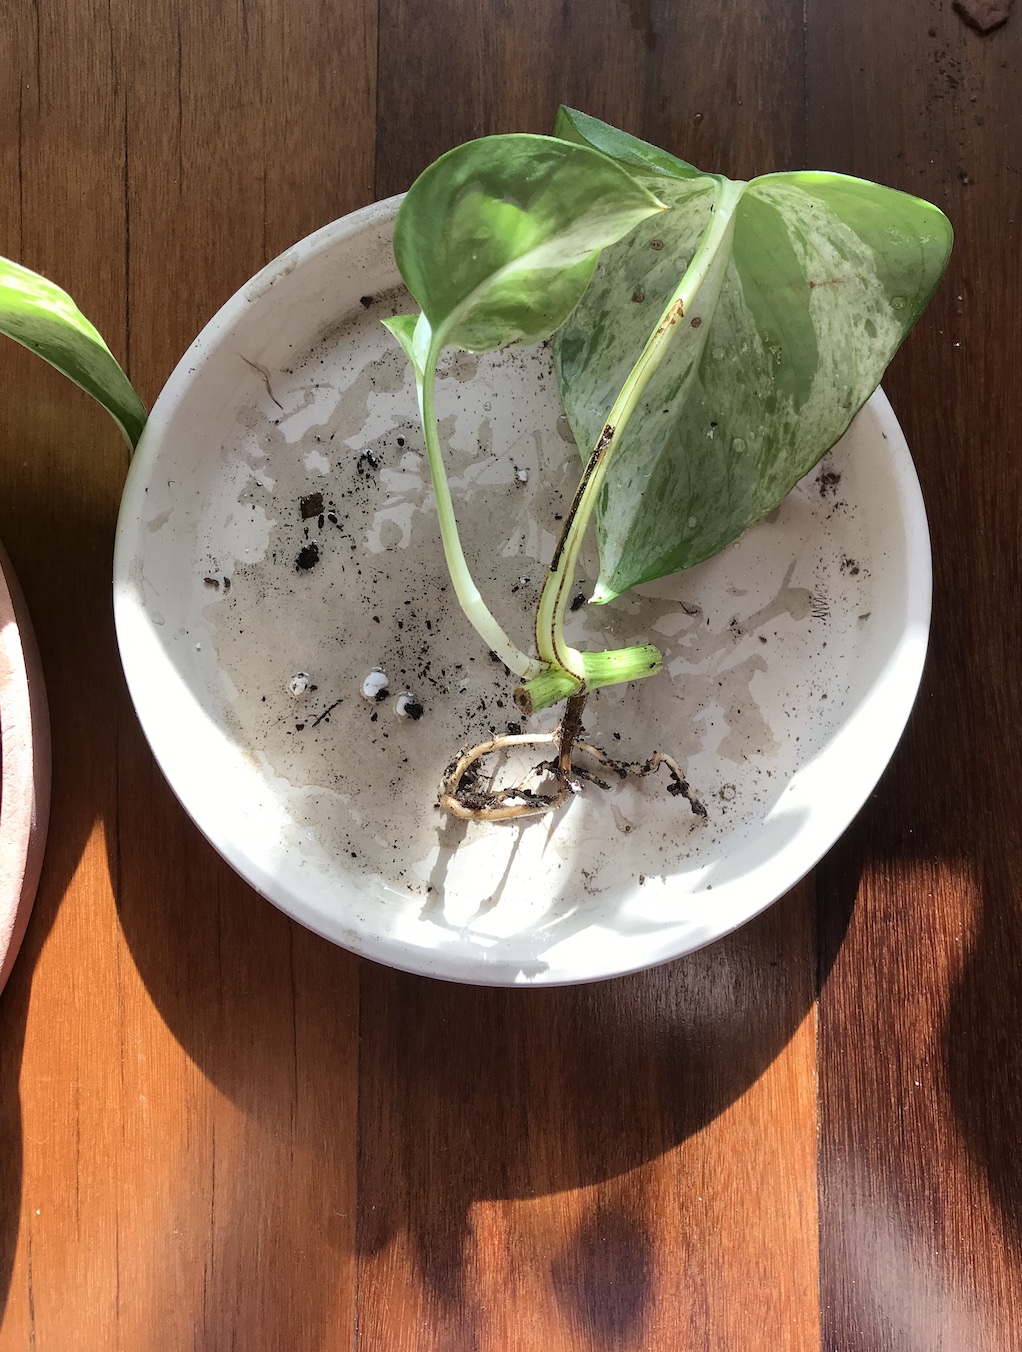


I always like to have a few pots of marble queen around – it’s one of my favourite trailing houseplants and it’ll hopefully get growing as we get into Spring. The variegation of this one is really pretty too. True, it might take a while to trail but for now it’s a cute table top plant!
Planting up my Echinocacus grusonii / Golden barrel cacti from seed
It’s taken a long time to get to this stage! You might have seen on this post that I thrifted this lovely bonsai planter on my birthday back in February. I knew straightaway that 1) it would look really good on the south facing kitchen windowsill and 2) it would be the perfect upgrade to plant the cacti. They’ve lived in my old lunchbox for over 2 years because it’s a good makeshift propagator! But it’s not pretty and these cacti have outgrown their space and were ready for potting up. I grew these from seed in this container so it feels like quite a moment to do this!
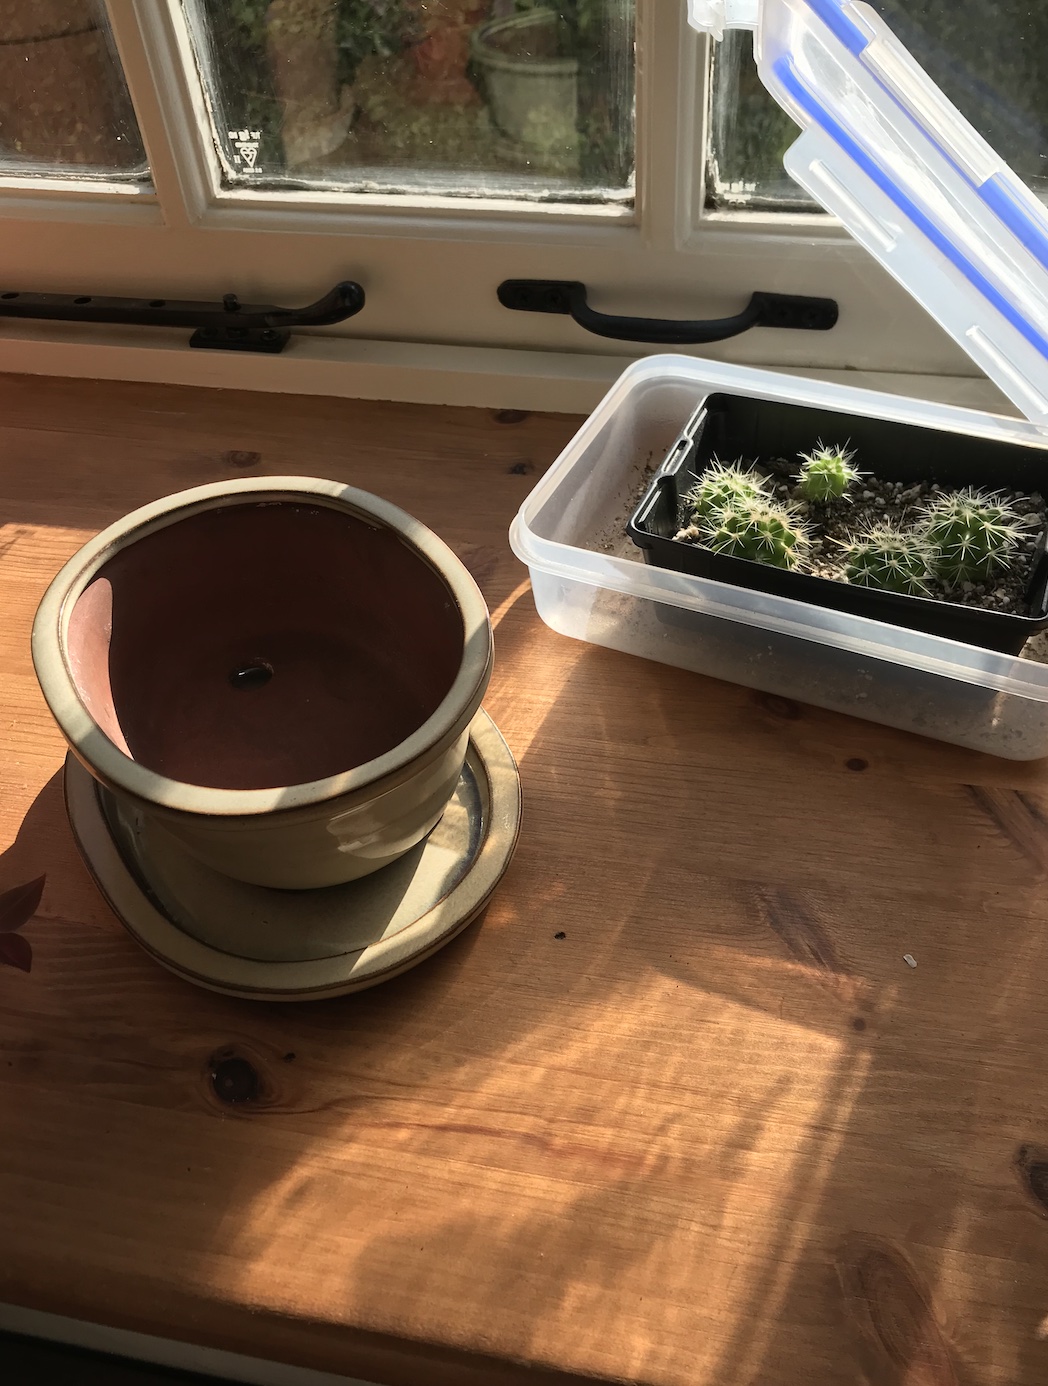

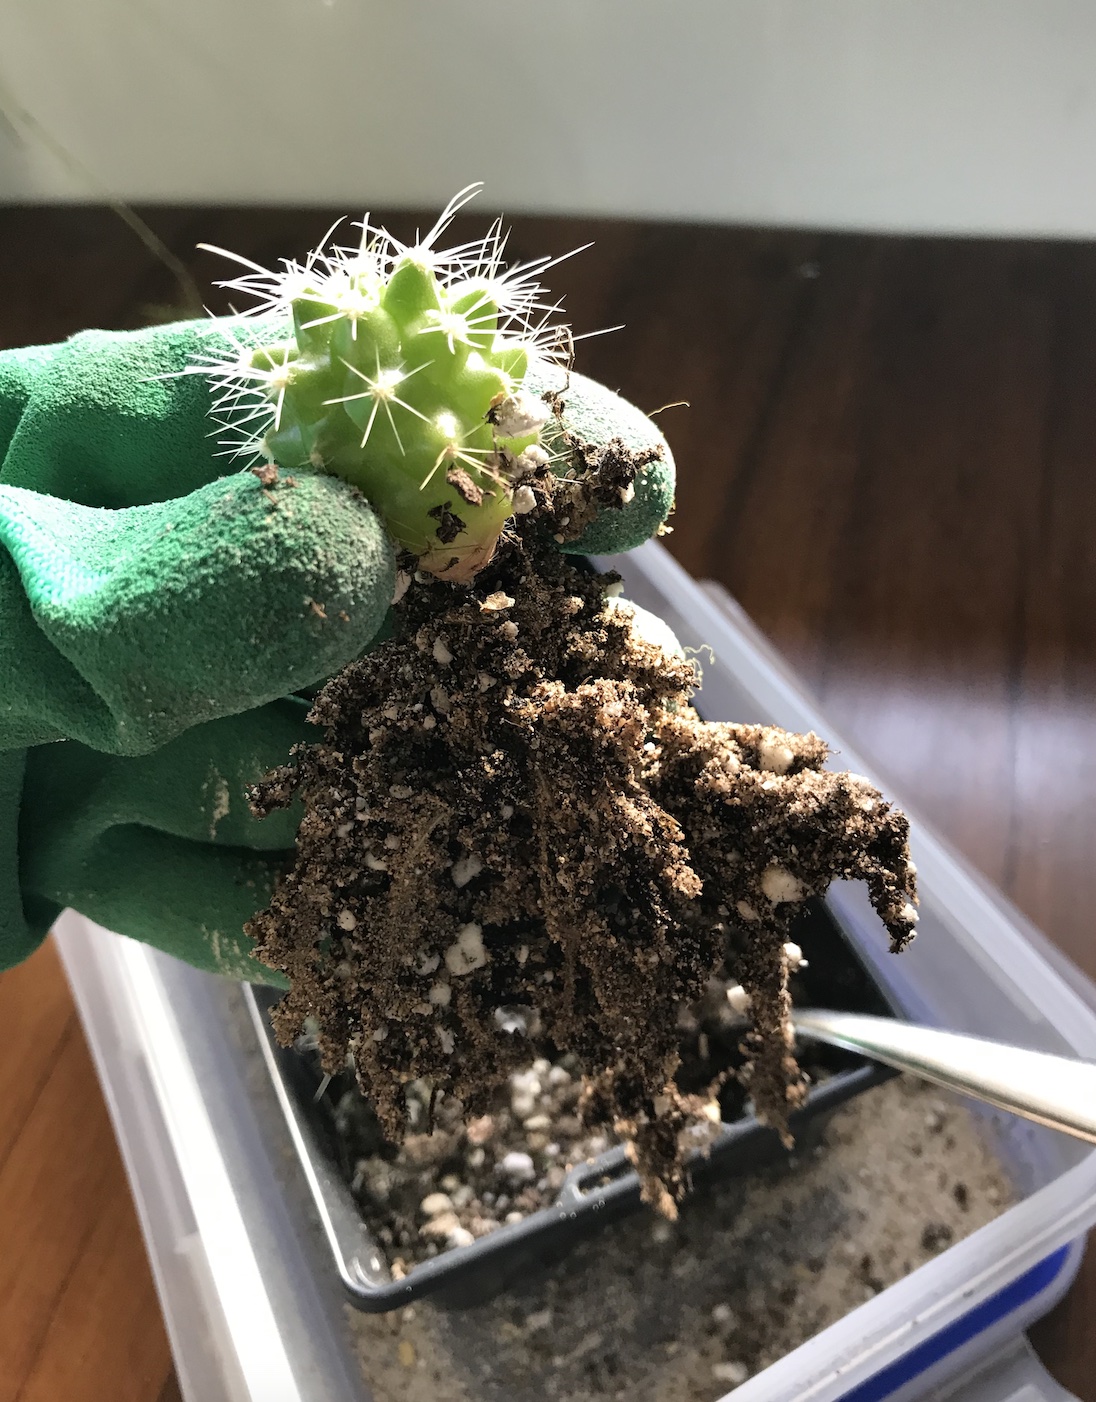
It’s hard to show in the photos, but the main area these cacti had been struggling with was their roots just did not have enough depth to anchor down in the tray. In comparison, the bonsai pot is more than double the depth of the tray. So whilst there isn’t much of a change in terms of space around the individual plants, they all have plenty of space for their roots to settle into their new pot. In time, I’ll probably take two of these plants to make up some individual pots. But for now, these will be fine here. Their growth is so slow I probably won’t need to do anything until next year!


I made a video of the process too for my Pinterest:
A couple of Pilea peperomioides
It wouldn’t be a Repotting Diaries without a Pilea plantlet or two now would it! These two were in with the main mother plant and I just felt like it was time to give them a planter of their own. I left three of the other plantlets in with the main plant for good measure, and I’m going to give these two a space in some nice little planters.

I don’t know if it’s just me, but as my plant collection matures, I’m finding I have fewer plants to go in some of the more diminutive planters. So I’m going to make more of an effort this year to dig out (no pun intended) some of my favourite little pots and plant some little propagation experiments in them. Plants this size make for excellent shelf plants too… just ensure you are giving them enough light and don’t forget to water them!


Strelitzia/ Bird of Paradise repotting
Here’s my BoP from my Strelitzia care guide I published the other week. It was looking a little something like the leaning tower of Pisa over winter and I needed to do something about it! The roots had grown so big around the bottom of pot, they were encircling it and pushing the plant up and causing it to tilt. It was a messy job, but my plant already looks a lot happier standing up tall. Let’s see how long before a new leaf starts to appear.


Snake plant/ dracaena/sansevieria trifasciata laurentii propagations
If you’re a regular reader of House Plant House, you might recall some snake plant propagation experiments I was carrying out last year. These are a few dracaena/sansevieria trifasciata laurentii leaves I wanted to plant up together. You can notice how the newest leaf to grow is not variegated because it was propagated by a leaf cutting and not division. The variegated leaves are the ‘original’ leaves that I propagated. Therefore, the new plant will be a combination of solid green (new) leaves and the yellow-edged variegated leaves. In time though, the older variegated leaves can sometimes die off, like you can see in the small plant below left:


Have a look at my Snake Plant Propagation Methods or Snake Plant Care Guide if you’d like to see more on this. I’ll also share a video I made at the time:
Conclusion

Thanks for reading and Happy Spring Equinox if you celebrate it. I hope that you can spend some time in nature or with your plants this weekend. I’ll pop a link to my Repotting Diaries series here if you want to get in the mood for some plant care and hopefully today’s post has offered some repotting inspiration to welcome in the growing season too. There are also lots of posts on this over on my Instagram and Pinterest if you want to see more.
There are also some other related posts you might enjoy, a few of which I’ll link here for further reading:
- Getting your houseplants ready for Spring
- Post-winter plant pep up: helping your houseplants to look their best
- Repotting guide
- The BIG Monstera re-pot: repotting my 3 Monstera plants
- Oxalis triangularis gets ready for Spring
- Let’s talk about light: a HPH guide to understanding houseplants, lighting + orientation
- A mindful approach to keeping houseplants
- My houseplant potting mix
Here you’ll find some pins to save or share with someone who might enjoy this Repotting Diaries: Spring equinox edition:

Leave a Reply