
Today’s post is all about snake plant propagation. If you have a couple of these plants at home + have been thinking about giving this process a try, there are a few methods to choose from when it comes to propagating these easy-going plants.
Throughout the post, I’ll be explaining the most popular processes alongside sharing the results of my sansevieria/ reclassified as dracaena, ‘prop-experiments‘ over the last few years. For me, the fun of propagation comes from the element of experimentation + it’s so rewarding when you have some success with this. From the outset, it’s important to know that this is a slower process compared to popular trailing plants like pothos, scindapsus etc., but not as slow as others…like ZZ’s… I just like to think of it as a good practice of patience!
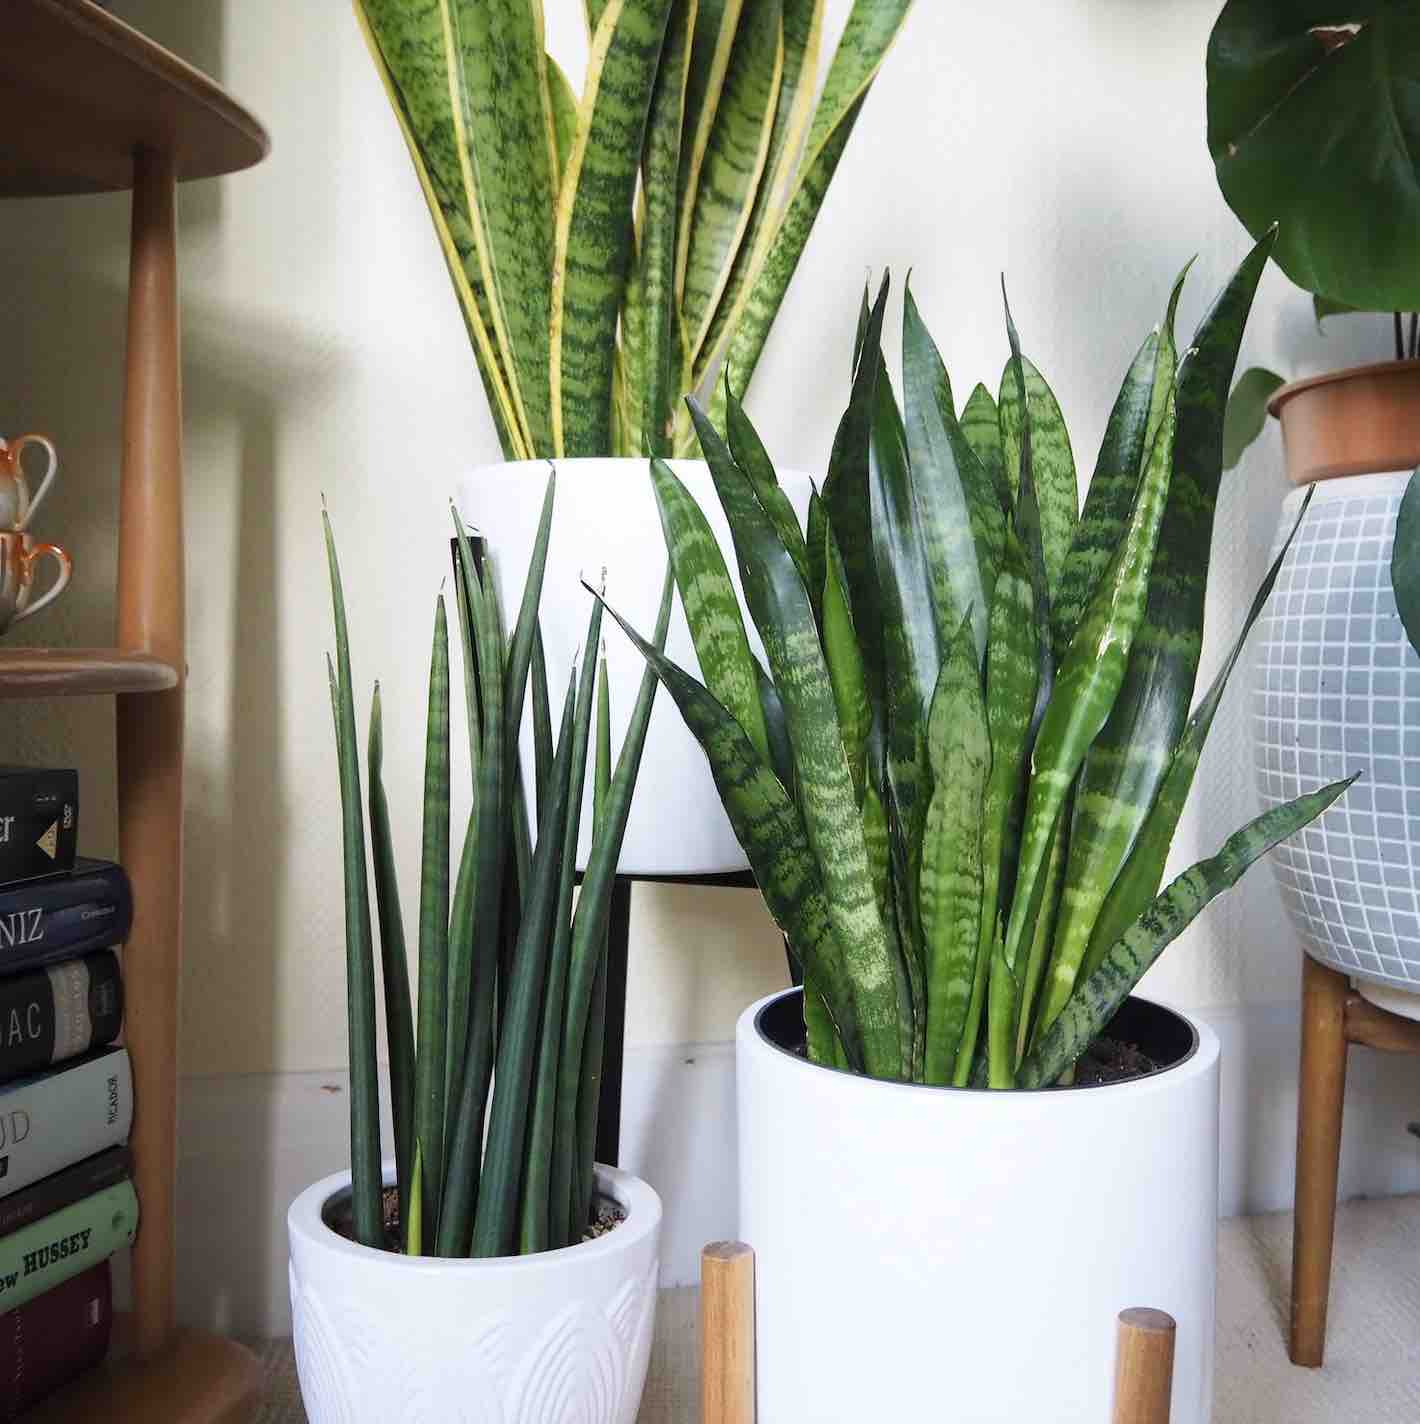
Furthermore, whilst these houseplants are often classified as ‘low light’ options, this really just means that they can tolerate less light. For optimum growth, a fairly bright, indirect light position will make the plant much happier + give you more propagation opportunities. If you have been keeping your plant in a darker location, take time to adapt it to a brighter position by doing this gradually over around 6 weeks. My snake plant gang grew best for me in my old apartment, around 2 metres from a west facing window + also about 2 metres from a south-west exposure (I’m in the northern hemisphere). It was in these positions that I was able to observe + enjoy them growing + not just looking a little forlorn in a dreary spot in the corner of a room!
In the post we will be discussing:
- A note on propagating variegated snake plant cultivars (reverting cuttings)
- Propagation by division
- Propagation by leaf cuttings
- Propagation options
- Water propagation
- Soil propagation
- Alternative substrates for propagation
- Seed propagation
Snake plant propagation has become a fun houseplant activity that social media seems to have popularised in a big way over the last 2 years, but from the messages in my inbox, I know new houseplant enthusiasts can sometimes lack the confidence to know where to start. So let’s get into it…
A note on propagating variegated snake plant cultivars.
For many, the Dracaena (formerly Sansevieria) group fall into the category of a ‘classic houseplant’. They were ubiquitous in mid century homes + after their widespread distribution, for quite some time were considered a bit retro + an exemplar of a mid-century aesthetic. But over the last few years, their popularity has flourished once more + this has resulted in the development of lots of new + interesting cultivars with a variety of forms, coupled with seemingly endless options of unique colourations + variegations.
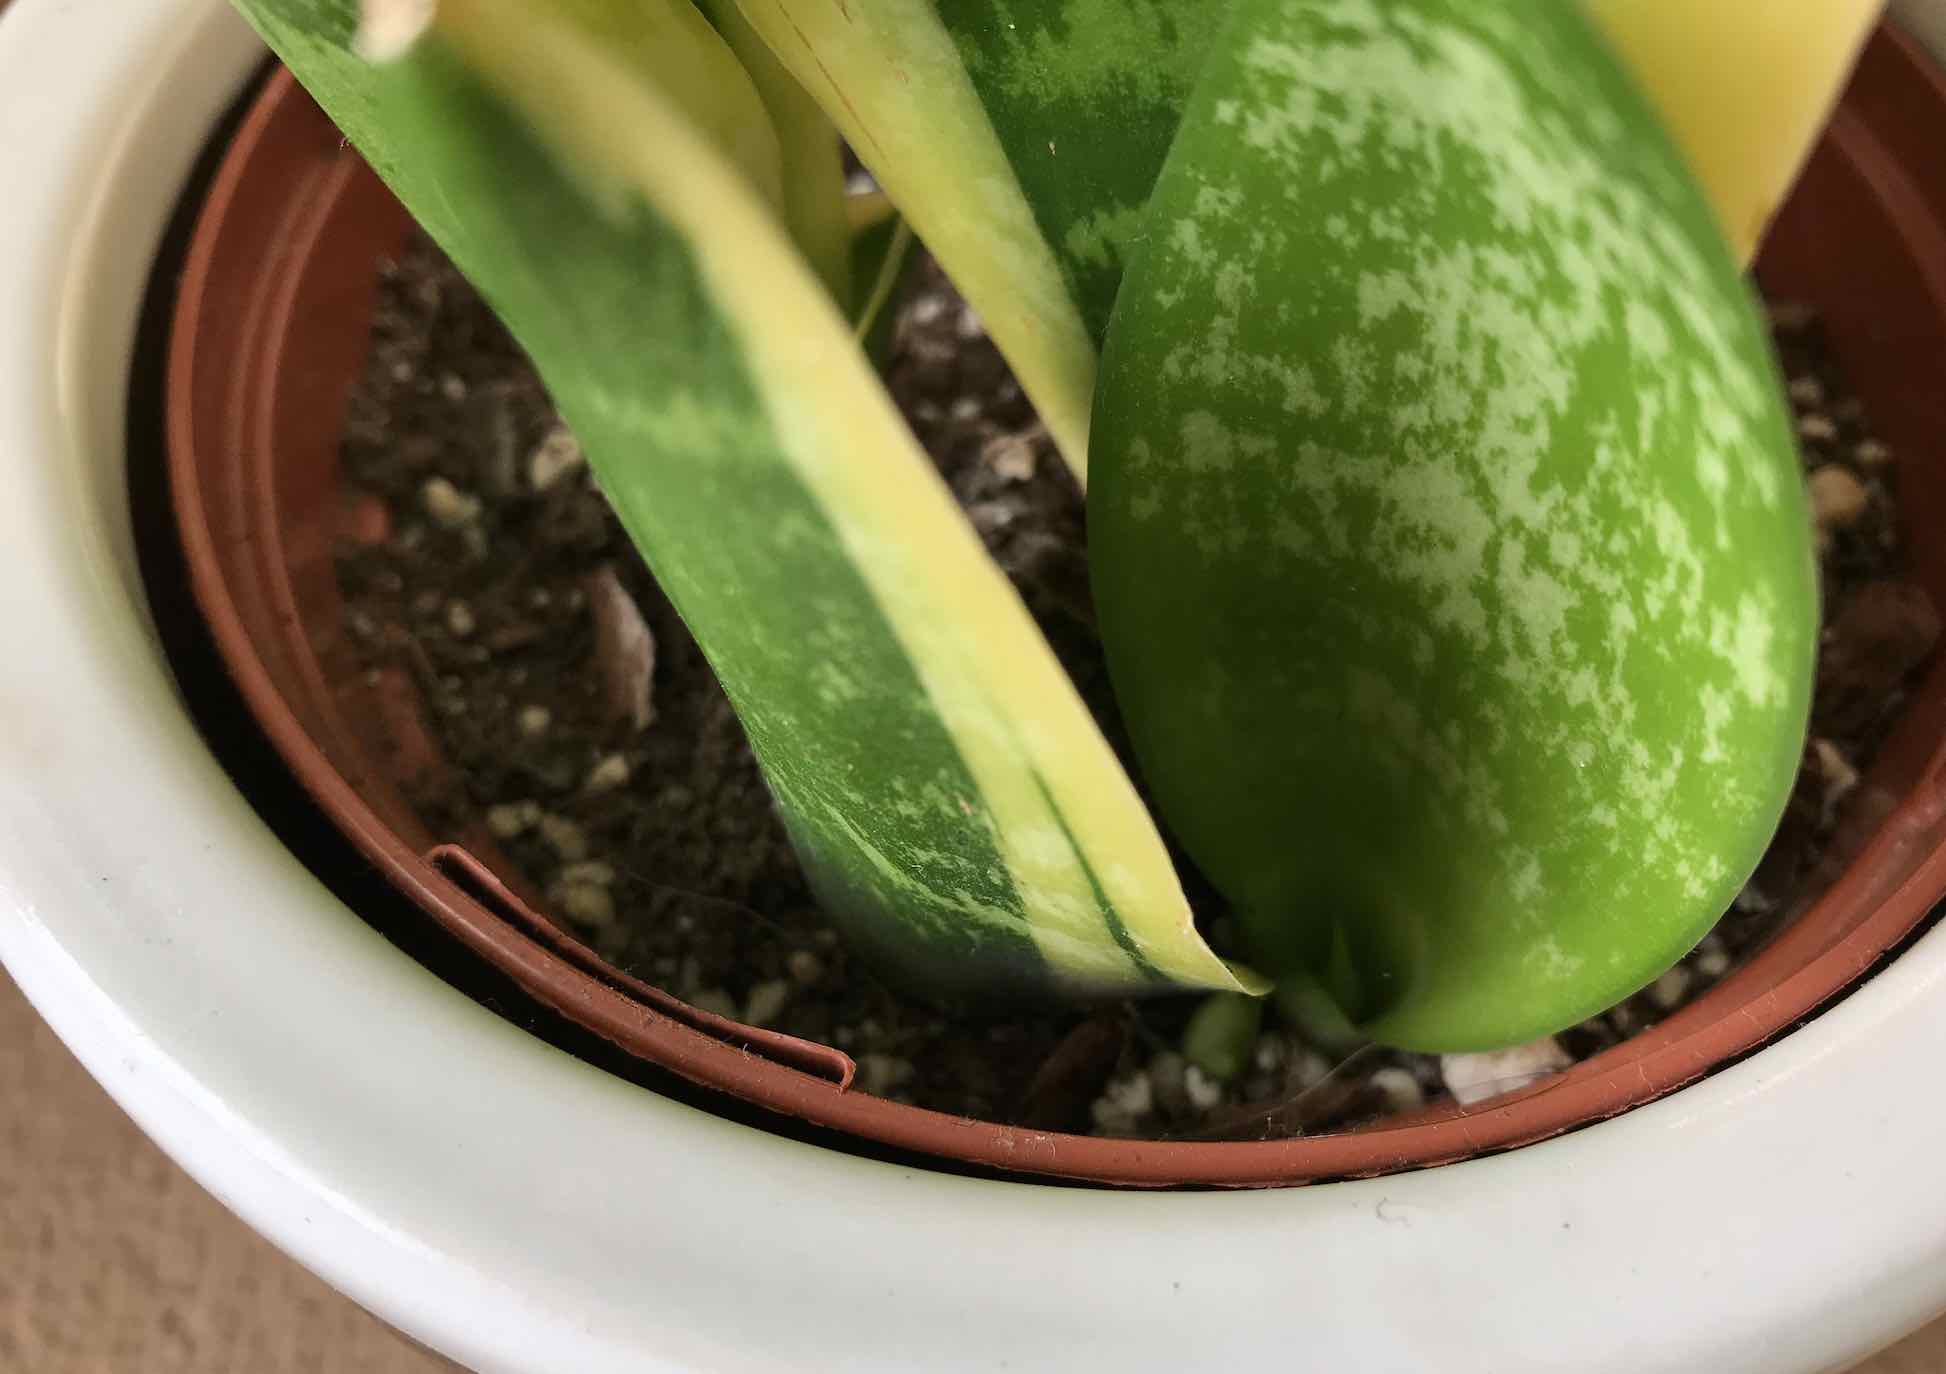
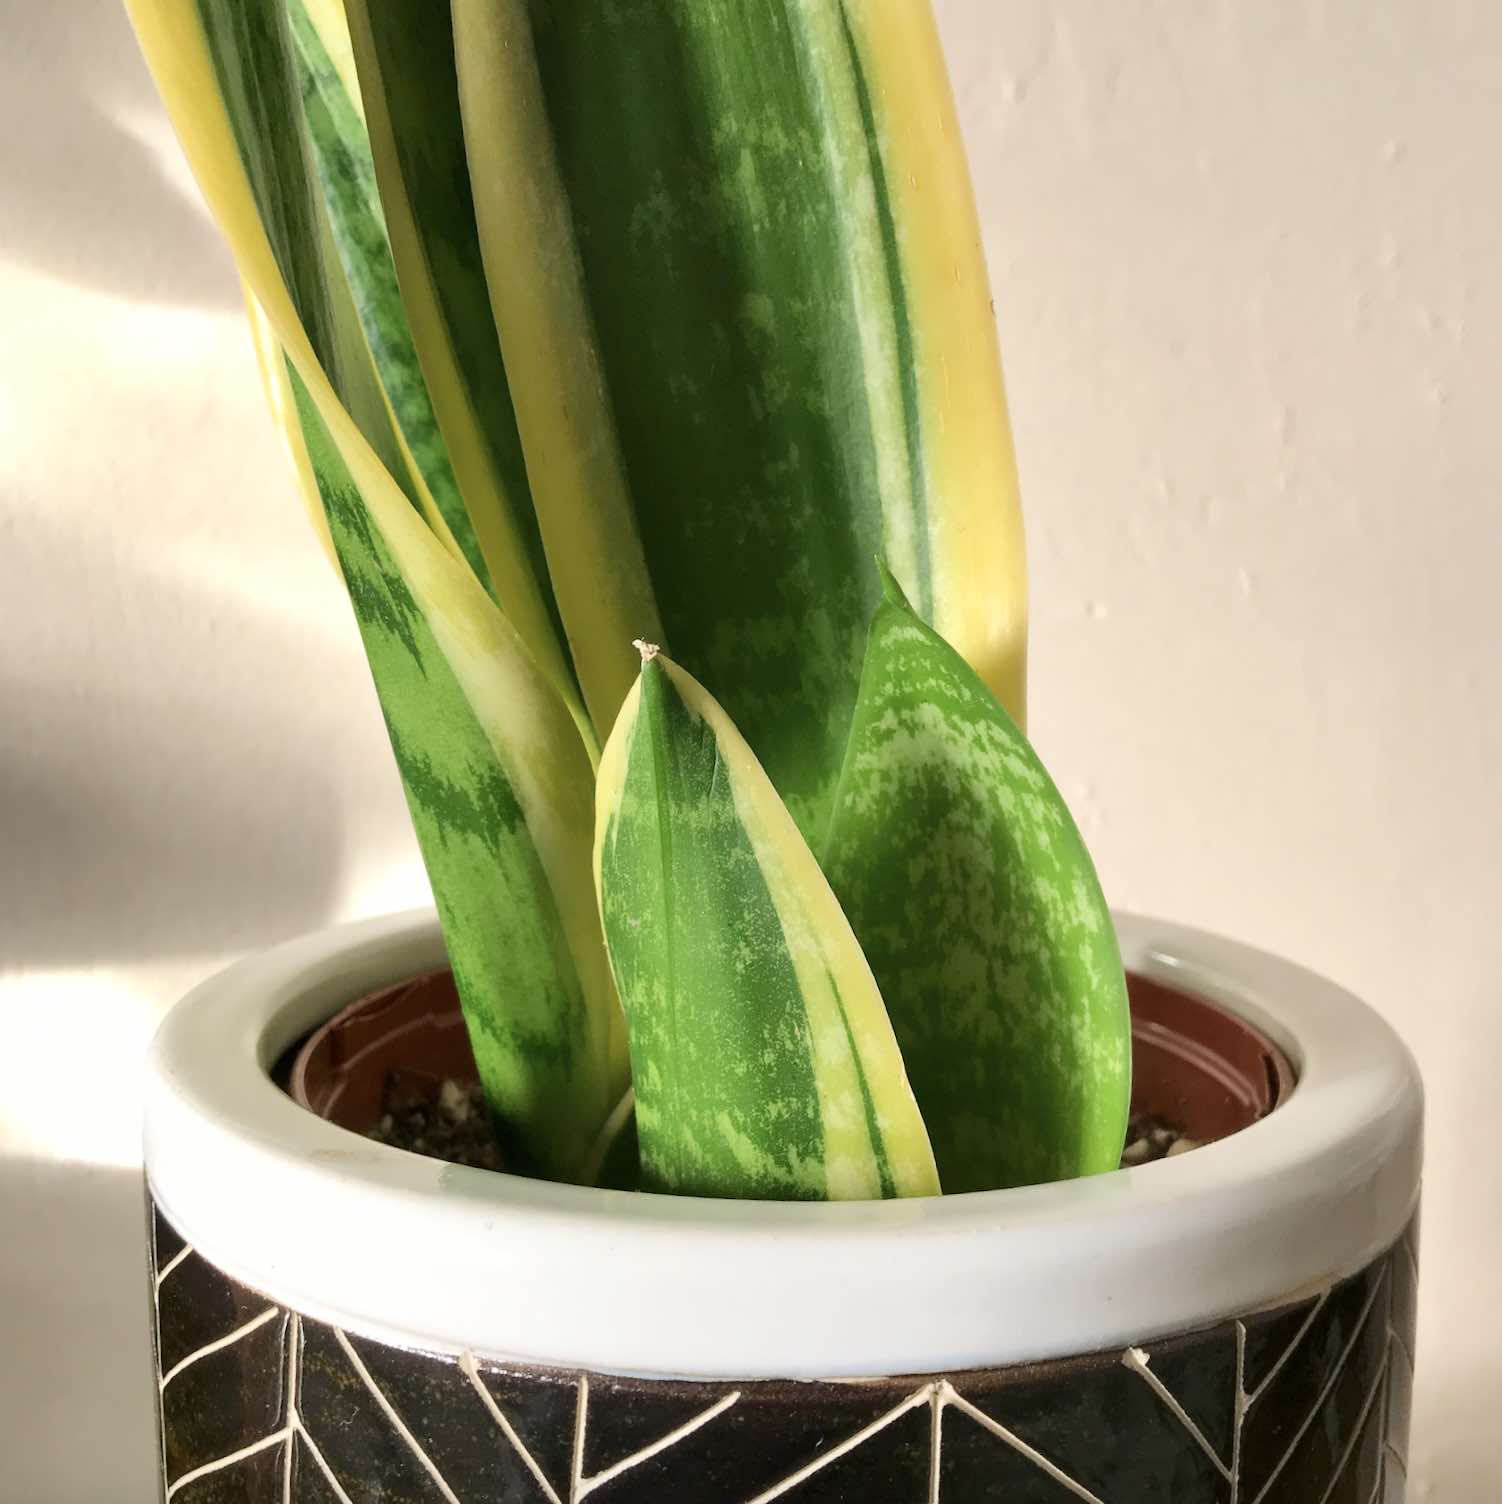
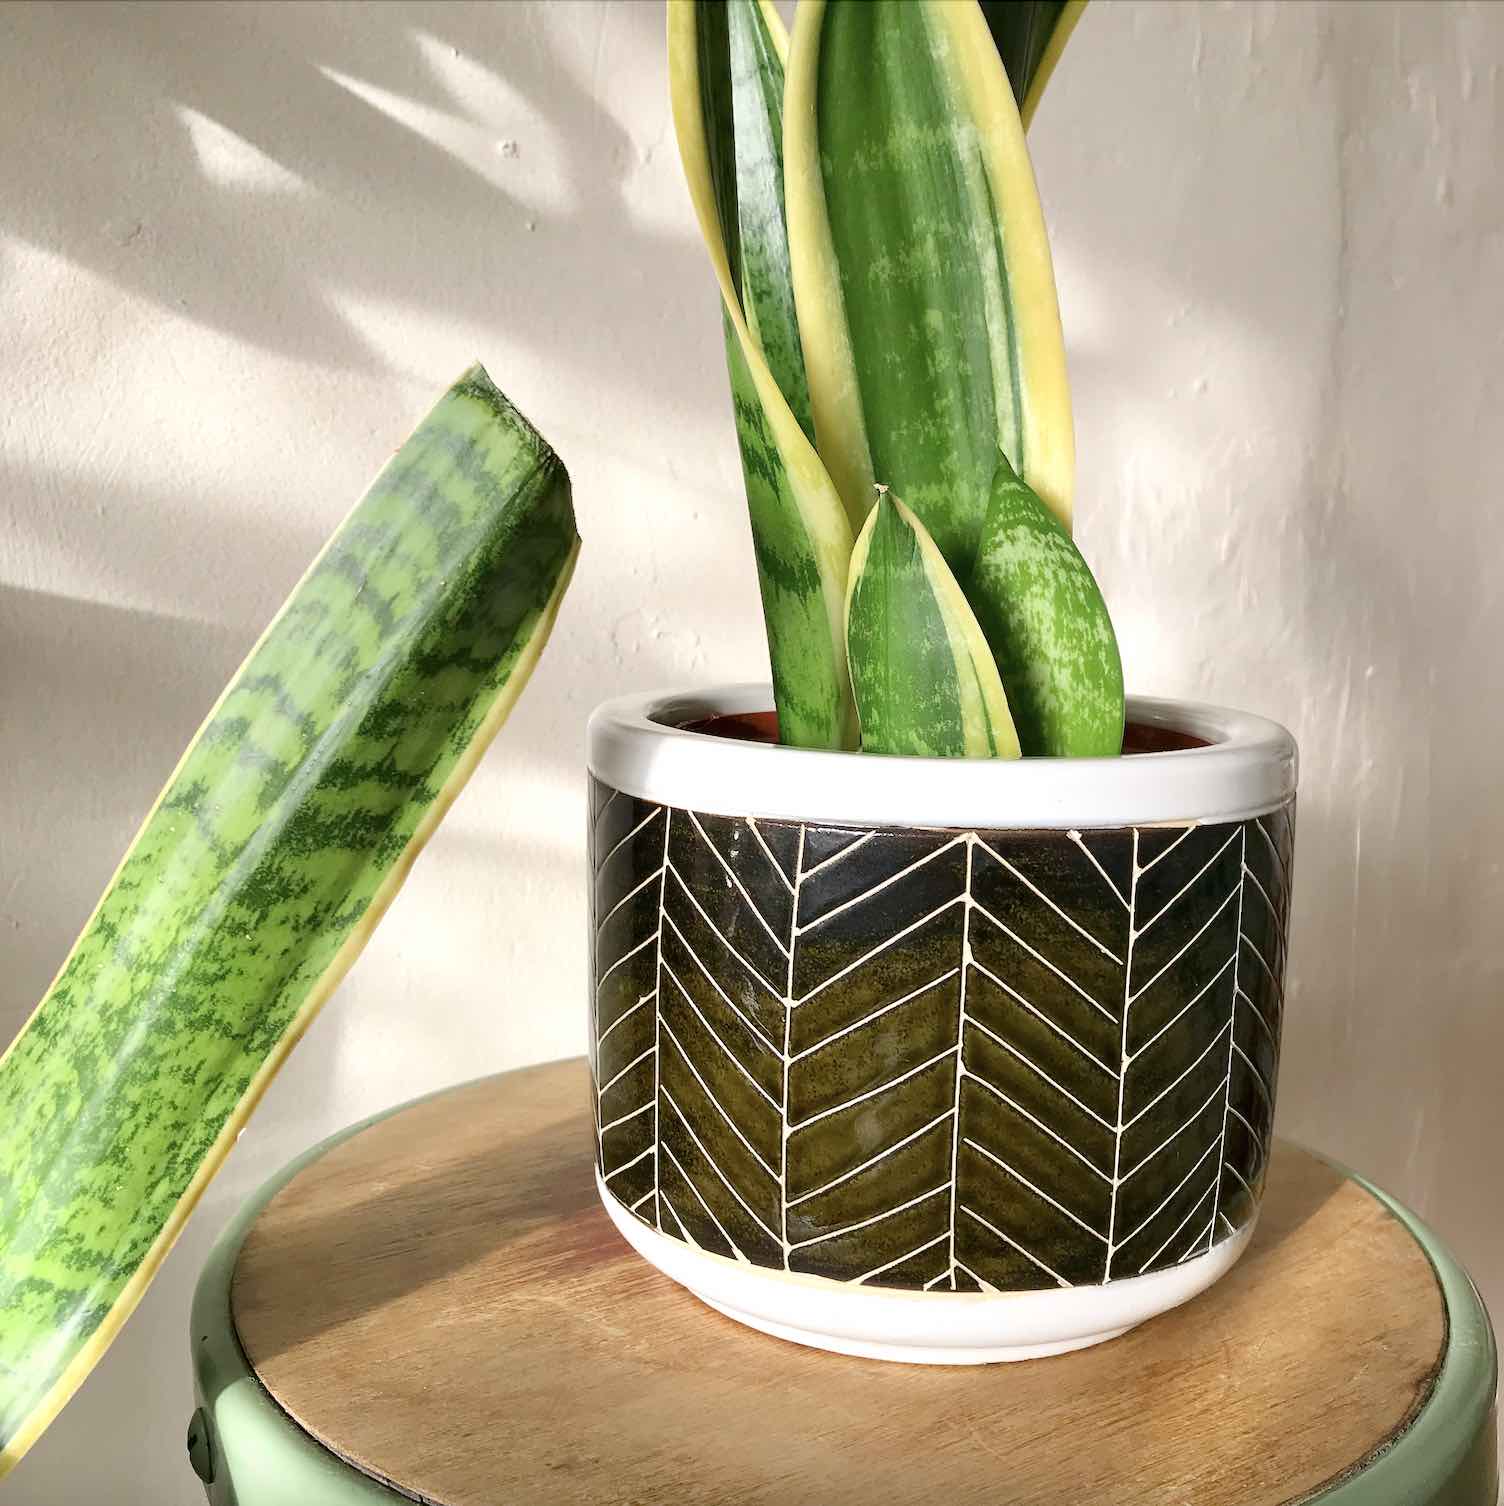
The first thing to consider before we get into the propagation methods is what type of snake plant you have + most importantly, whether you want to keep the variegation when propagating it. This is because the mutation that causes the variegation to occur in these plants does not continue when the plants are propagated by cuttings. Ultimately, propagating by cuttings means that the new growth will revert back to a solid green dracaena leaf. This is good to know from the outset because if you have a less-common cultivar you are considering propagating, then propagation by division is a much better choice!
Propagation by division.
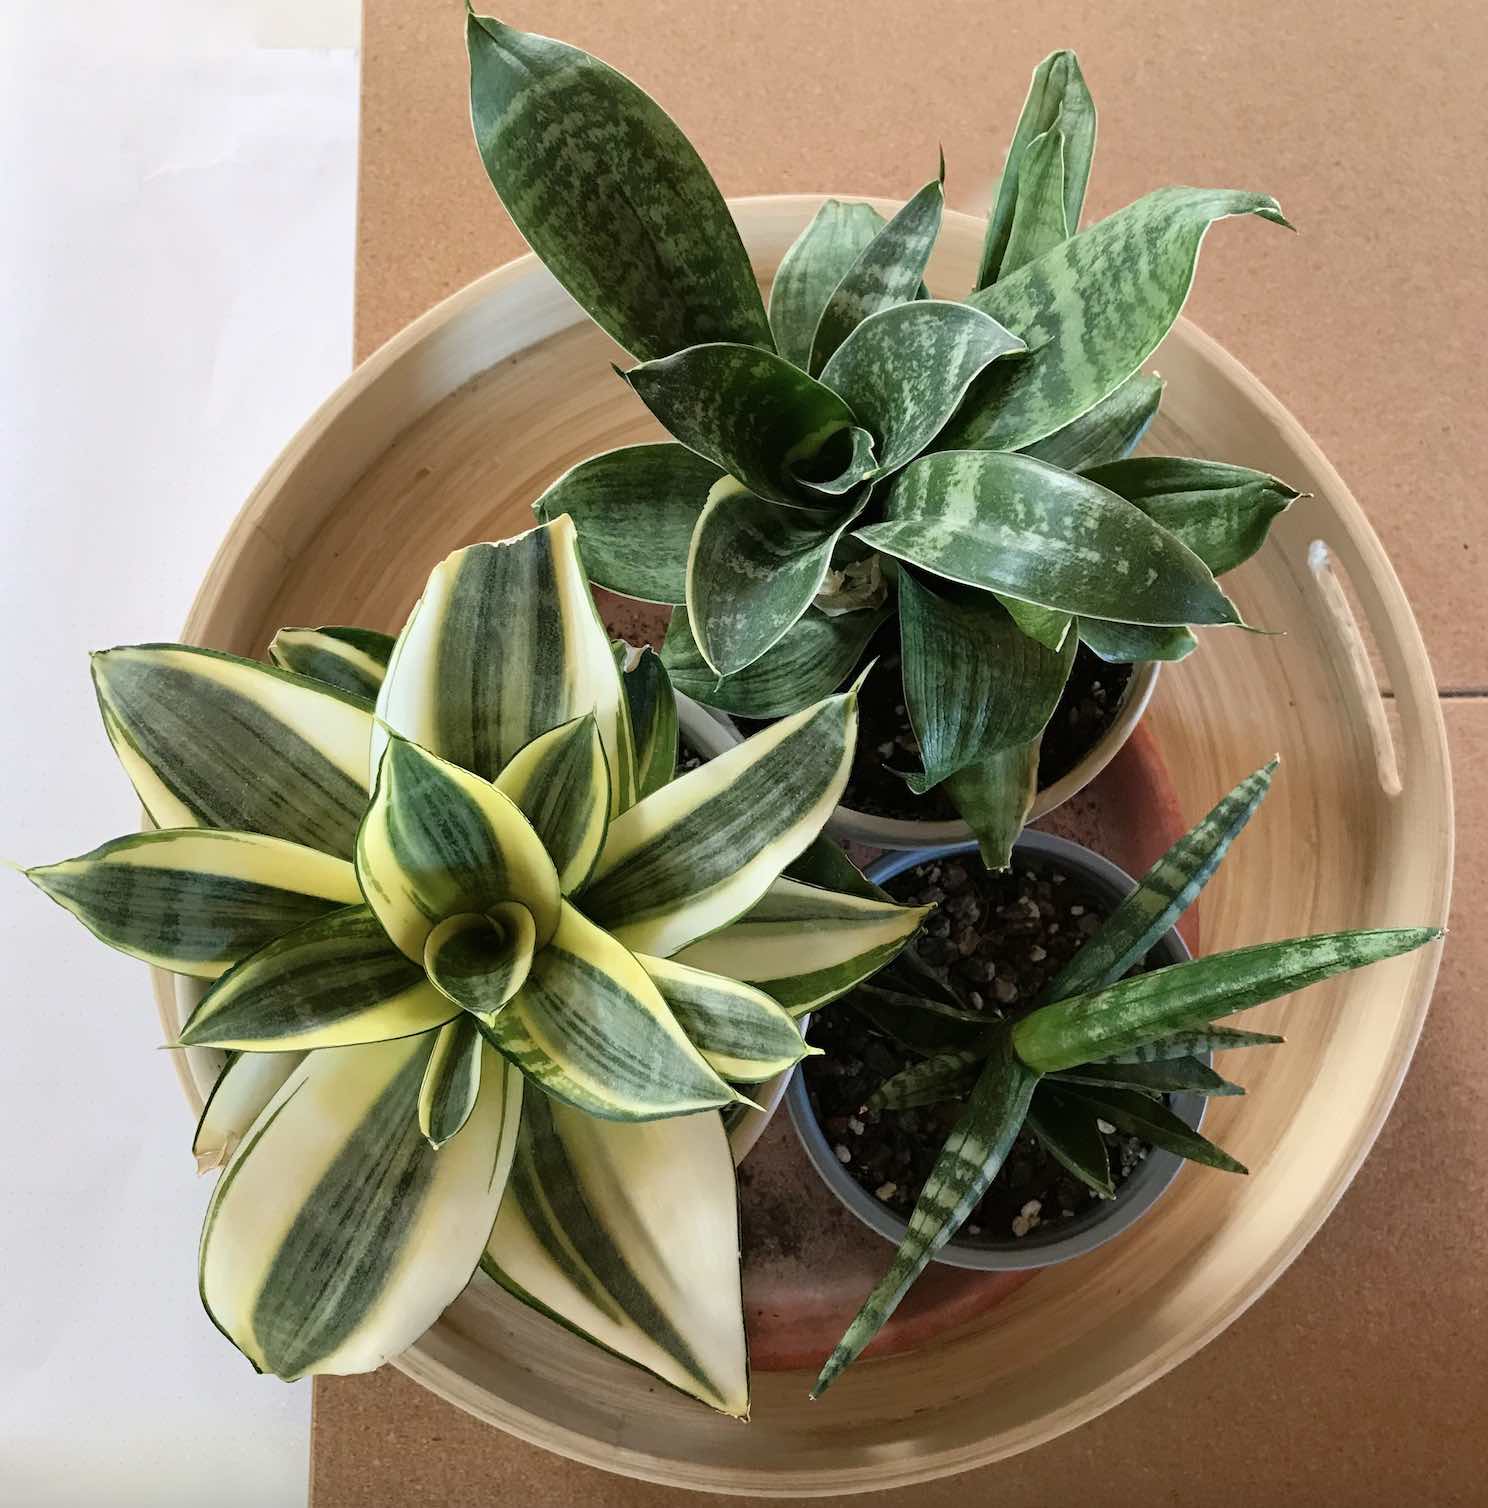
Propagation by division is arguably the easiest method if you have a mature snake plant which has not been repotted for a number of years + has filled the pot with growth around the base of the plant. Over time, the pot can even get contorted with these chunky white-coloured tap roots! In snake plants with a more compact rosette form like these above, you can notice that the solid green birds nest snake plant at the top (‘dracaena trifasciata hahnii’) has started to produce offsets which can also be separated to create a new plant.
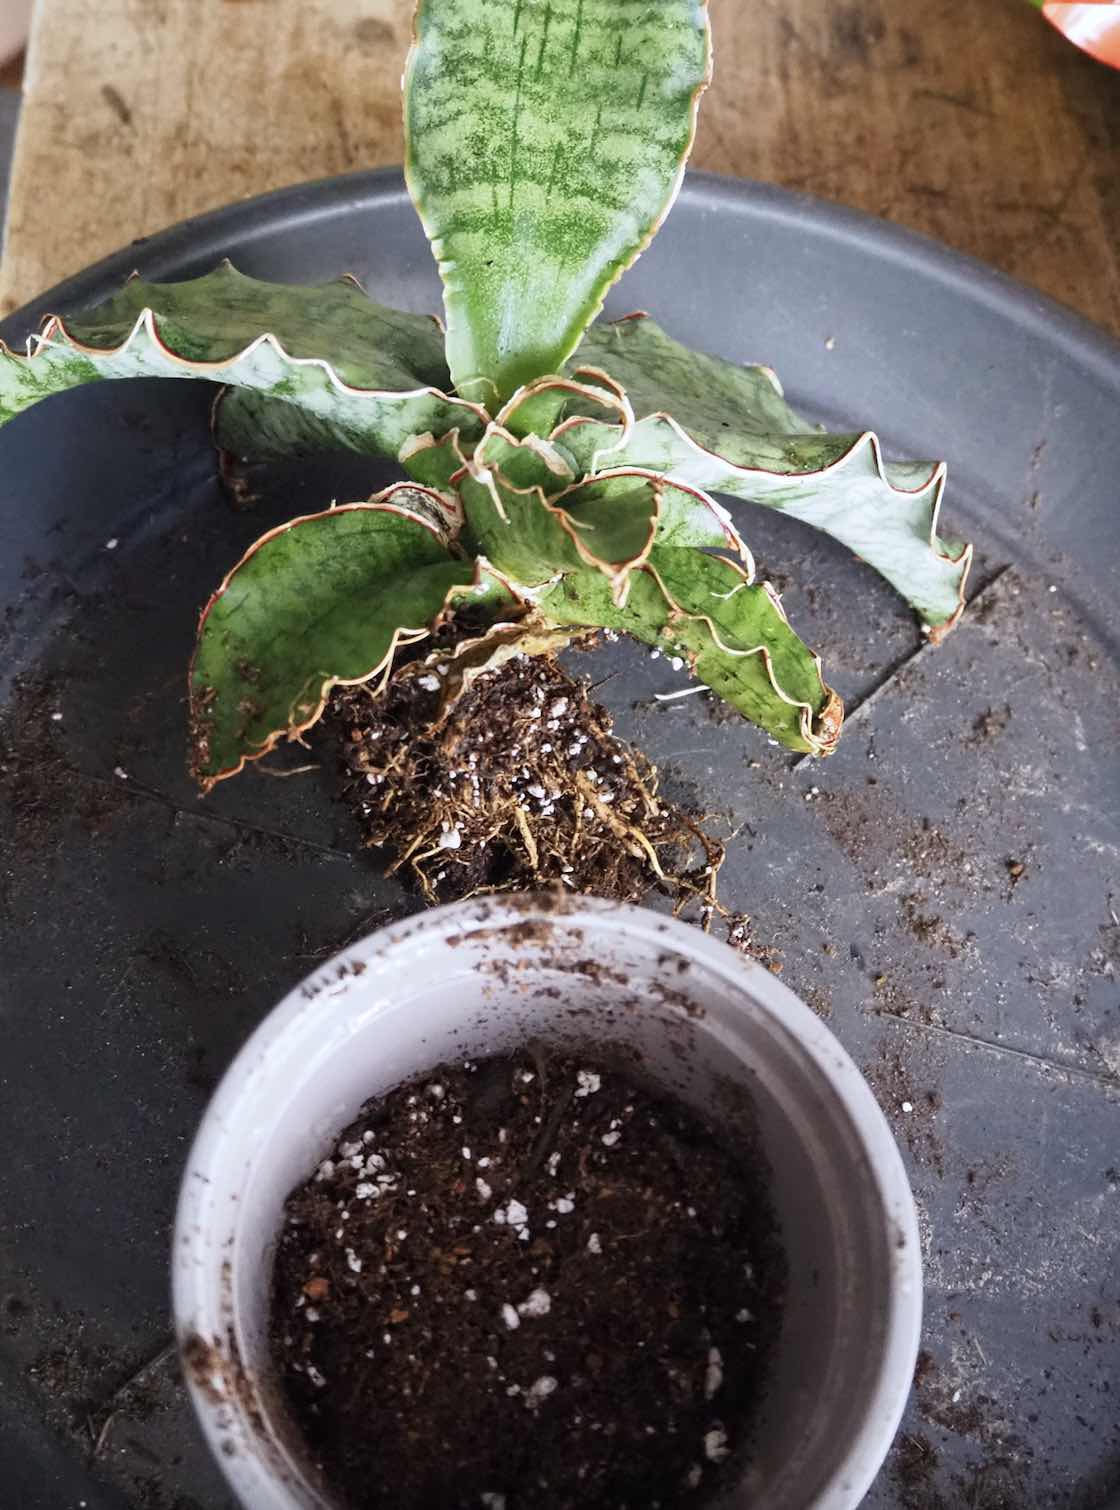
When propagating by division, you want to ensure that both ‘divisions’ have roots + if there is a larger tap root that can be chopped in half, this is a good idea + will give both new plants the best chance for success. Otherwise, some sort of root system is usually fine + better than no roots at all. Furthermore, separating young plantlets without a sufficient root system can be tricky, unless you then callus the division + water/soil propagate until roots are formed before planting up. I have done this with some success but it’s not the most straightforward option in my experience.


The picture above right shows a division I separated from my dad’s snake plant (a dracaena/sansevieria trifasciata laurentii) last time I repotted it for him — it already had some small roots but has really flourished this year (photo from December 2020). Propagating by this method has ensured the yellow edging is still present. For a growth comparison, here is the plant in March 2020:
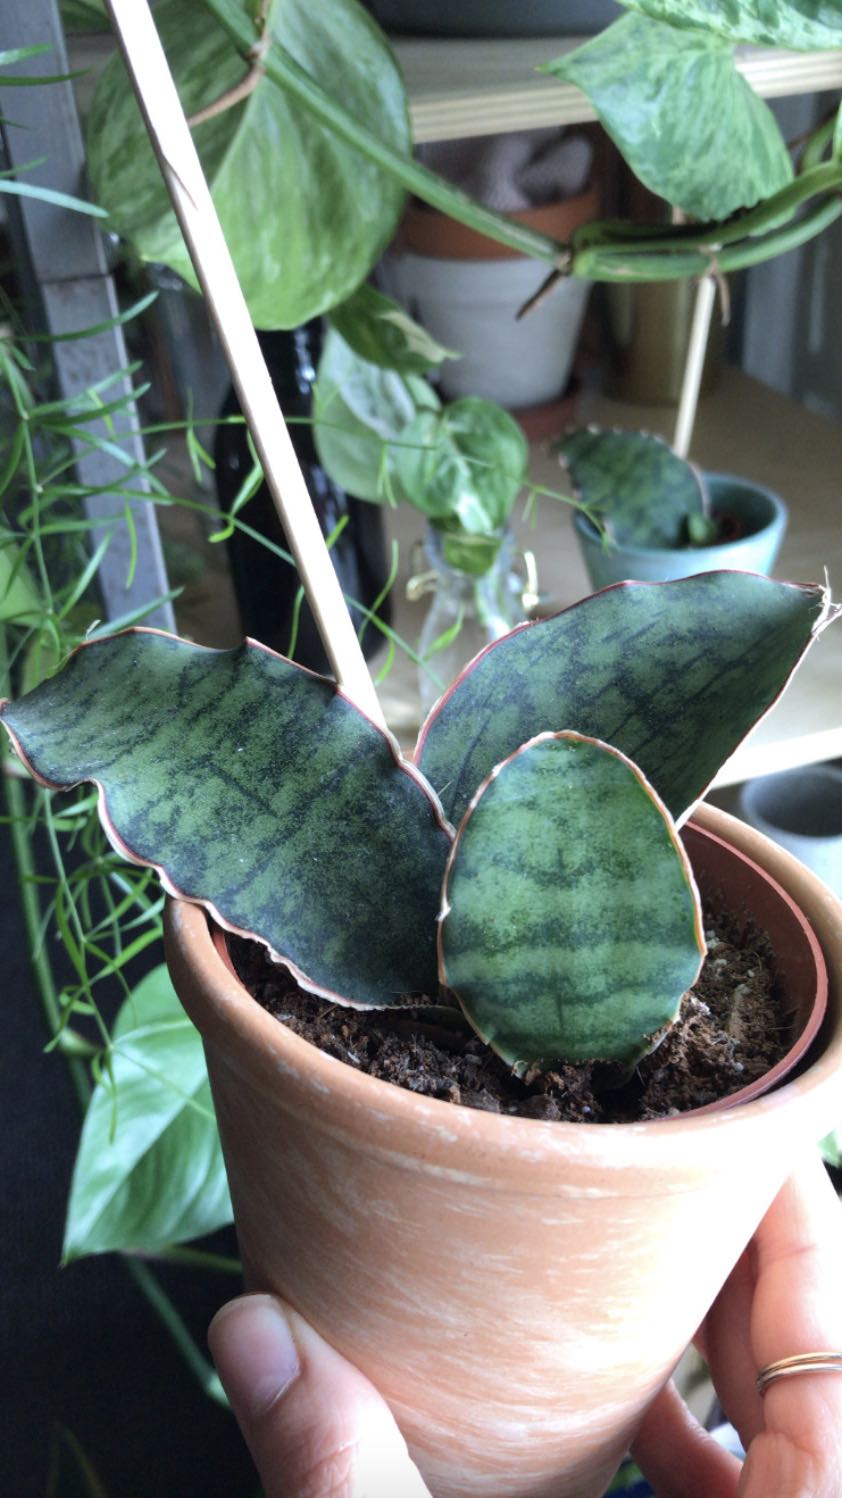
Also, as you can see in the photo below, the kirkii blue snake plant that I rescued off the floor of a nursery greenhouse a few years ago was very battered + I separated two of the leaves to give the plant a bit more room around the base… it was very difficult to get in a planter with this wild shape! These two leaves both successfully took to rooting in potting mix + have since started to produce new growth. Even though they are still quite juvenile in form, the leaves have the same pink edging as the mother plant which illustrates how propagation by division is my preferred choice for more unusual varieties.
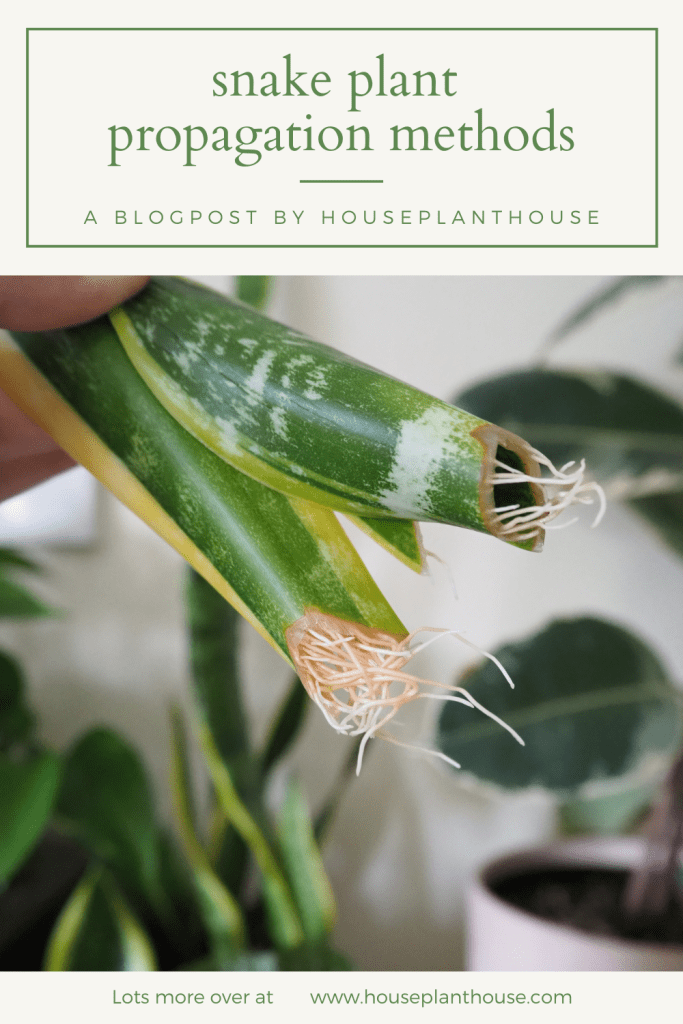
Propagation by leaf cuttings.
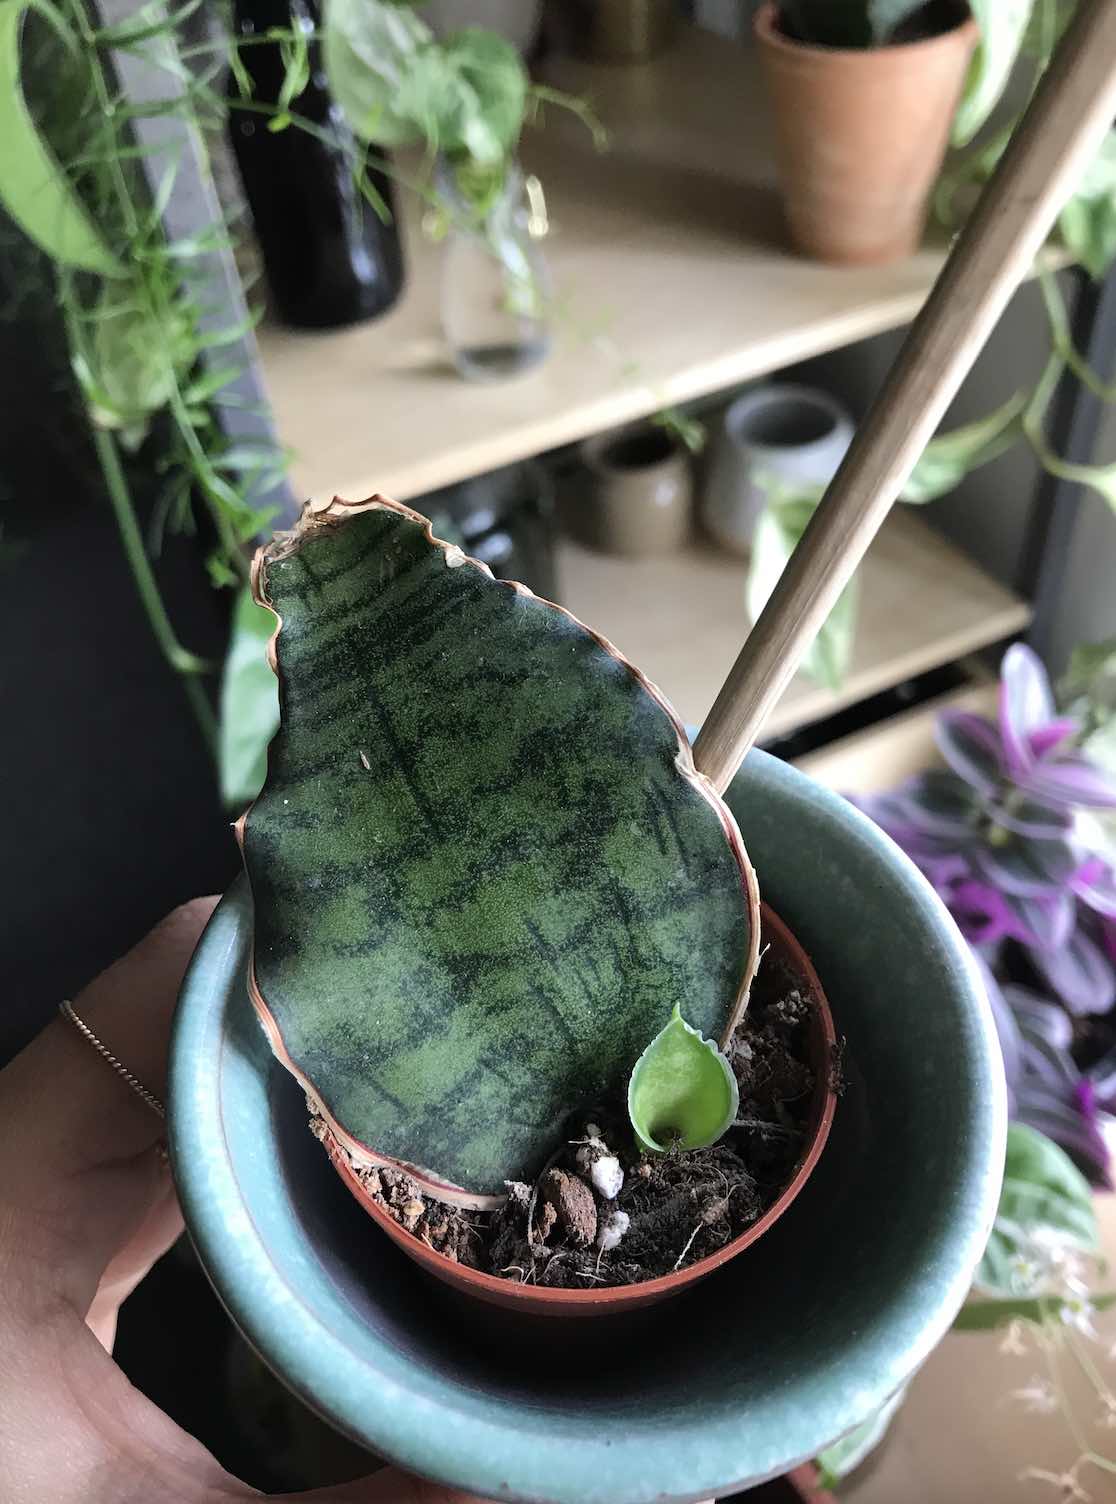
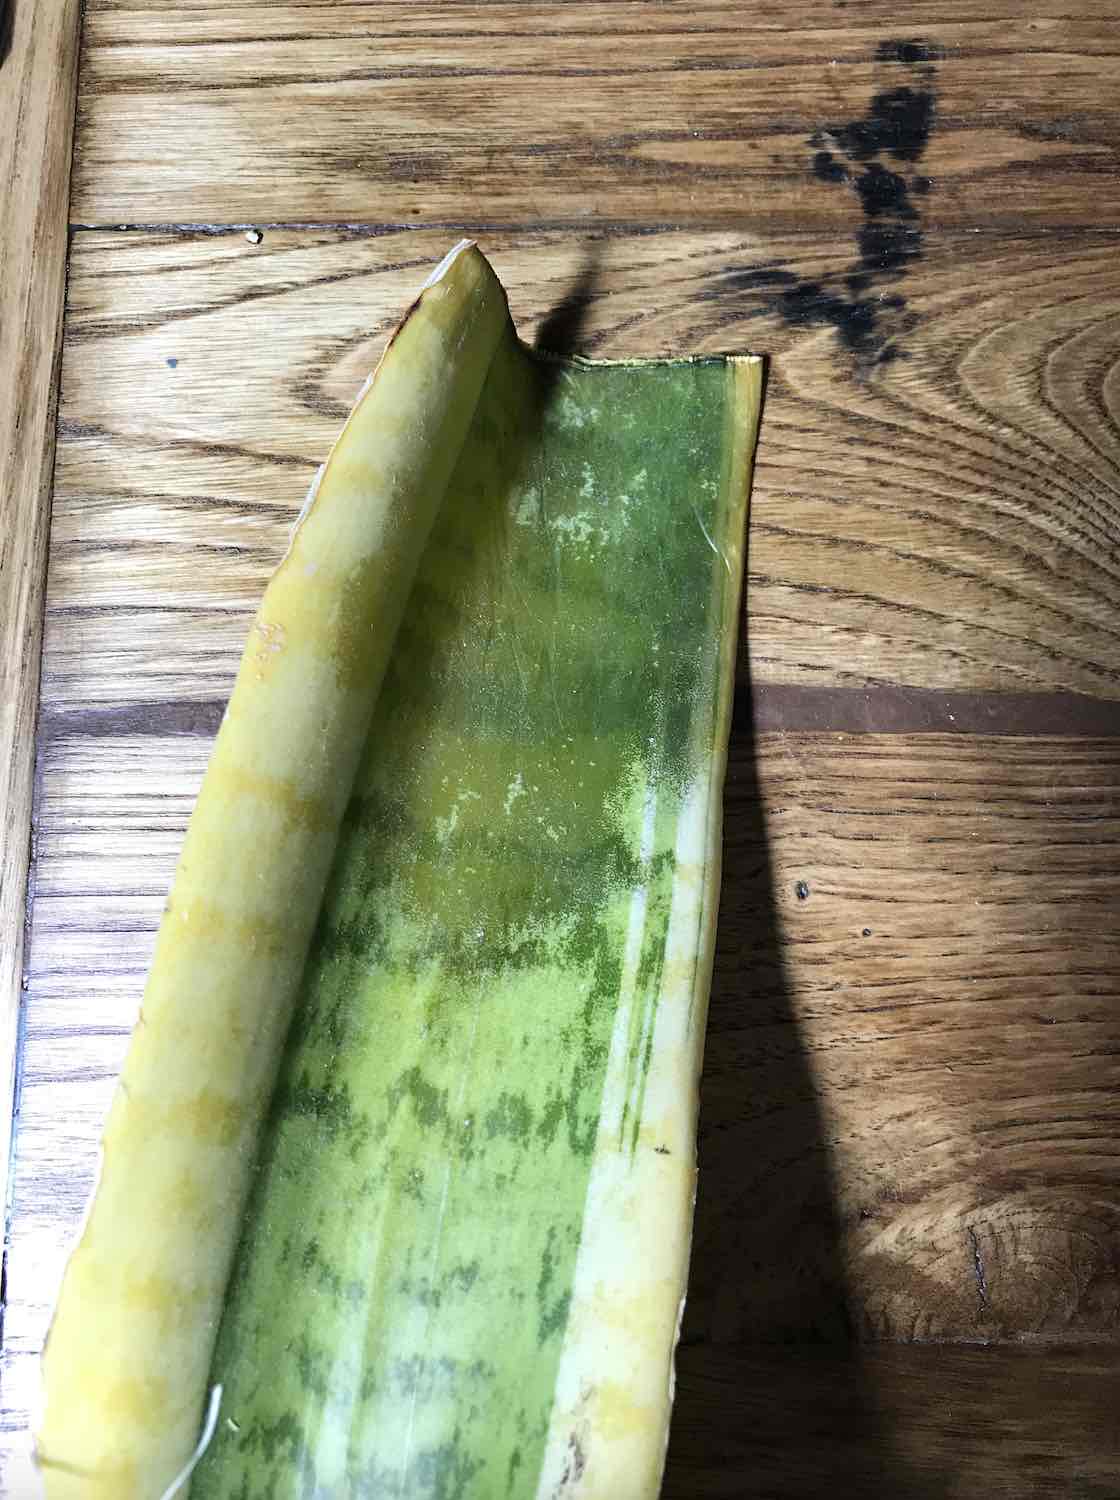
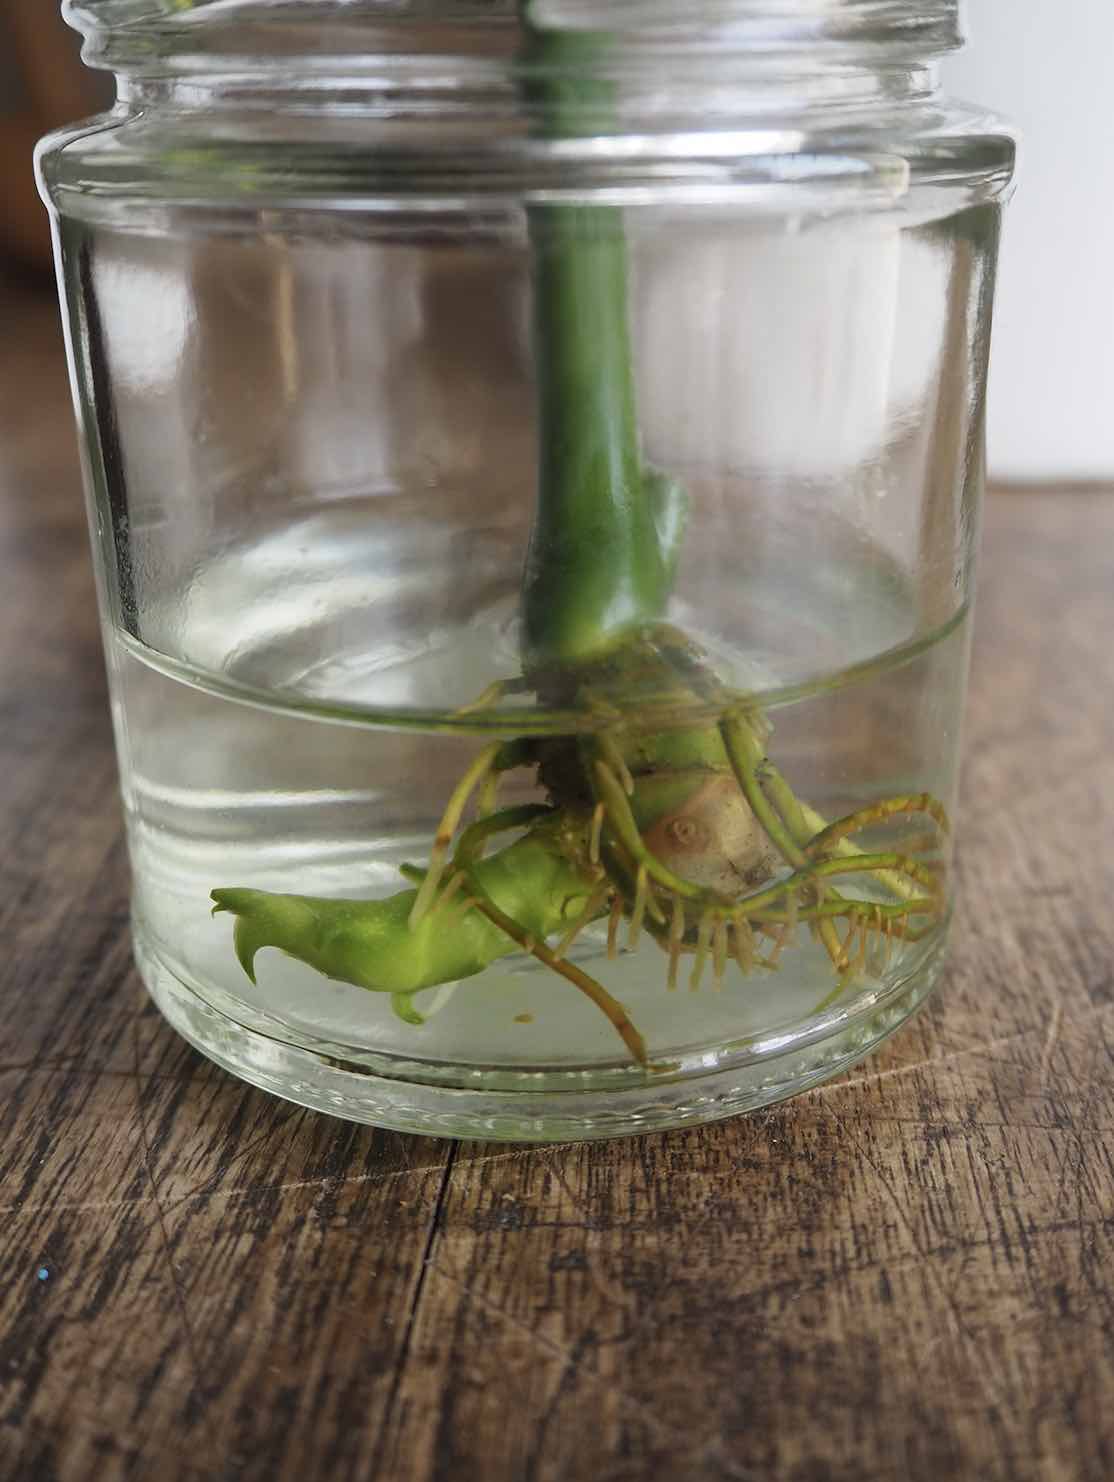
Leaf cuttings can be a slower process than propagation by division, though there can be cases where this option is more appropriate. An example here is chopping a leaf that has some damage or started to rot at the base, which you still might be able to save by taking a cutting. It’s worth saying that it’s always best to take cuttings from a healthy plant, but it’s not out of the question to successfully root a leaf if you catch it in time — just cut a few inches above the damaged area. This winter, I had two leaves that got damaged + I cut both of them + left them to callus (more on this in a minute) — one sealed over fine + is now in water, but the other was too damaged to save + as you can see in the photo below right, got soggy + was unsuccessful. Not all cuttings will propagate successfully so try not to take it personally if it doesn’t work out at first!
Before you the snips out, make sure you sterilise the blade well because the succulent nature of snake plant leaves can be particularly prone to bacterial infections in this process. Jagged cuts with a blunt scissors can lead to soggy cuttings too — a sharp, clean cut is always best.

1. Remember which way is up!
Once you’ve cut your snake plant leaf, you can either leave it as it is + choose to root the end (keeping the length the same), but you can also cut the leaf into multiple pieces if you want to increase your chances of success. More often than not, I will keep the leaf whole + root the bottom.
If you decide to take multiple cuttings, the most important thing to remember is which way is up on the cutting! If you plant the cuttings upside down, the leaf will not root. The photo above shows how this process looks (as spotted at Wentworth Gardens). Interestingly, this cylindrica form of dracaena/sansevieria actually also reverts to a flatter-leaved shape when propagated in this way. But experiment for experiments’ sake if that’s your thing.
2. Cut a ‘V’ shape to increase the surface area for roots to grow
It’s no surprise that the more roots you have, the more likely the cutting will succeed in growing into a strong + healthy plant! When you take leaf cuttings, an inverted ‘V’ shape allows for a greater surface area for roots to grow + it’s where new leaves will form too . Another tip is that this cutting technique can help you to identify the bottom of the stem if you are making multiple propagations from one stem.
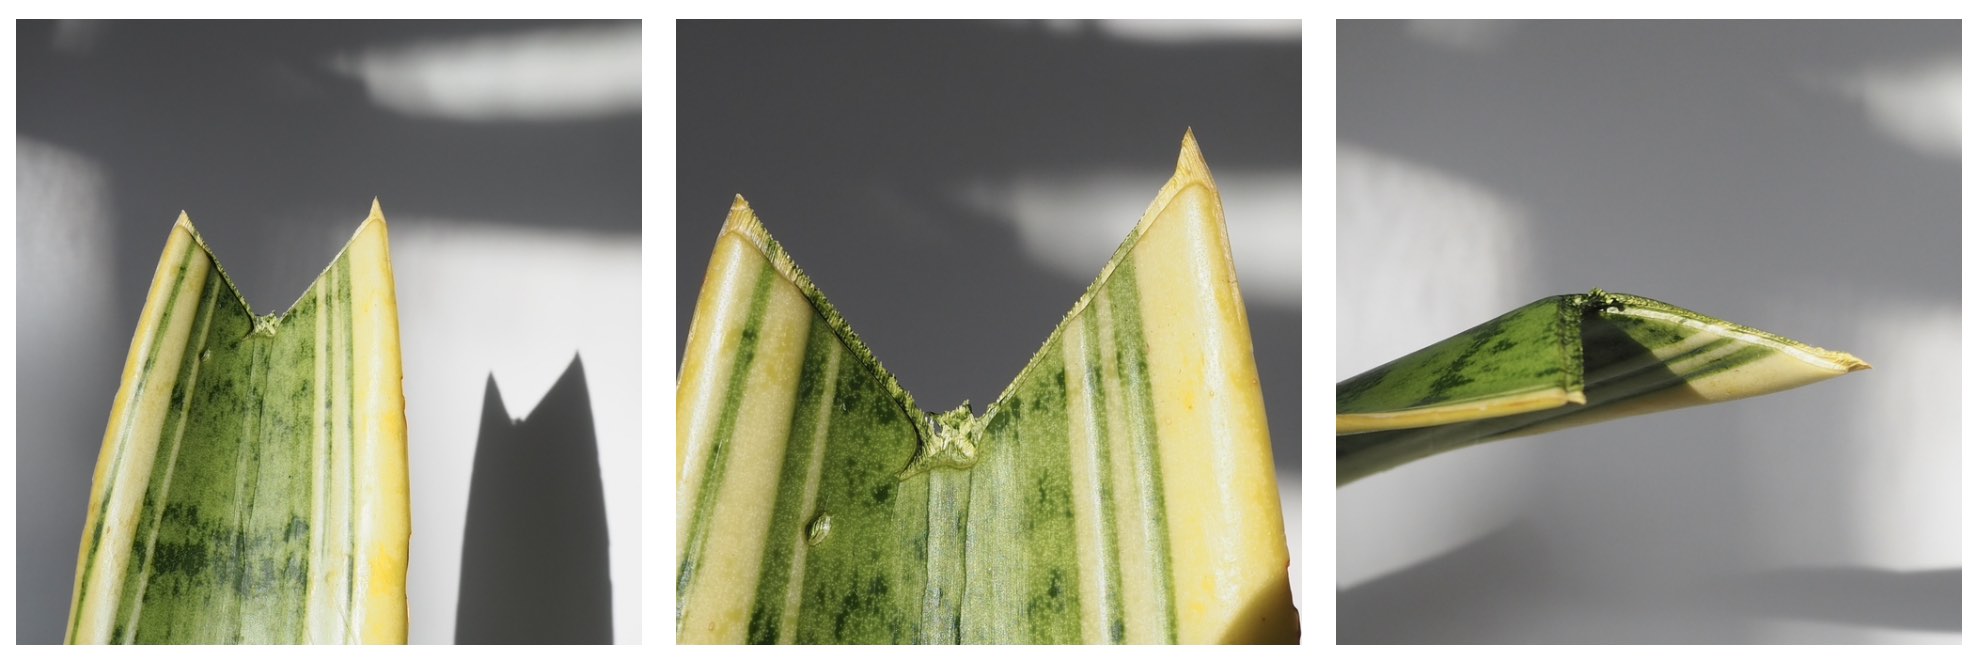
3. Callus your cuttings
I’ve talked about the importance of callusing your cuttings within a recent post, so I will link it here. In short, allowing the cut to ‘seal over’ is a big help in preventing your cuttings going soggy or rotting because it creates a thin ‘barrier’ of protective tissue between the open cut + the water/soil/etc. In the photos above, you can see how the cut looks when it has hardened + is ready for propagation. For my snake plant leaves, I’ll wait around 5-7 days — a little longer in winter if the leaves are particularly thick.
Propagation options:
As I’ve said in my other propagation posts, what media you choose is personal preference: whether you like to propagate your plants in water or soil, perlite or sphagnum moss is up to you + there are often a number of factors that will influence this — the plant in question, your lifestyle + household conditions too.
Water propagation.
I’d say water propagation is my most used propagation method in general because I enjoy the process of watching roots grow! For snake plants, so long as your cuttings are callused, these leaves can do really well in water. I pop them in a glass with a few inches of water + almost forget about them! Old jars are a good size for this as the height supports the leaf too. I’ve got some old brown bottles which have a narrower top (but wide enough for the cutting to be removed easily) which always works well. I think this shape of glass helps to keep the humidity up around the base of the cutting which can help speed the process up a bit.
Change the water every week or so if you remember + if you notice any algae build up around the water level, clean the cuttings + the glass well before re-using. To prevent this from happening, keep the cuttings in a well-lit position but out of direct light when they are rooting. In warm conditions, check the water level for evaporation every few days + top up or replace with fresh water.
These cuttings were all propagated in water:
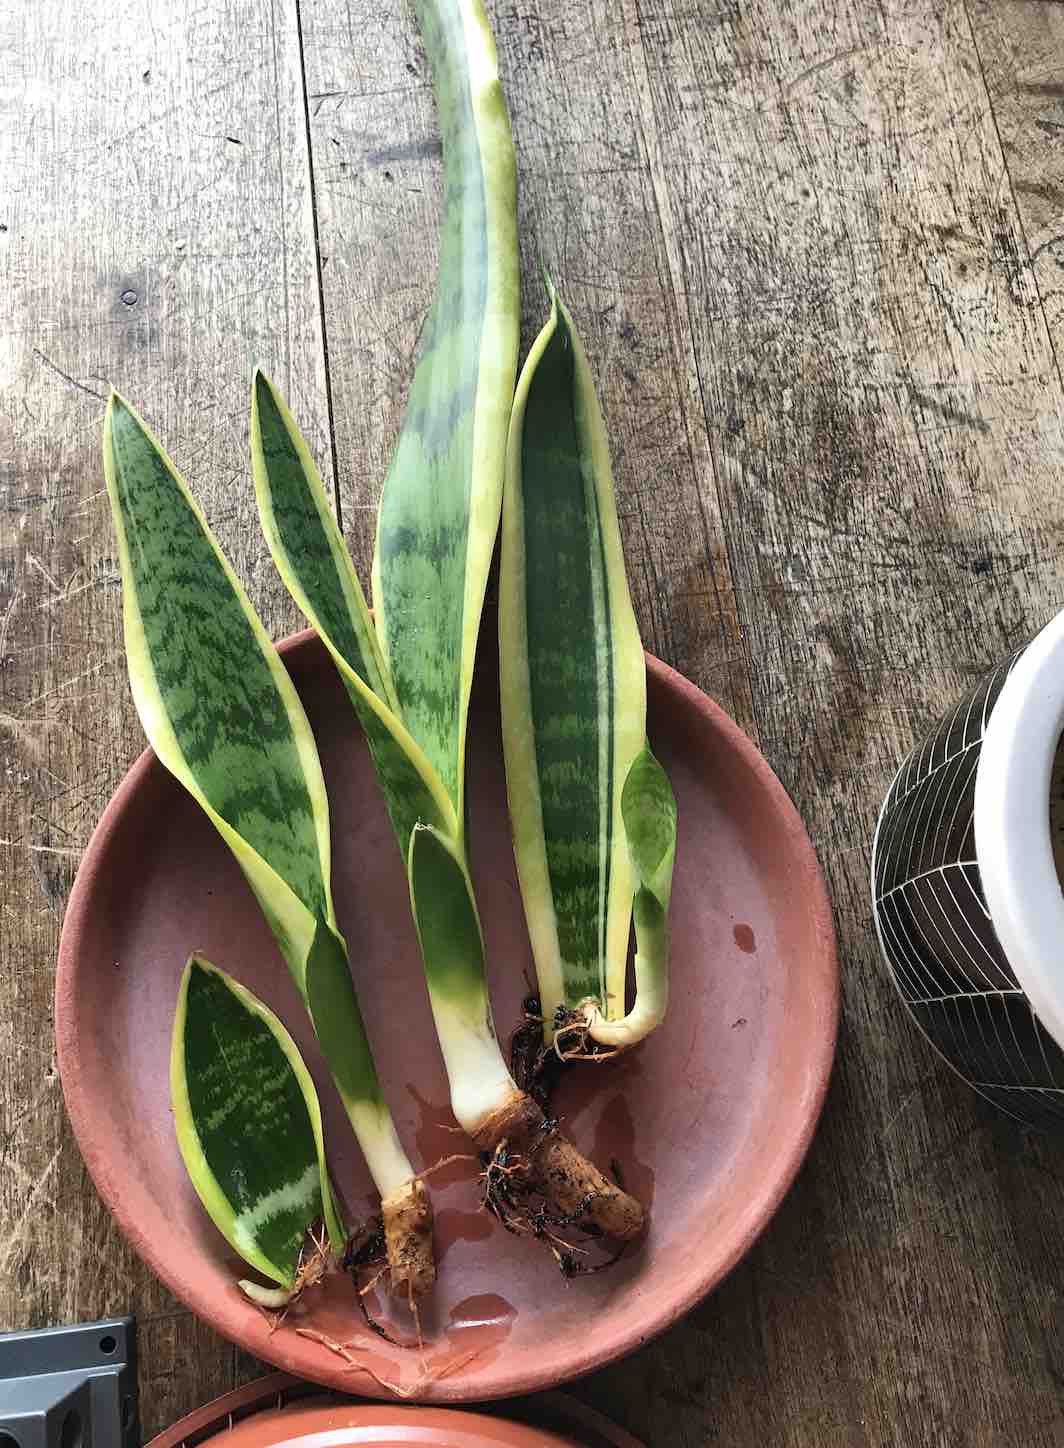

I decided to pot these dracaena/sansevieria trifasciata laurentii leaves up together (to take up less room!) + the photos below show the progress after 2 months. Notice how the newest leaf to grow is not variegated because it was propagated by a leaf cutting + not division:

Below left shows this clearly + below right is the newest cutting I will propagate + add into this pot when rooted:
Cuttings will be ready for potting up when the roots are 1-2inches long. This can take a number of months so you’ll need to be patient! When planting, choose a smallish pot + keep well watered until the cutting takes to the potting mix. You can tell this by giving the leaf a gentle wiggle + it will feel firm + stable in the pot. Cuttings propagated in this way can take a while to adapt because the plant senses a difference in pH when moving to potting mix from water.

Soil propagation.
Soil propagation is the other most common method + whilst you won’t be able to watch the roots growing like you can in water, this way has the advantage of the cuttings not needing to transition to potting mix once rooted. Water propagated stems can sometimes take time to adjust to potting mix, whereas soil propagations are already adapted + used to this as a growing environment. Cuttings into soil can often be a little slower to root + it can sometimes be tricky to get the watering correct with this method, but if you are consistent with their care, it’s a great option.
The soil mix I use for rooting my snake plants is a cacti + succulent compost with some additional pumice/perlite/horticultural grit — whatever I have available at the time.
In terms of humidity in dracaena propagating, you might want to use a humidity dome/propagator/clear plastic bag with holes in to increase the humidity around your cuttings. Signs that the cutting could use a little help are when it starts to wrinkle up — this means that the cutting needs moisture but as it has no roots yet, it needs some extra help. If you have smaller snake plant cuttings, this can also help to speed this process up + increase your chances of success.


Alternative substrates for propagation.
Snake plant cuttings can also root successfully in a number of substrates. I’ve experimented with a semi-hydroponic LECA set up in the plant shop + this worked well with snake plant stems as it gave them stability in their container + consistent moisture which aided steady root growth. In case you hadn’t heard of this growing medium before, LECA stands for ‘lightweight expanded clay aggregate’. It also looked interesting in a glass vessel — there were quite a few customers asking about what I was up to! I’d like to try more growing + propagation experiments with LECA this year.
Sphagnum moss + straight perlite are alternative possibilities too, but I haven’t tried either with snake plant cuttings specifically (but I have propagated succulent cuttings in perlite + a variety of cuttings in sphag).
Conclusion.
To conclude, I wanted to mention seed propagation briefly because it is perhaps the least common method for the average houseplant gardener. If your climate enables you to grow your snake plants outside, you might be lucky enough to catch your plant flowering! It’s not impossible to get blooms indoors + occasionally, the combination of a strong enough intensity of light plus a slightly stressed/under-watered/pot-bound plant can provoke your indoor plant to throw out an inflorescence or two. You can let these flowers go to seed + this is what can be planted. These seeds (which are similar in size to sweet pea seeds FYI) are best planted when fresh + the outer ‘skin’ needs to be removed before placing in a suitable container. As with all seed sowing, if you have a propagator a heat mat or a warm position out of direct light, this can create favourable conditions to help increase the chance of germination.
I’d say that growing snake plants from seed adds a whole other dimension to their reputation as relatively slow growing houseplants, but if it’s an aspect that interests you, give it a go! I am quite intrigued by this process + I have enjoyed the process of growing cacti from seed, but I’d say I’m more of a seed-grower with my outdoor plants + a divide + propagate grower with my houseplants.
As this post has showed, snake plant propagation can take a variety of forms + I hope this post has helped to show how to choose a method that suits you + the plant in question. I have more progress photos of snake plant propagation here if you want to see more. I’ve had quite a few questions about this specific topic so I hope you enjoyed + thanks very much to those that asked me to write this post. I also share my current propagation experiments over on my Instagram if you want to check it out. Happy propagating!
You’ll find the pins for this post to share or save to refer back to later:

Leave a Reply