
Some time at the start of the year, I decided to take my Monstera adansonii out of its pot + pull it apart. I had been growing it around a U-shaped bamboo stake for nearly a year but it was getting to that point where the longest stems were seriously long + looking a little straggly after a winter in pretty low-light conditions. I thought about cutting it back, but that would render the cane support pointless for quite some time. So I decided to re-work my plant into a few smaller ones + start over.
In this blogpost, I’ll share the propagation process with you, plus an update of how things are looking after a few months. Whenever I post a photo of monstera adansonii propagation over on instagram I get a lot of questions — so if you are thinking about doing something similar I hope this post will help. If you are looking for a Monstera adansonii care guide, I’ll link that here.
I am a firm believer in getting your houseplants to work for you — if something isn’t looking right, chop it, change it, propagate it or pass it on. For my adansonii, I had a hankering to allow it to trail + when I started to separate the stems, I divided them up to make a couple of plants + some cuttings too. Here’s how it looked beforehand…
1. Taking the plant apart
Let’s rewind a few months to one winter evening where I was tidying up one of the plant corners in the bedroom. My Monstera was looking in need of some help so I took the planter downstairs + popped it out of it’s pot + onto the table, aka potting bench. If you have one of these plants too, you’ll be aware that they are often made up of cuttings so there are usually a couple of plants in one pot. I’d done this around 2 years ago so knew there were a few I could divide up to spread across a number of smaller pots. I’m usually potting multiple plants up together to save space in this tiny cottage, but this time, I did the opposite.
Monstera adansonii can sometimes struggle a bit in winter as their foliage is thin + papery so are one of the plants that I know to check in with more frequently than some of my more sturdy houseplants. I thought that by separating the plants up + giving each division room to grow, I would have a better chance of keeping the individual pots healthy as I could hang them on a pole in my macrame hangers in a position that suited them well in terms of light. Larger pots of climbing plants can look great, but I didn’t really have anywhere suitable for this here + with preparing to move on my mind, I thought this would be the better option.
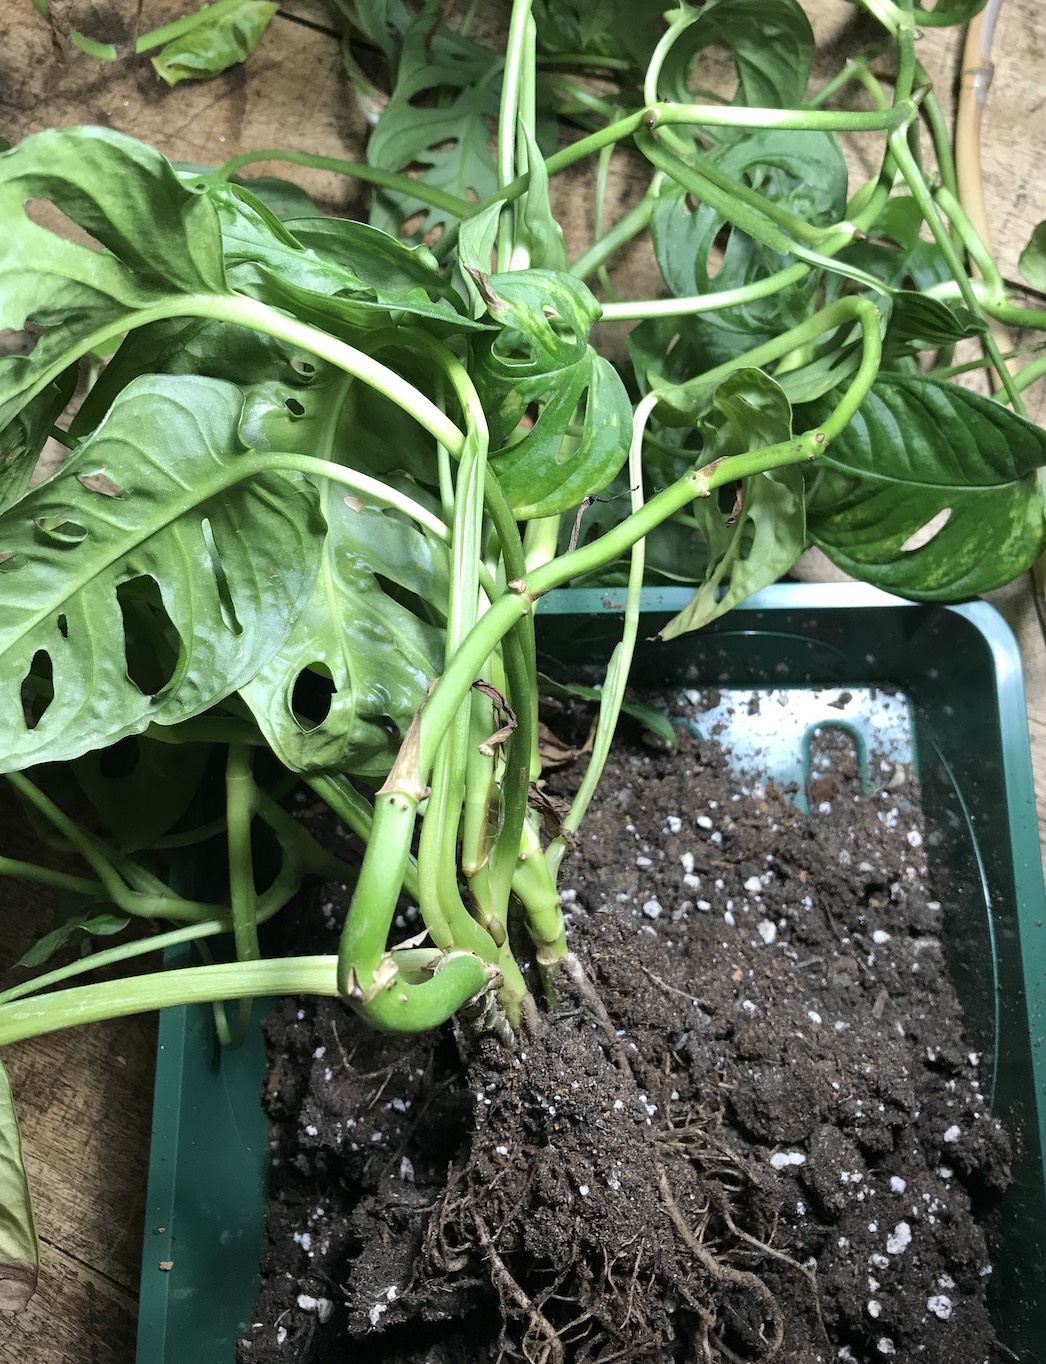

With vining plants such as these, over time, longer stems can often start producing smaller leaves if the whole stem isn’t getting enough moisture/light + humidity. This is quite normal when grown in regular conditions as a houseplant. When grown in their natural habitat or by using a moss pole or similar to support your plant, the stems can produce aerial roots that grip onto surfaces for support + moisture, which helps to keep the foliage larger in size with lots of fenestrations (holes).
2. Making up new pots
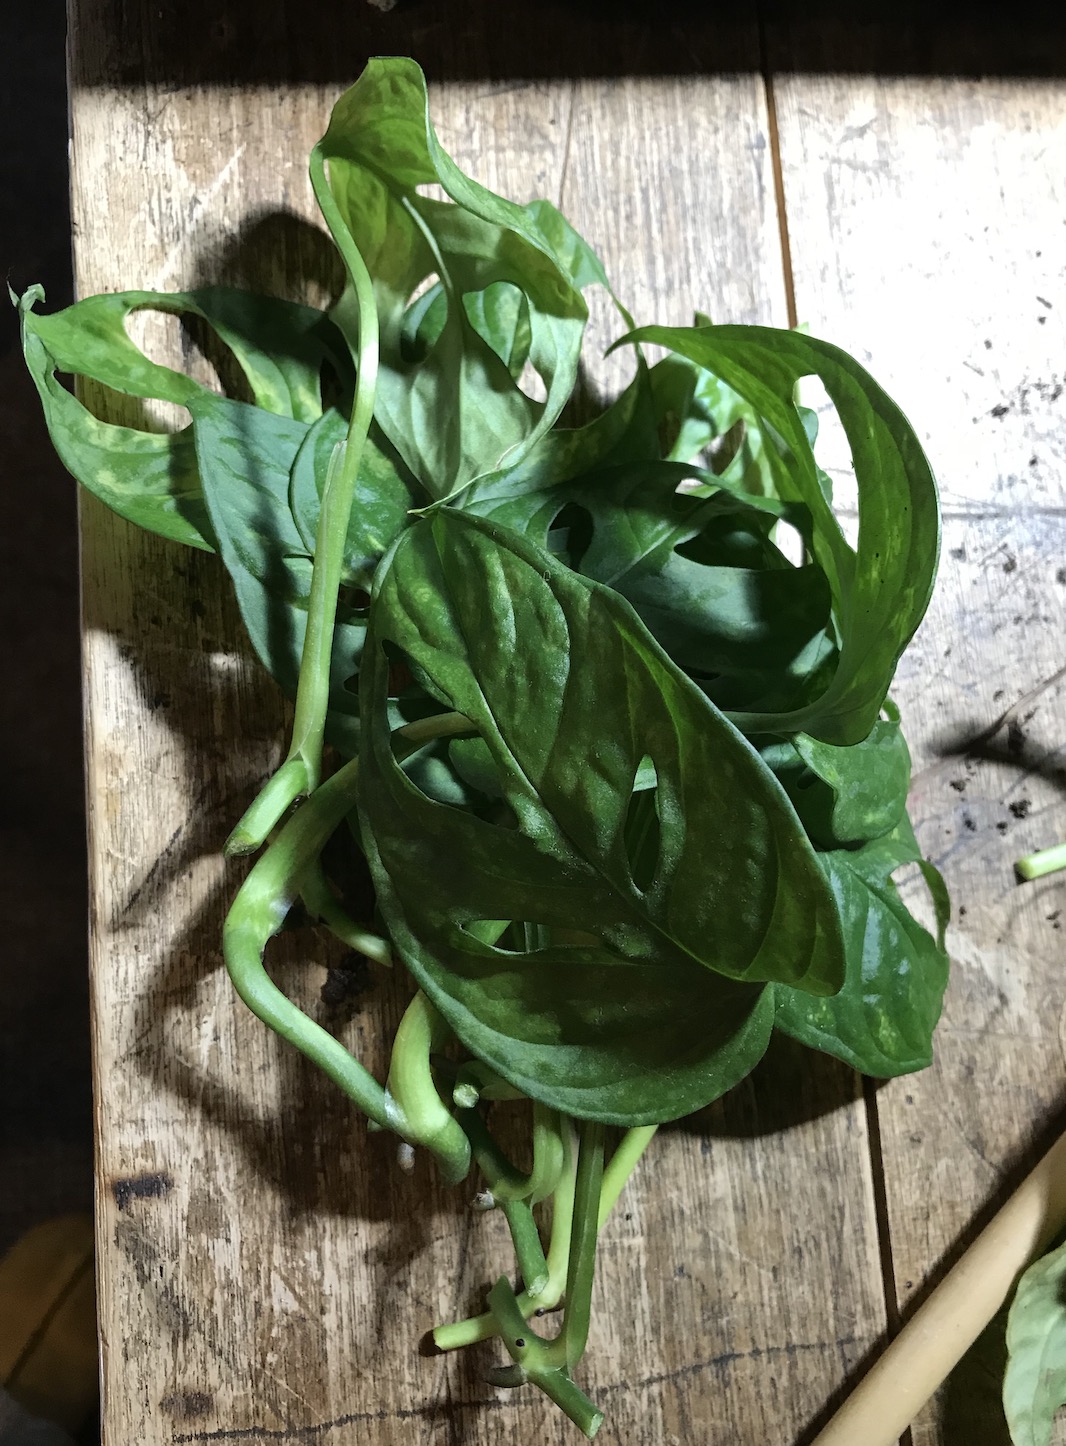
I ended up making four smaller Monstera plants — 2 of which I hung around 1-2metres from my south-east facing window, sheltered by a net. The other I put in my bathroom on the windowsill + the smallest pot ended up on my work desk. With the very long stems, I decided to chop + propagate these to make some new little plants. I absolutely love how they look like this— I think you can really appreciate the foliage when they are more sparsely planted as just a few leaves in a little pot, plus they are great for smaller spaces!
Here are two of the plants below after potting up:


I have hung these together as I like how they look as a pair — you’ll see that the one on the right still has a long-ish stem which I might prune in a while, but for now I’ve left it as is. Below is a close up of the plant above left — there’s an interesting form to this one + the light creamy planter creates a lovely background + really accentuates the fenestrations of the green leaves I think.

3. Propagation
Aside from the divisions I made to create the pots you see above, I will now go into the other type of propagation method — that is, by taking cuttings to root. This is often a slower process with Monstera adansonii cuttings, particularly in winter when I started! Here are some of the cuttings I took from the long stems of the main plant when I was potting them up above.

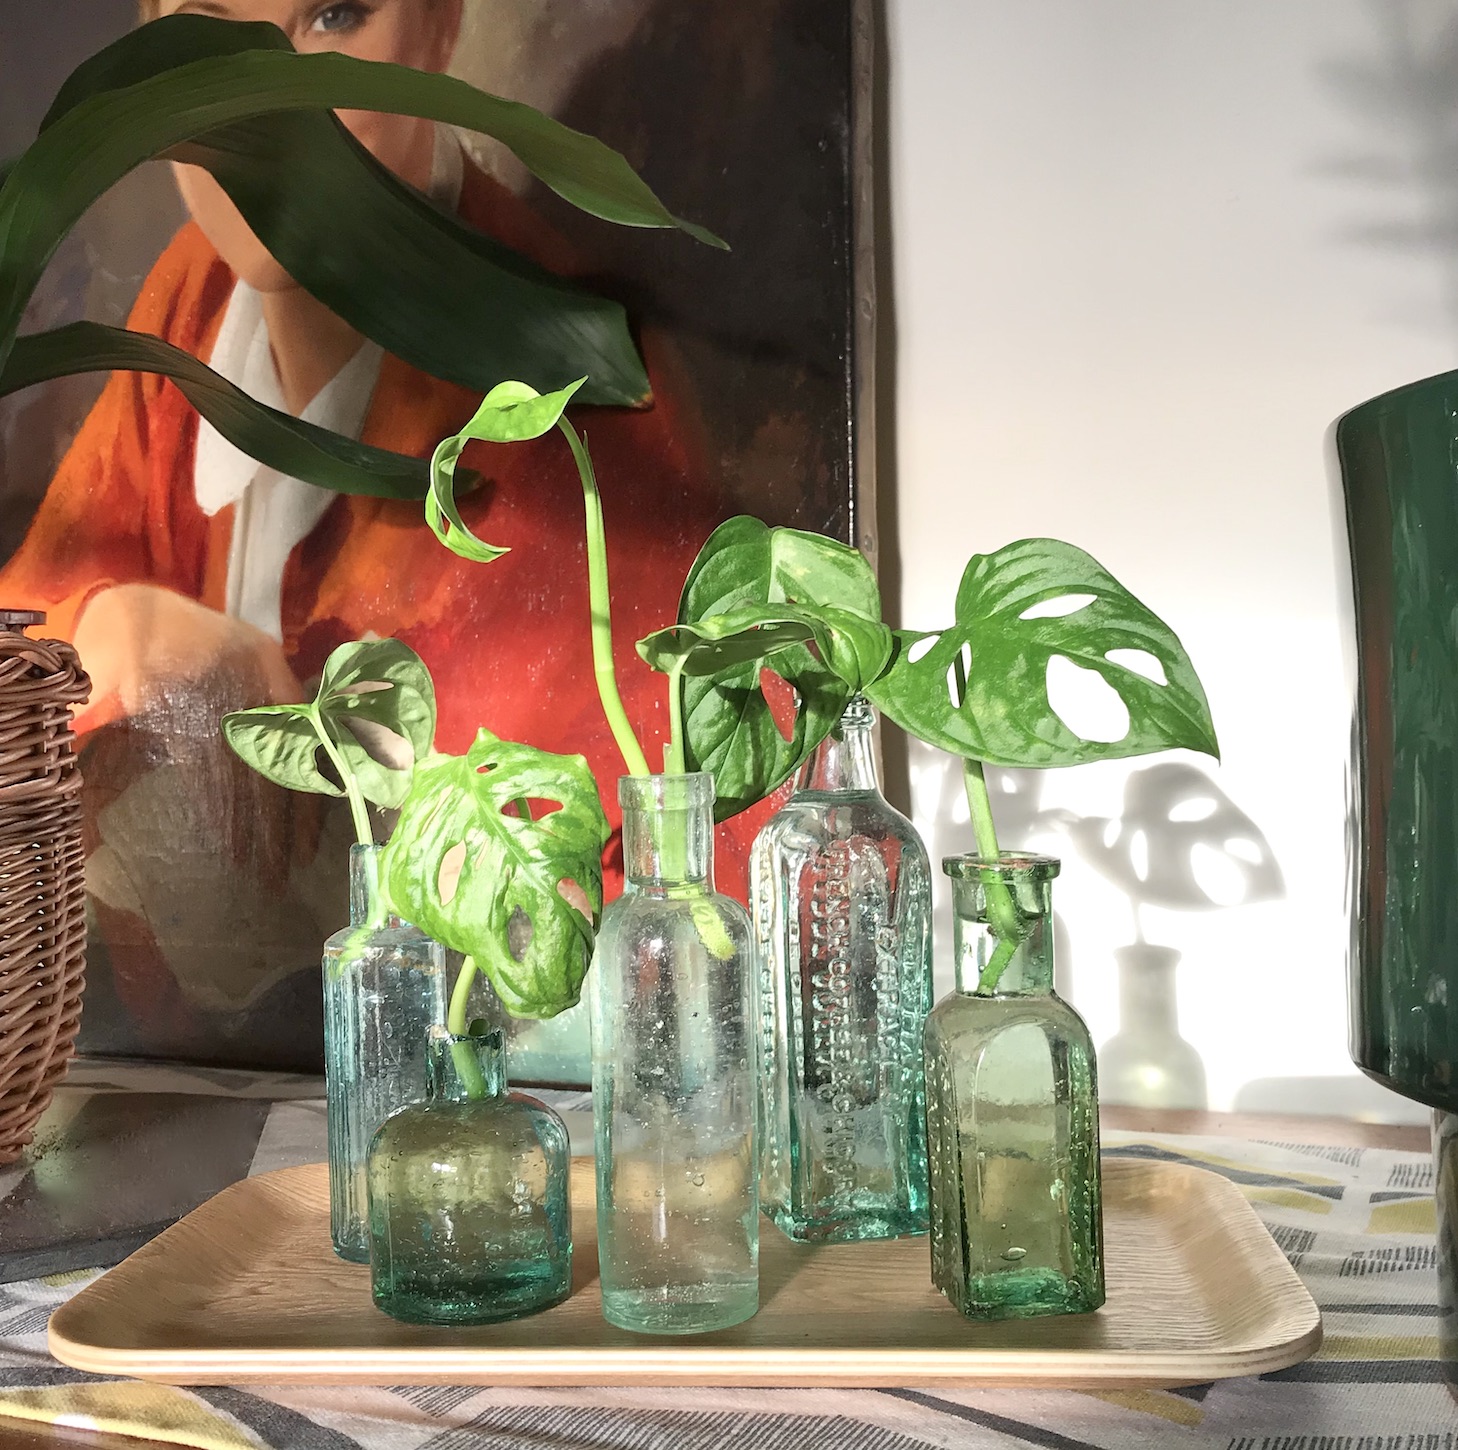
I decided to propagate some of the stems in water + a few other in sphagnum moss within a terracotta planter. I thought I had a photo of this, but I can’t find it at the time of writing! It’s pretty straightforward though — soak a terracotta planter in water for a few hours (ideally overnight) before stuffing the pot with a layer of moist sphagnum moss. I prefer to use a more shallow + wide pot for this, or I’ll also often use an old (clean) food container if the cuttings are small. Place the stems in the pot + add a layer of moss around the stems, just as you would if you were potting them up. If you like, you can also add a humidity dome around the pot as the increased humidities can create a nice environment for faster rooting. You can also root cuttings in houseplant potting mix too, by using the same method — choose what works for you + your home (more on that here).
Below you can see the stems in water. In case you wanted to see more of the vessels, I’ll link my vintage homewares for houseplants post for some inspiration of re-purposing old bottles like this! Anyway, these slimline bottles work well for individual stems like these as the narrow neck holds the cutting in place easily. I do need to keep an eye on the water levels + top up when they drop, as with all water props. It’s important to stress here that this is not a quick process so patience is required! Certainly for my cuttings, I’d just about given up hope with some of them when I noticed little roots were forming! Not all cuttings will always propagate successfully so don’t panic if that’s the case. If possible, it’s always a good idea to take a couple more stems than you need in case some fail. Once you’ve taken cuttings, leave the adansonii stems to callus over for 2-3 days to help reduce the likelihood of the cuttings rotting before roots form. After callusing + whilst waiting for cuttings to root, keep them in an ambient light position out of direct sun + if you can keep the humidity up that can help to speed up the process.
If you are a relatively new houseplant enthusiast, cutting your plants can feel very counter-intuitive! I’ve got a specific houseplant propagation blogpost here if you want to know more about the process in general.

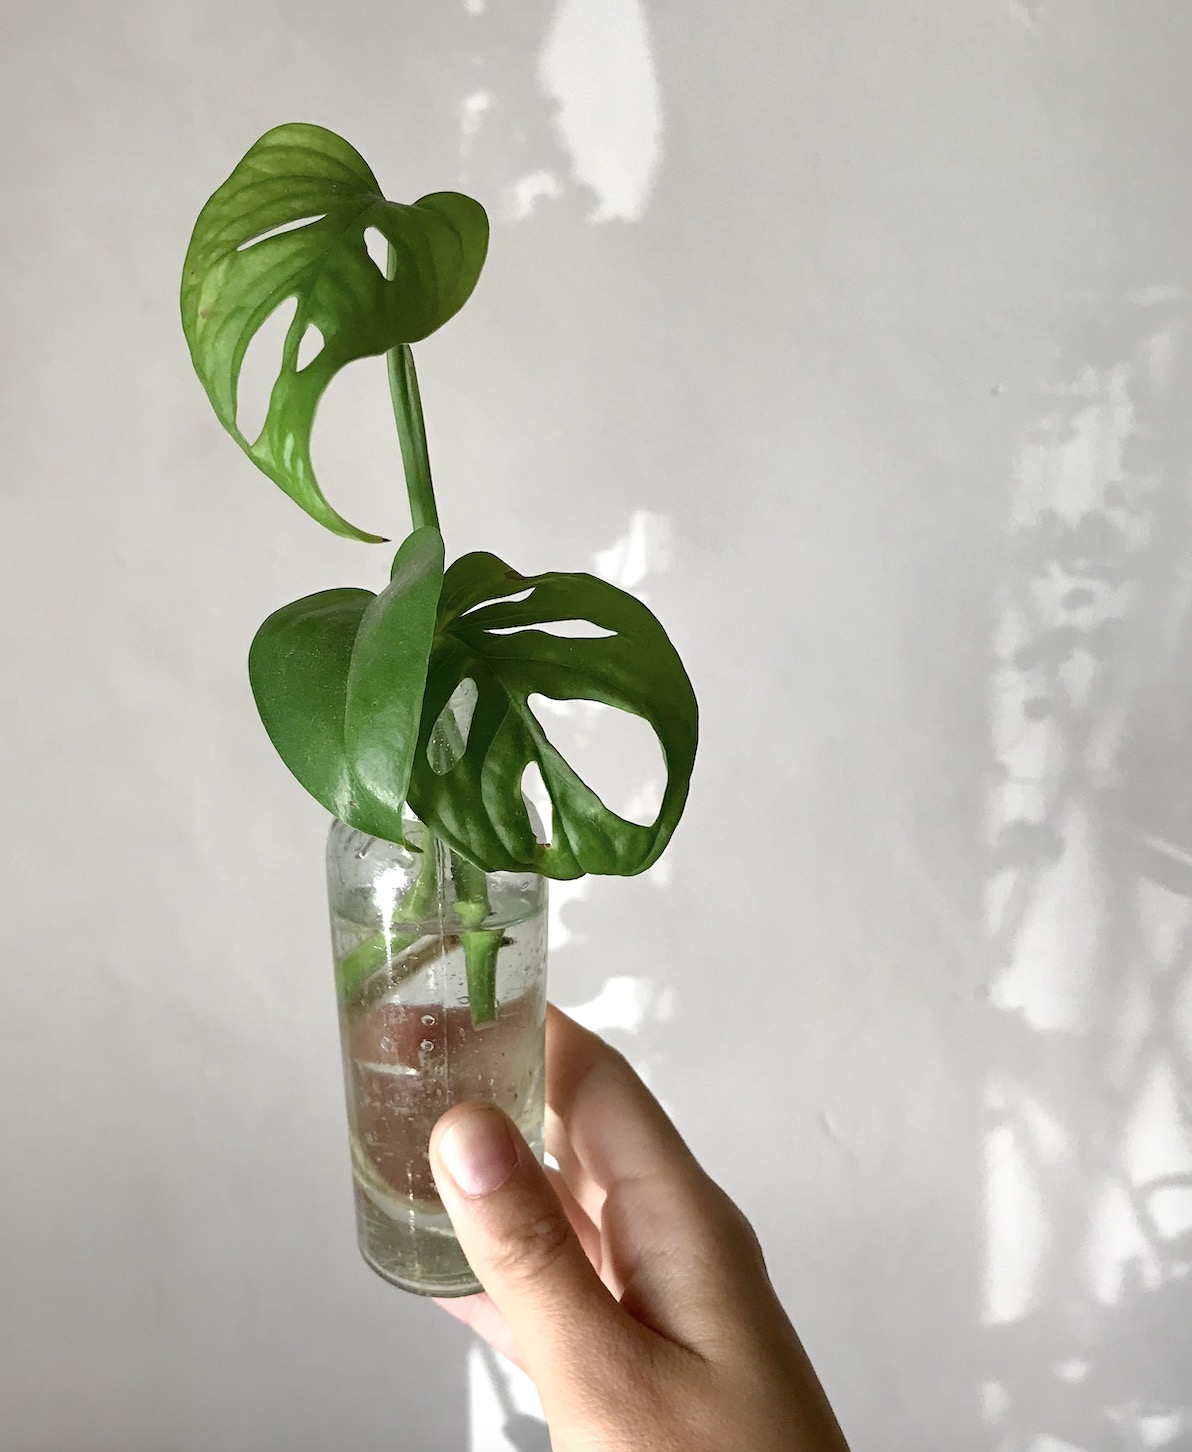
Below shows the little pot that I made up from rooting the stems (in the bottles) above — after a few weeks the cuttings had settled in nicely + a new leaf was on the way…


As I said earlier in the post, some cuttings can take their time to root, as was the case with this stem:


You’ll also notice that there’s a rogue golden pothos stem rooting in here too — to save on space, I popped this stem in with the adansonii one + as you can see, both have now rooted. I’m going to pot these up over the weekend to make a tiny plant to put in my propagator. These plants do well with the extra humidity if you have the option, but I mostly grow mine in normal household conditions. As a note, the cottage + all the other old buildings I’ve lived in are comparatively quite humid — new builds tend to be less so in general, I’ve found.


The most commonly asked questions I get about Monstera adansonii propagation concern post-cutting growth such as… What happens to plant growth when the stem gets cut? Where do I cut along the stem? Where does new growth appear? Will the stem stop producing leaves? Does cutting damage the plant?
I’ll address these points next, with photos to illustrate (of course…!)
4. New growth + updates
Hopefully the photos above show how cuttings propagate + root, so now lets turn our attention to the existing plants…
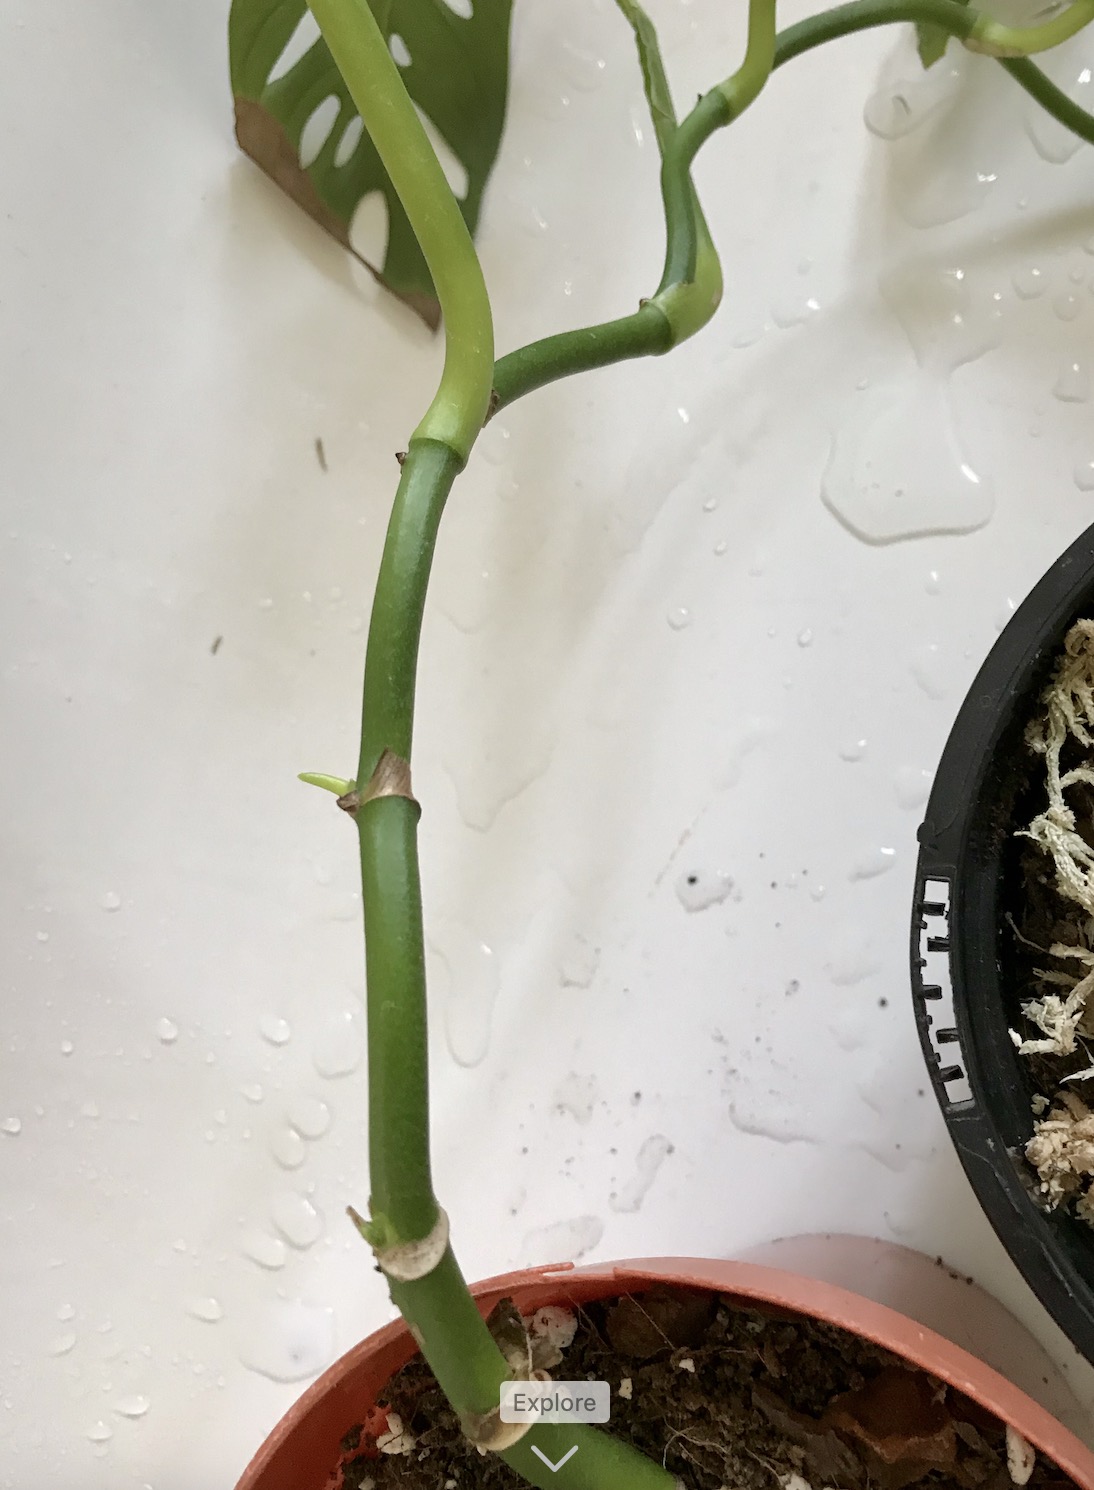
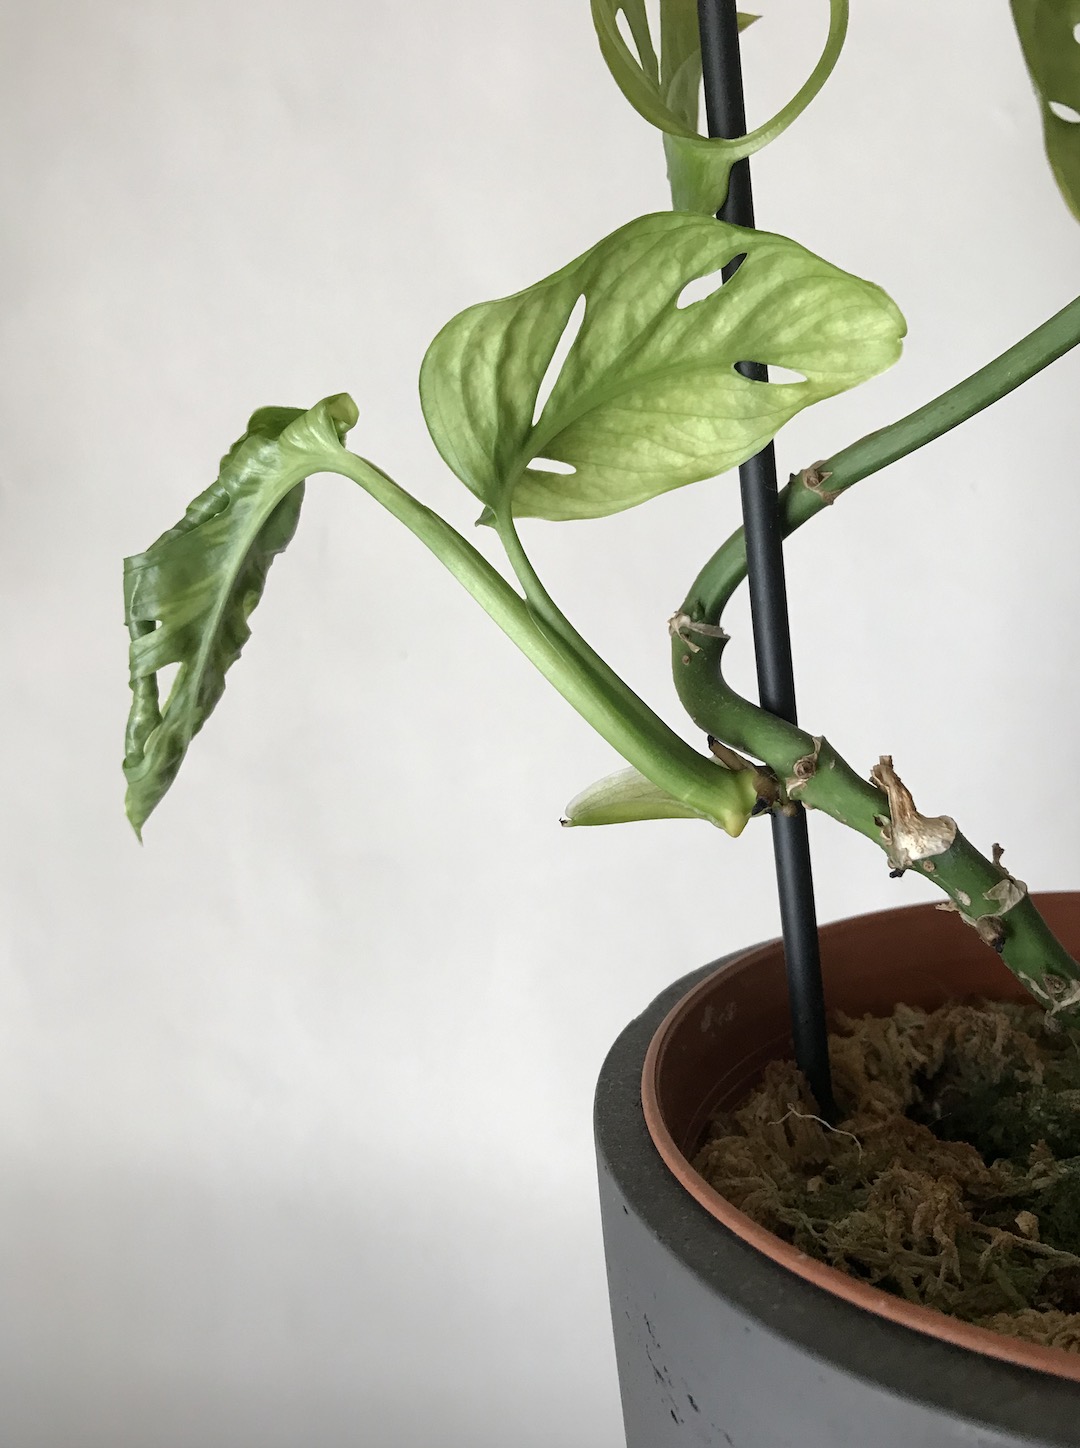
What happens to plant growth when the stem gets cut? Okay, I’ve been around my three main plants to take photos to show how things go after pruning back your Monstera adansonii — see below.
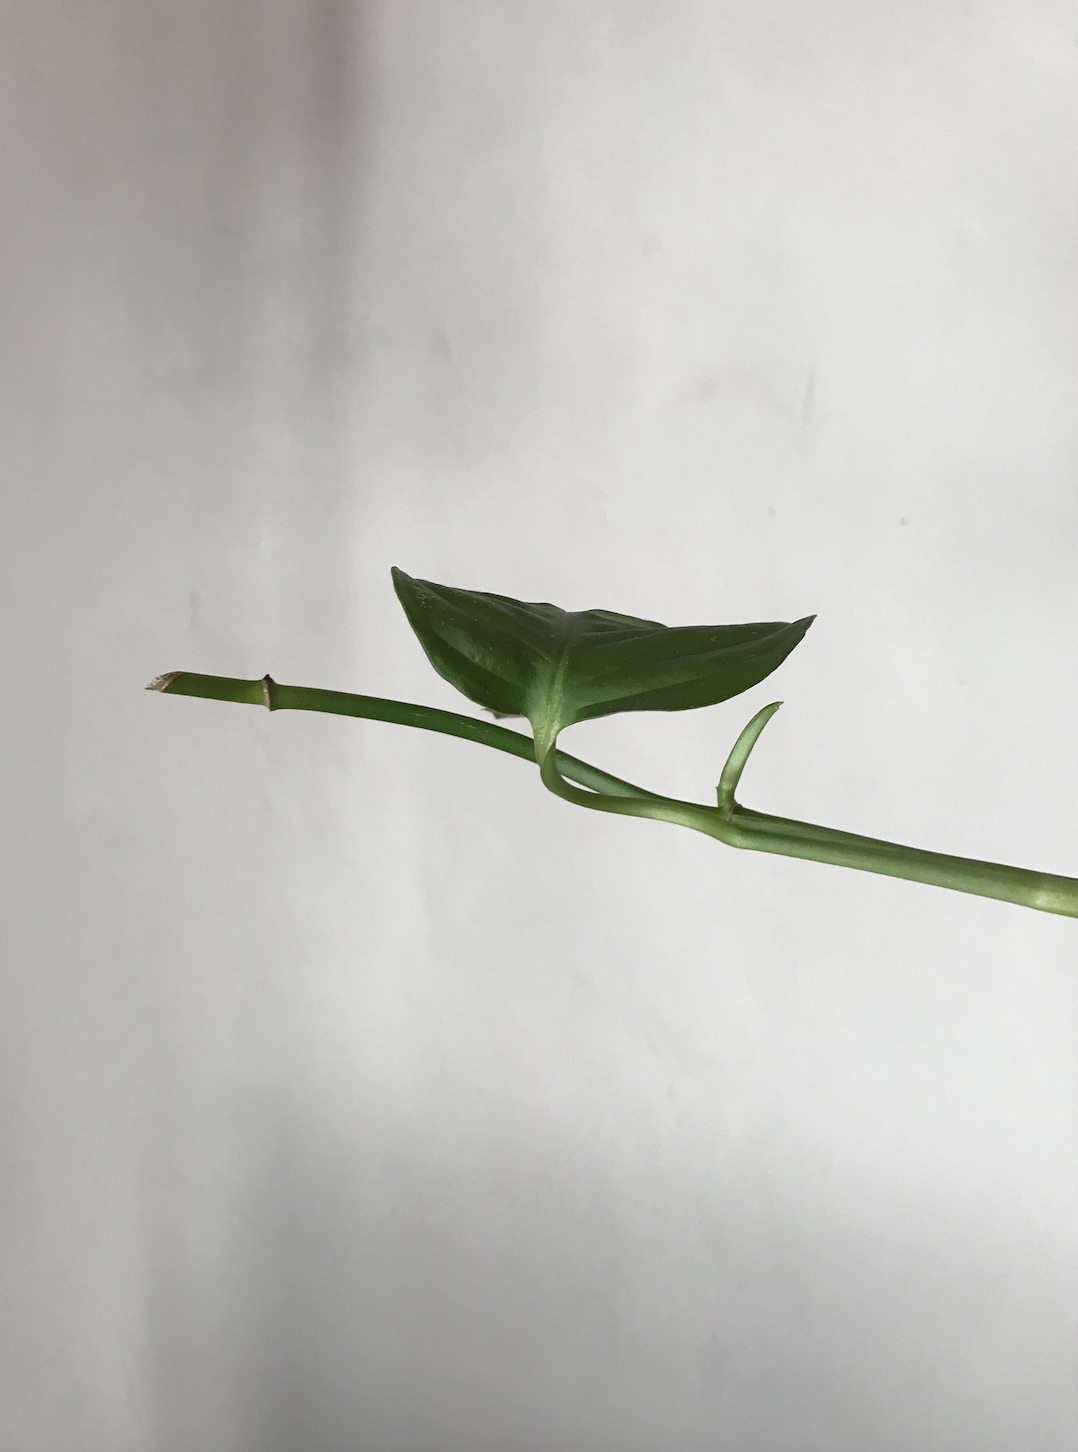
Where do I cut along the stem? See above — the cuttings I took to propagate individually all need a node or two to successfully root + over time will be able to form a completely new plant. On the existing plant, you can either leave the cut as it is, or prune it back to be near to a node, or close to the last leaf on the stem. The bit of stem between the nodes are called internodes + these can often be a few inches in length. Some people like to prune these back if they are aiming to achieve an especially full looking plant. I do a bit of both.
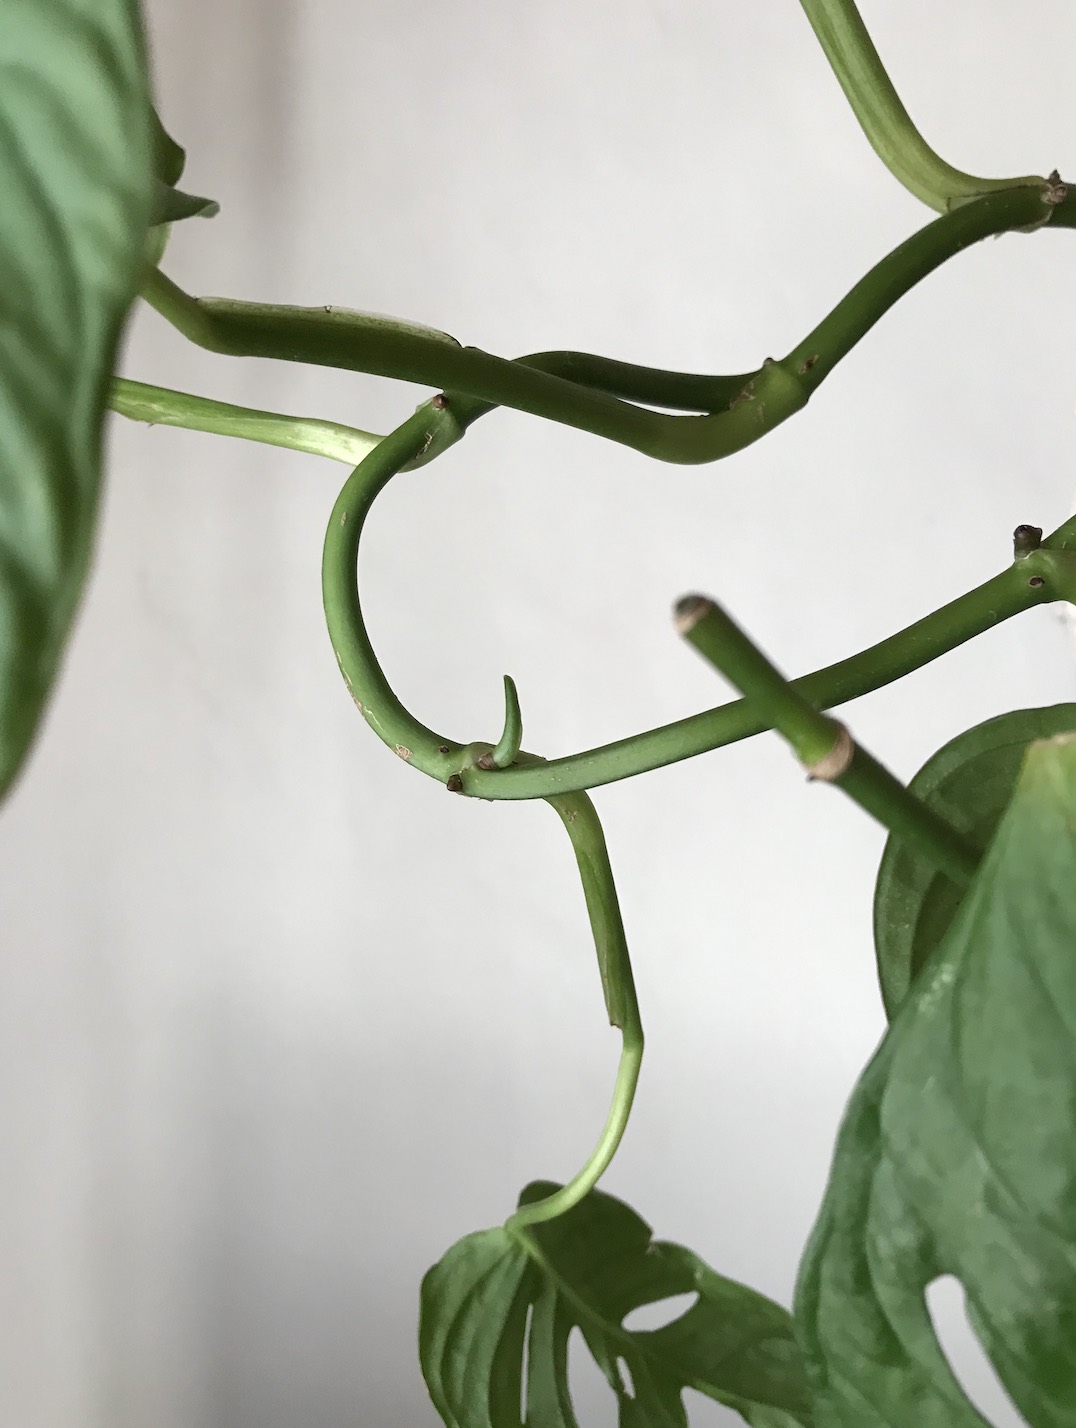
Where does new growth appear? As the annotation below shows, new growth appears around the nodes — the little nubs at multiple points along the stem.
Will the stem stop producing leaves? In short, no! But from the end point that has been pruned, growth can stop at this point. Instead, what often happens is that energy is then distributed along the other parts of that stem that are able to facilitate new growth (the nodes). That’s why some people choose to prune their plants — it can help them to maintain a fuller, more bushy appearance as these new growths — that is, the multiple new leaves appearing along the stems, can help keep the plant looking its best.
Does cutting damage the plant? This is something I get asked a lot + taking cuttings from your plant doesn’t cause it any harm. Just be sure to sterilise your snips before taking cuttings with rubbing alcohol + ensure the blades are dry. It’s also best to do this between taking cuttings from different plants to help reduce the risk of any kind of bacterial infections in the wound forming. Over time, the cutting will seal over + callus over (more on that here).
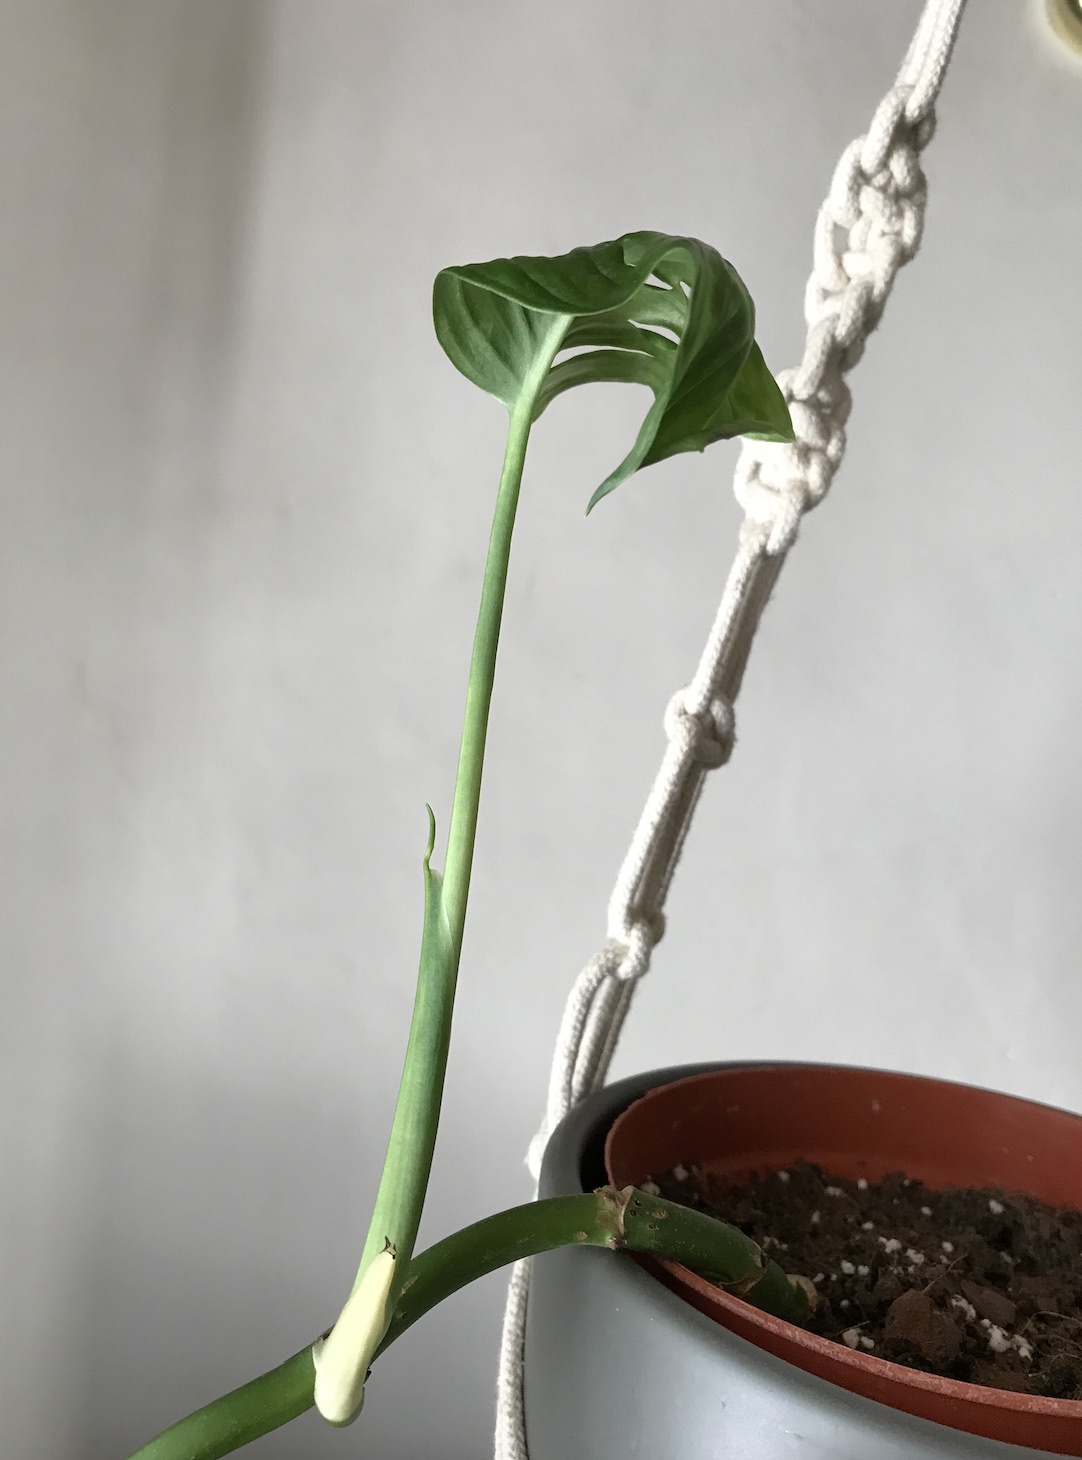
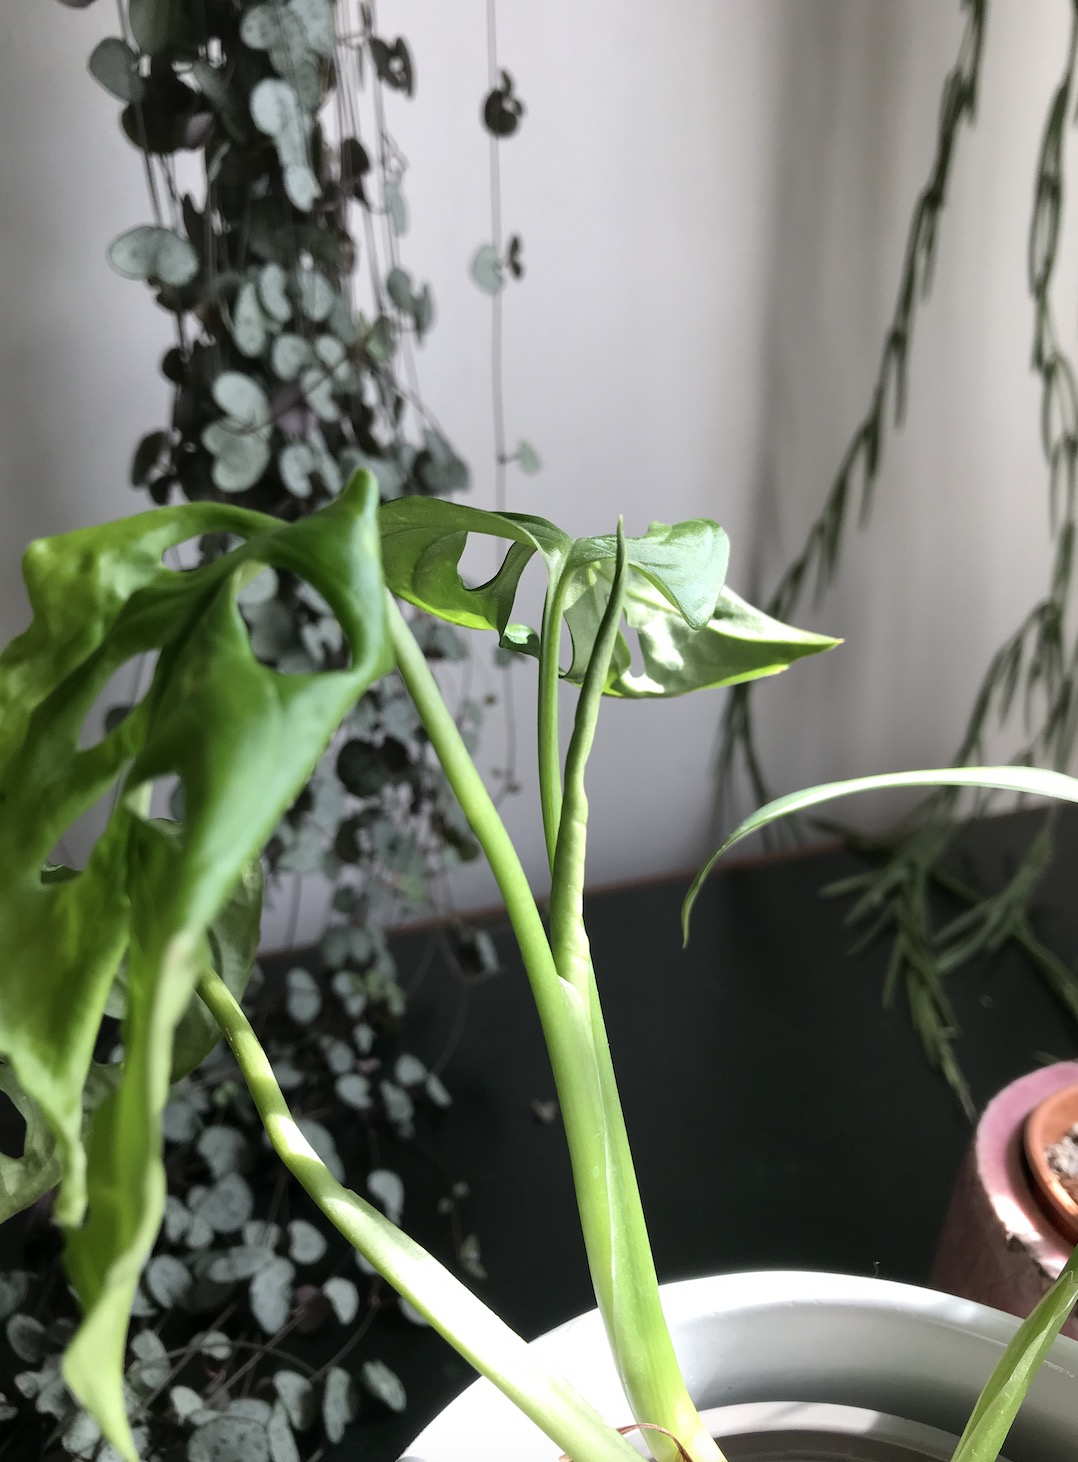
The triptych below shows a new leaf forming on the stem, over a couple of weeks. To the far left is the tiniest spike of new growth around the node just below the centre of the frame. Fast forward a while + here you can see that the first leaf has unfurled + there is the start of another beginning to appear too — the photo on the far right shows signs of a new leaf developing to the left of the new stem of the new leaf!

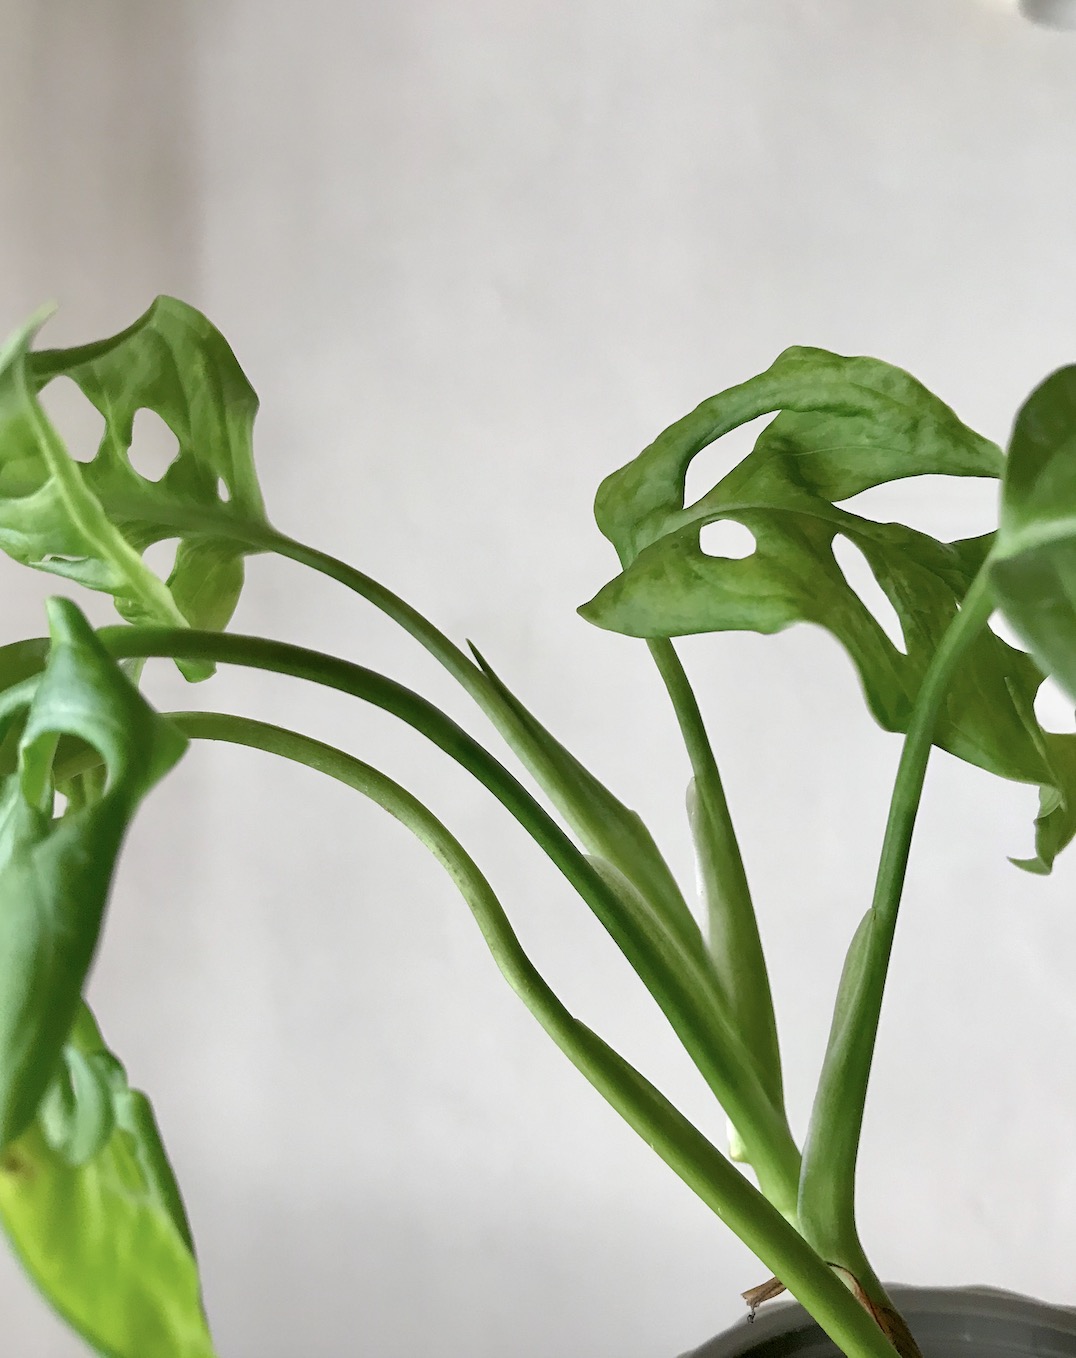
On of my other pots has been a bit slower to start producing new growth, but these are promising signs…
This pot below is the furthest along + has not only produced one new leaf, but two! This one lives in my bathroom so I think the higher humidity has certainly been a contributing factor:

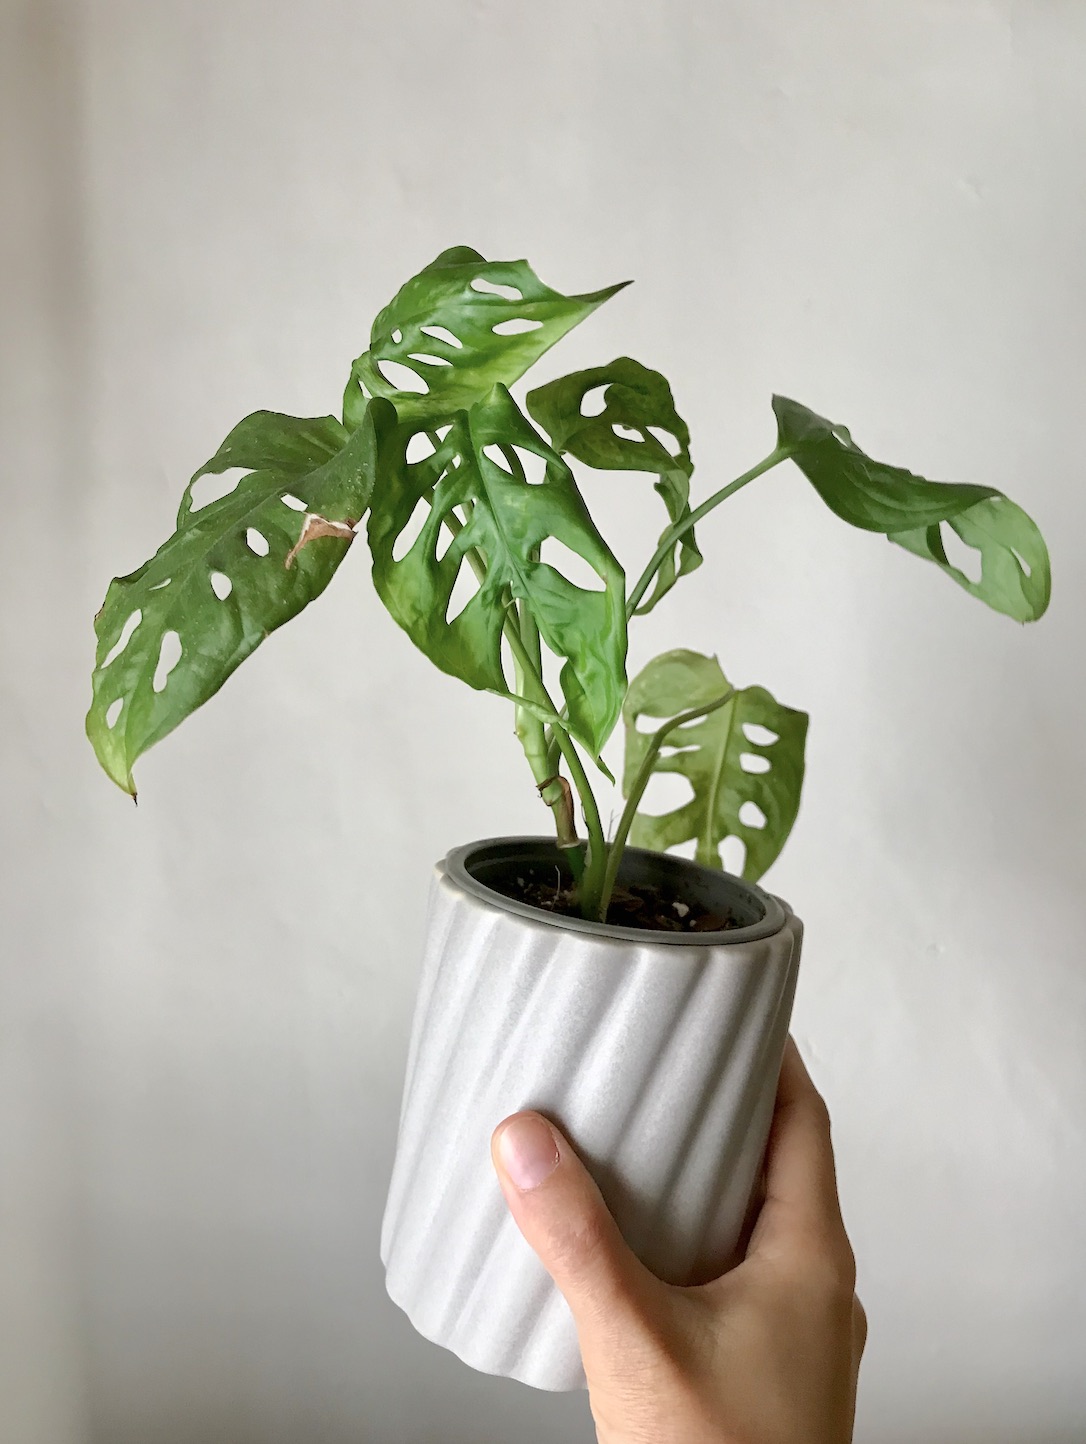
My pot of cuttings is now starting to look like a little plant now!
So there we go, I hope you enjoyed seeing the process of propagating a Monstera adansonii + thanks for your questions. I’ll pop some videos up on Pinterest of the process over the next couple of days if you want to see more. Feel free to save or to share with someone who might like to see this post —

Leave a Reply