
Today’s Renovation post marks a turning point in the project as things started to get pretty messy up in here. Until now, it felt like the Chapel was a relatively calm workshop space — a place to work on paint stripping, sanding + woodwork etc. But it was at this stage that the reality of turning this building into a home really hit — things were going to have to get worse before they could get better if we were going to save this building + protect it for the future. The task was to set about dismantling the existing insides of the building, salvaging what we could to re-use + getting prepared for the building works…
Taking apart the vestibule
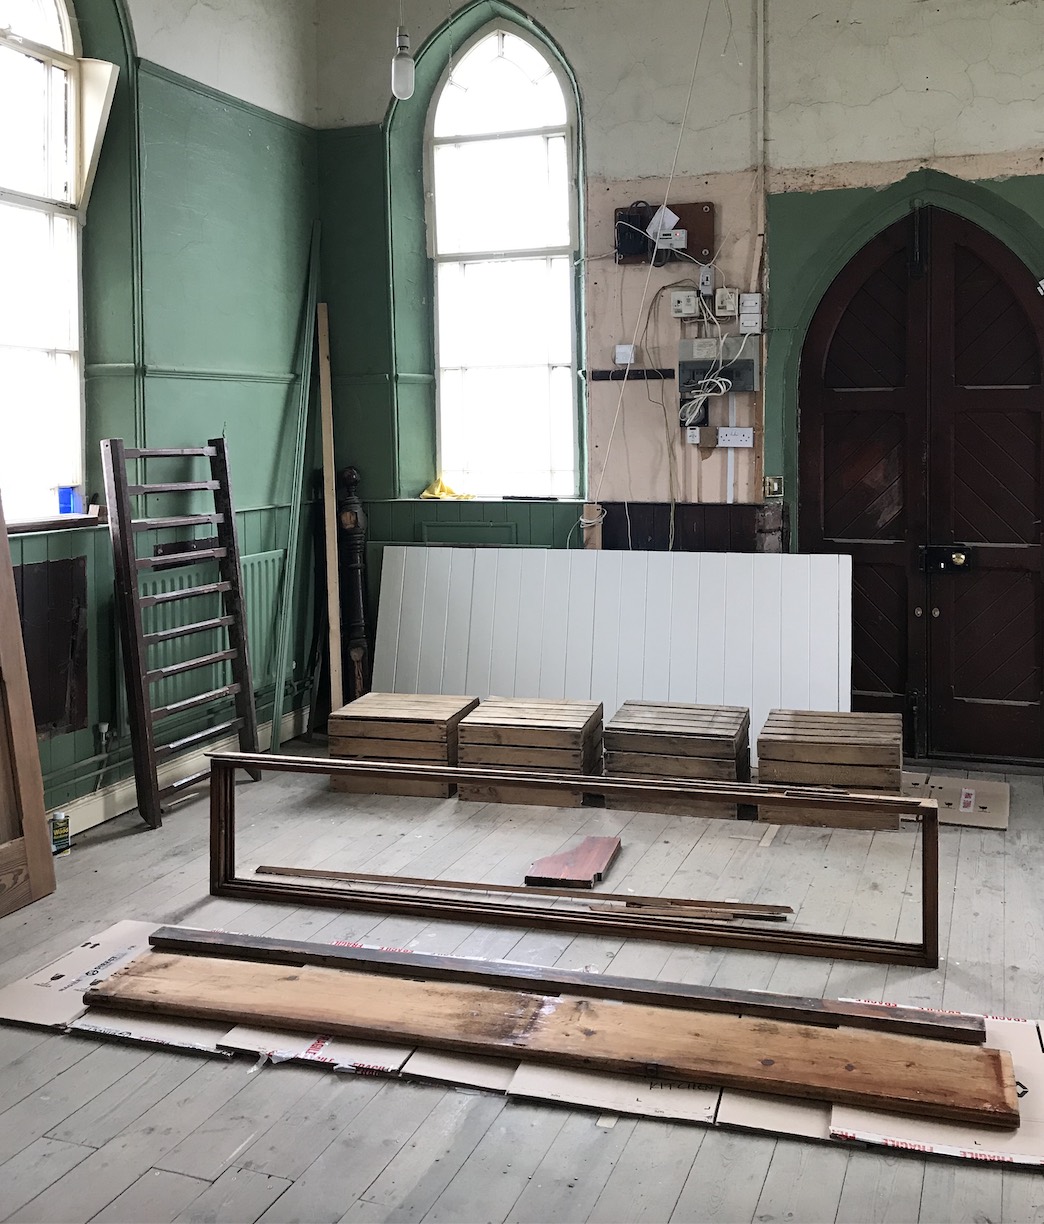
As I mentioned in a previous reno diaries post, the vestibule that sat at the front of the Chapel wasn’t original to the building but a later addition from another Chapel. As we started to take the structure apart, it became clear that there were lots of parts we would be able to re-use and incorporate into the new design which I was excited about. It was of a lovely pitch pine construction + had been installed well + took some effort to dismantle so that everything remained in good condition to re-purpose!
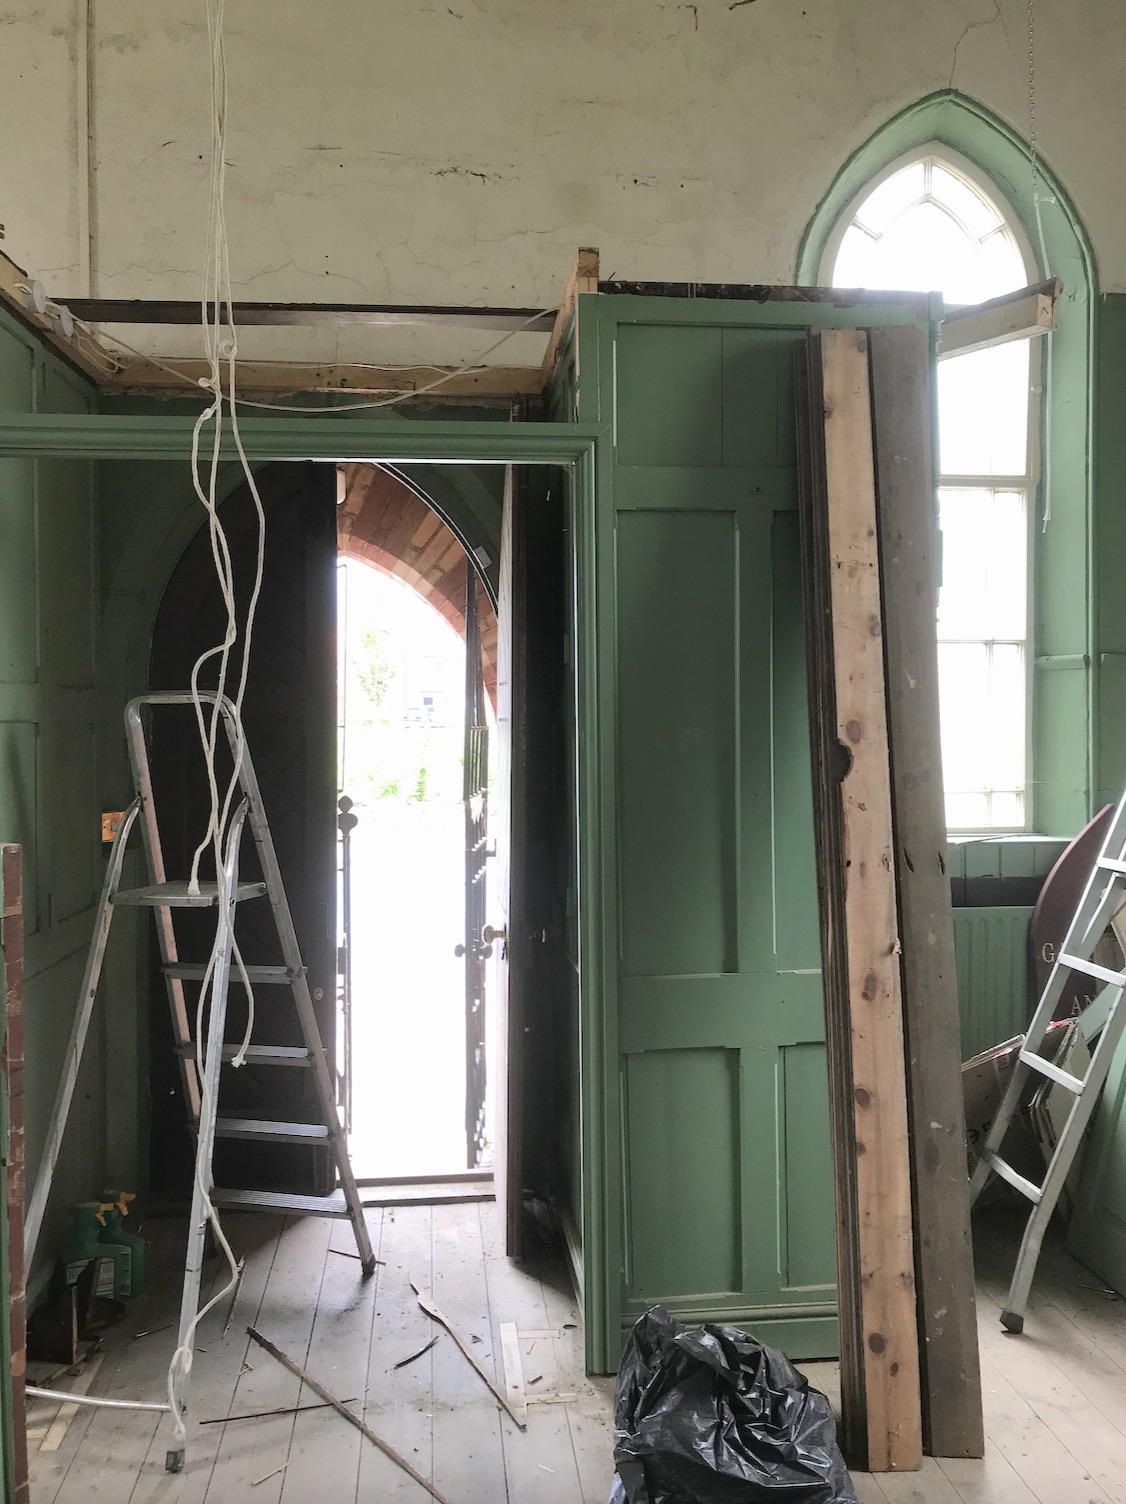

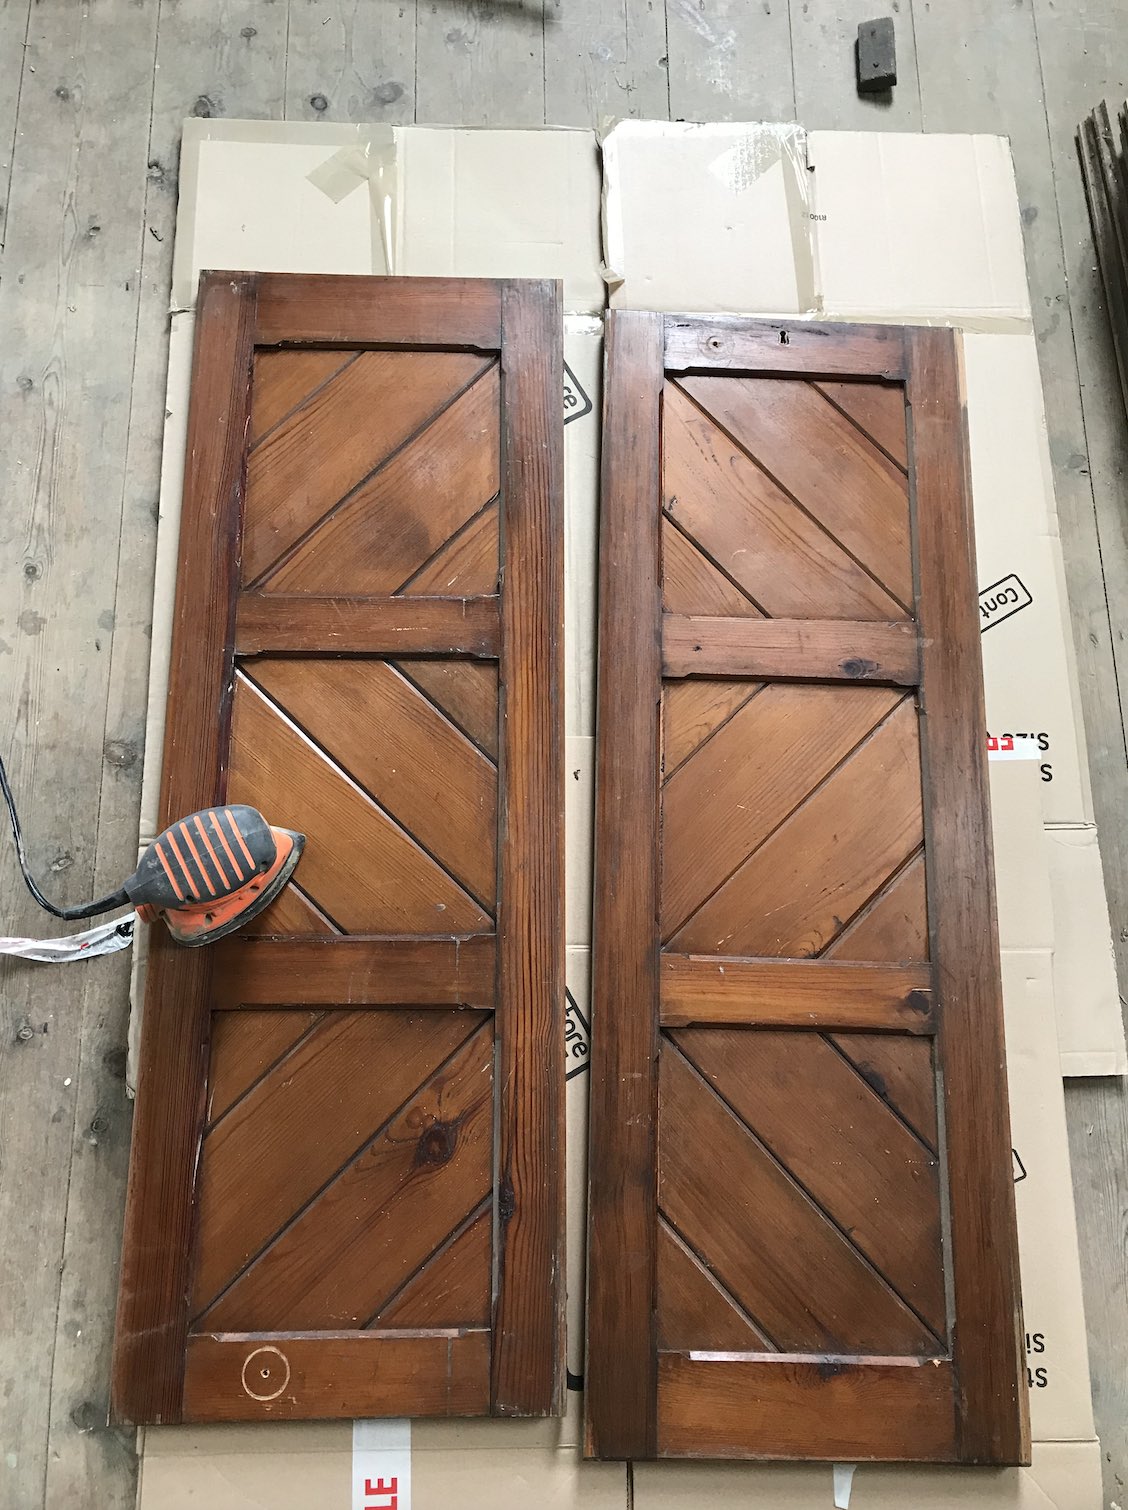
From the vestibule, you’ll have already seen the double doors that we’d removed + had been stripping down. These larger panels (one standing below left) were beautiful + we were thinking about using them to construct a little cloakroom as they were the right kind of sizes I’d been sketching…


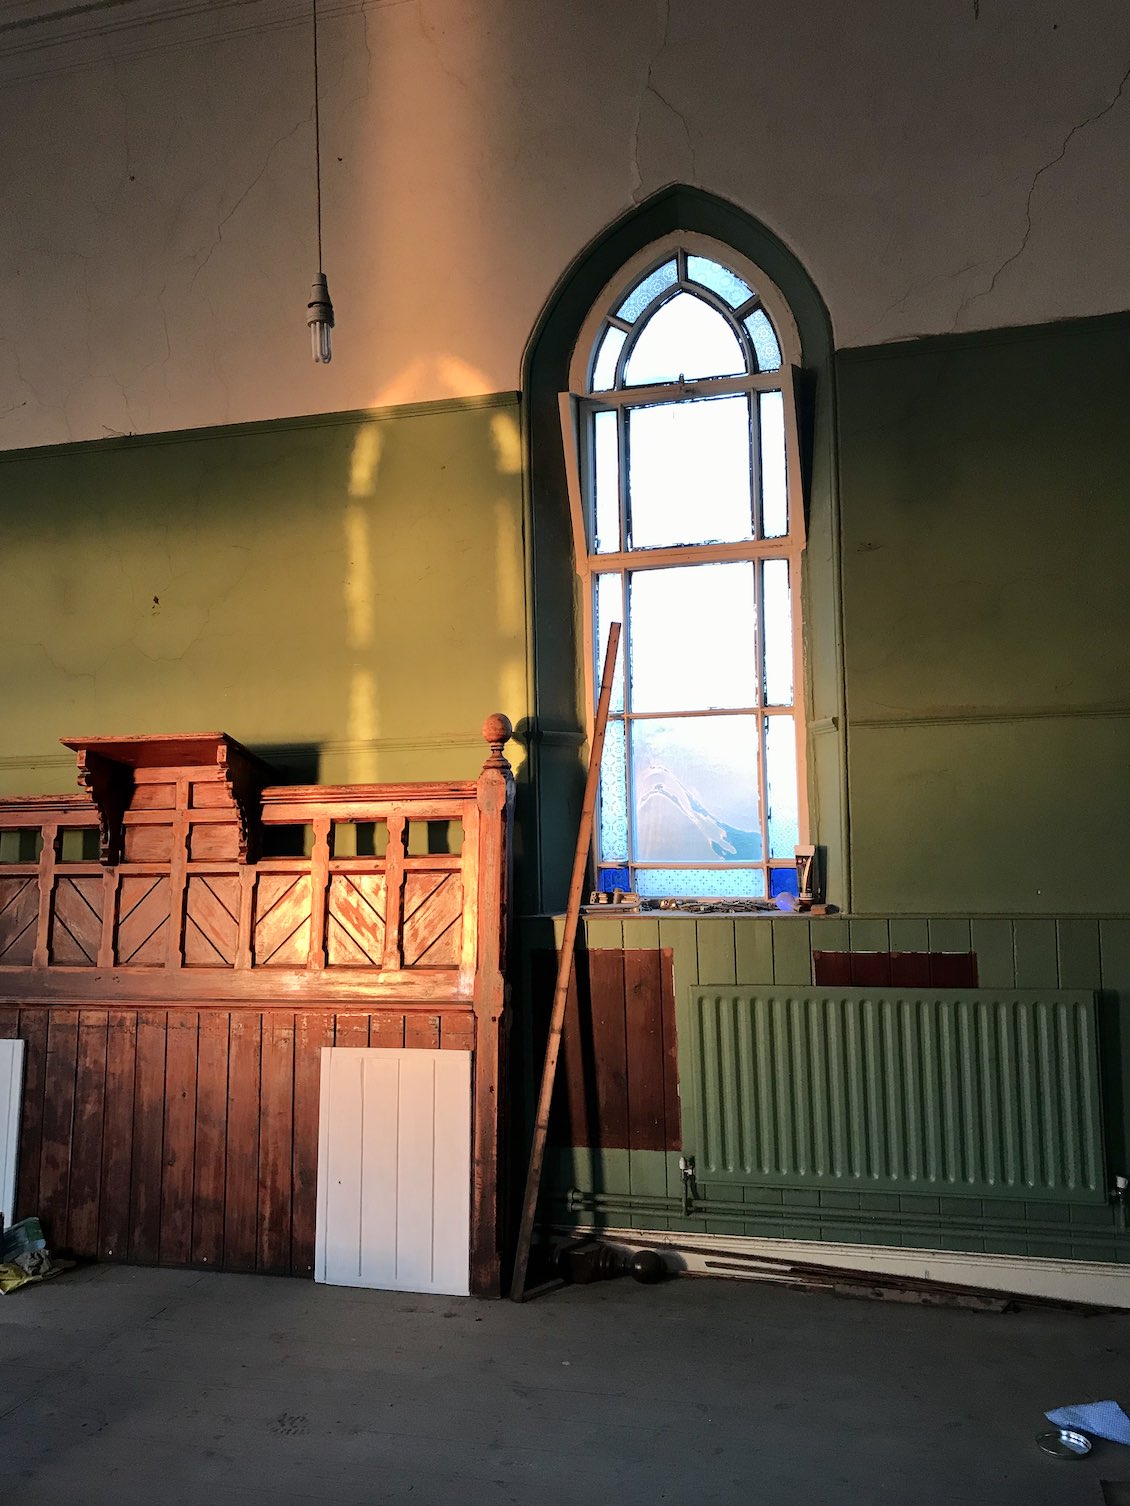
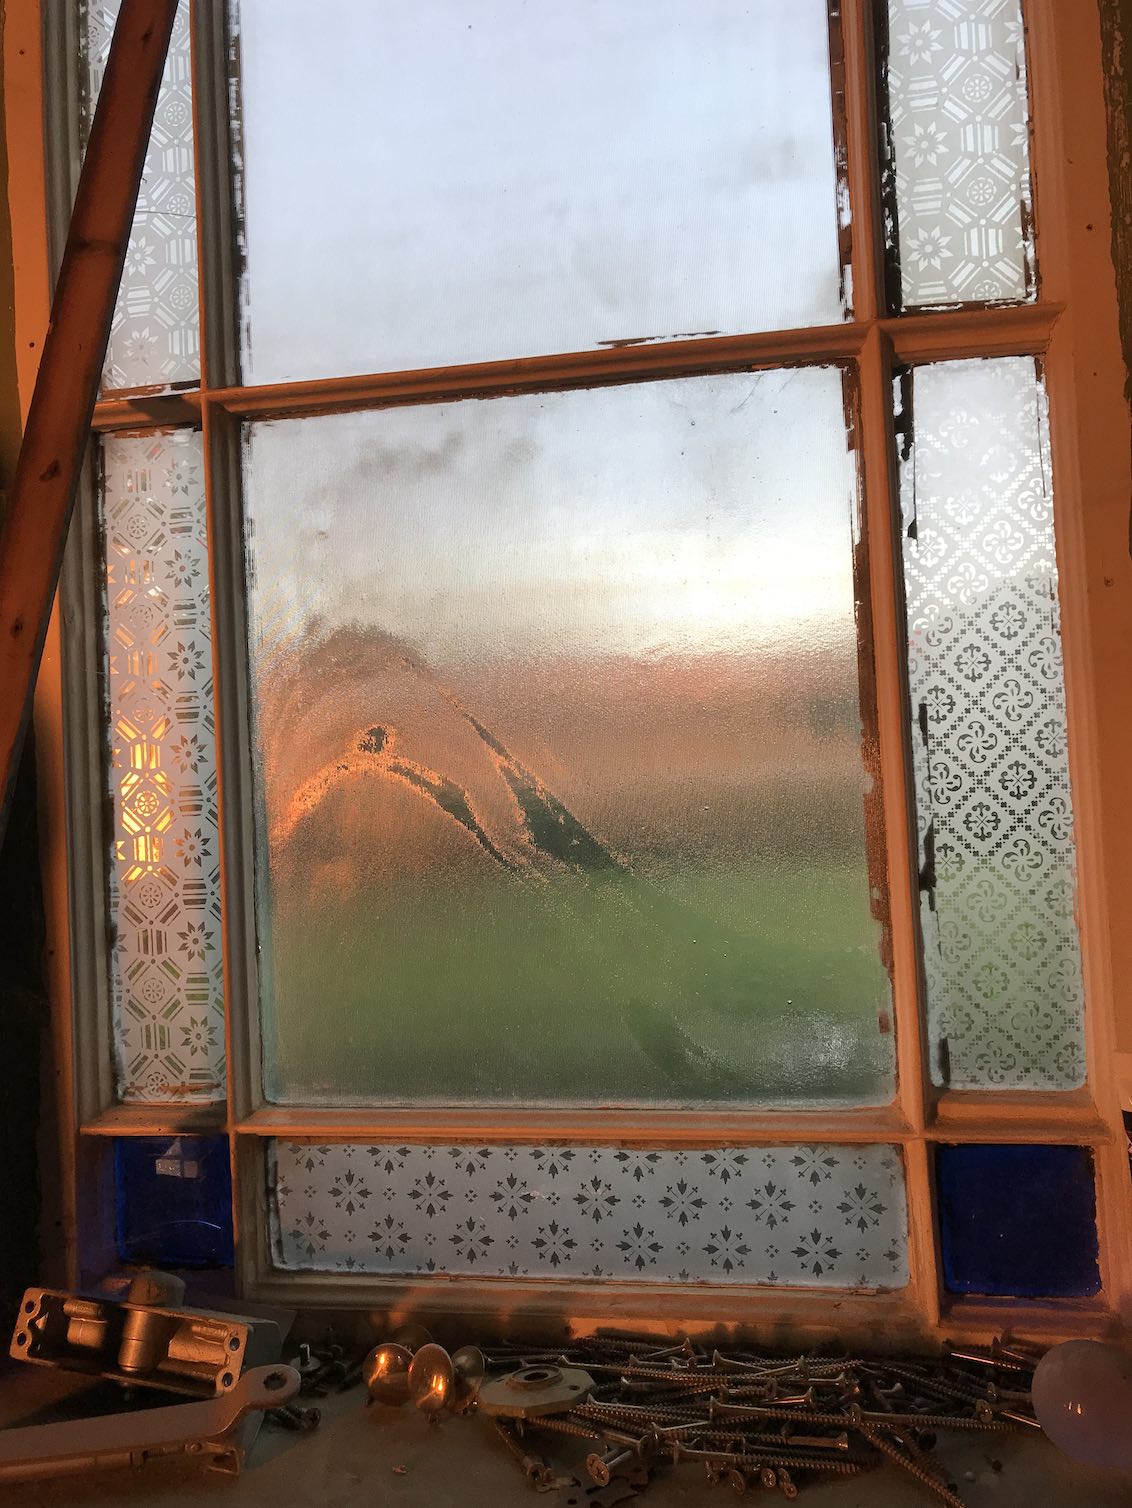
Now that the light wasn’t obscured by any internal structures I started to notice how it moved around the space, casting Chapel window-shaped shadows along the walls + floor.


There we go — the front of the building is fully opened up once more:

Sourcing internal doors
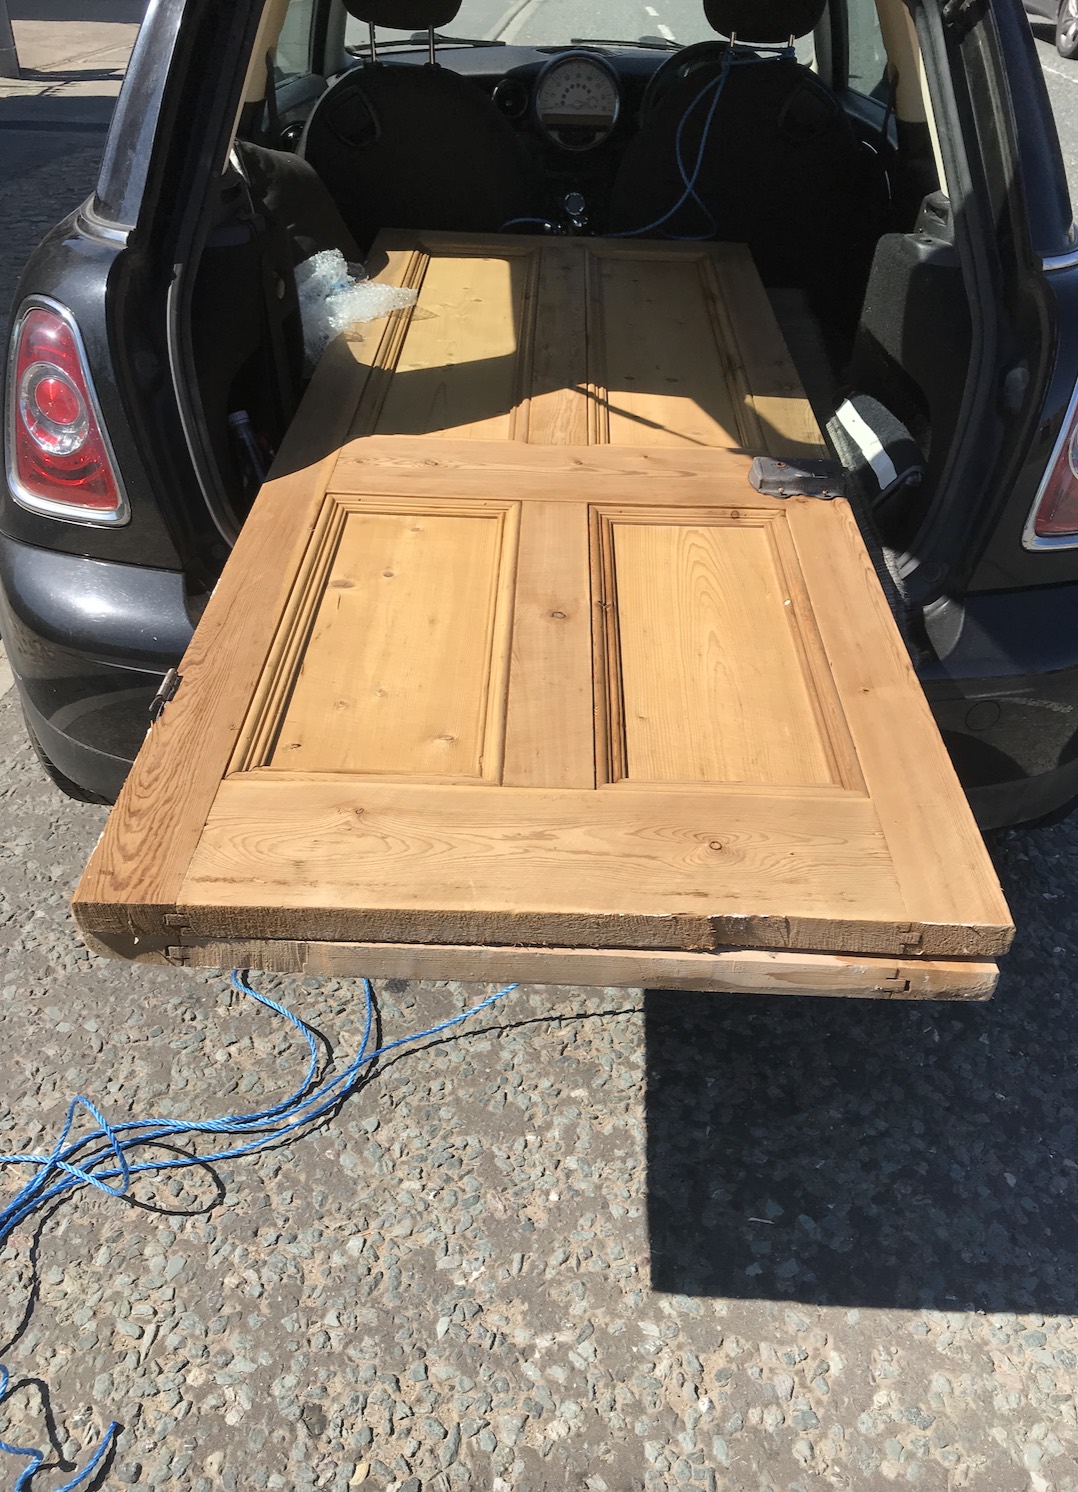
After finding those little windows (in the previous post) I was planning on using two as borrowed lights above the internal doors (I’ve included a sketch further down), we needed to find some doors that would work with the dimensions — we visited a couple of salvage places until we found a great dipping place + managed to score two Victorian pine doors that we could get dipped. After my ongoing sanding escapades with the double vestibule doors, I was happy to get these paint stripped in a tank! I still had a LOT of sanding + paint stripping + wood-worming to do to pieces that were too large + heavy to fit in the car + transport, so on balance, I didn’t mind getting these two treated. One of them was slightly narrower than the other which was perfect for the cloakroom measurements I was working on + they fitted in well with the borrowed lights too.


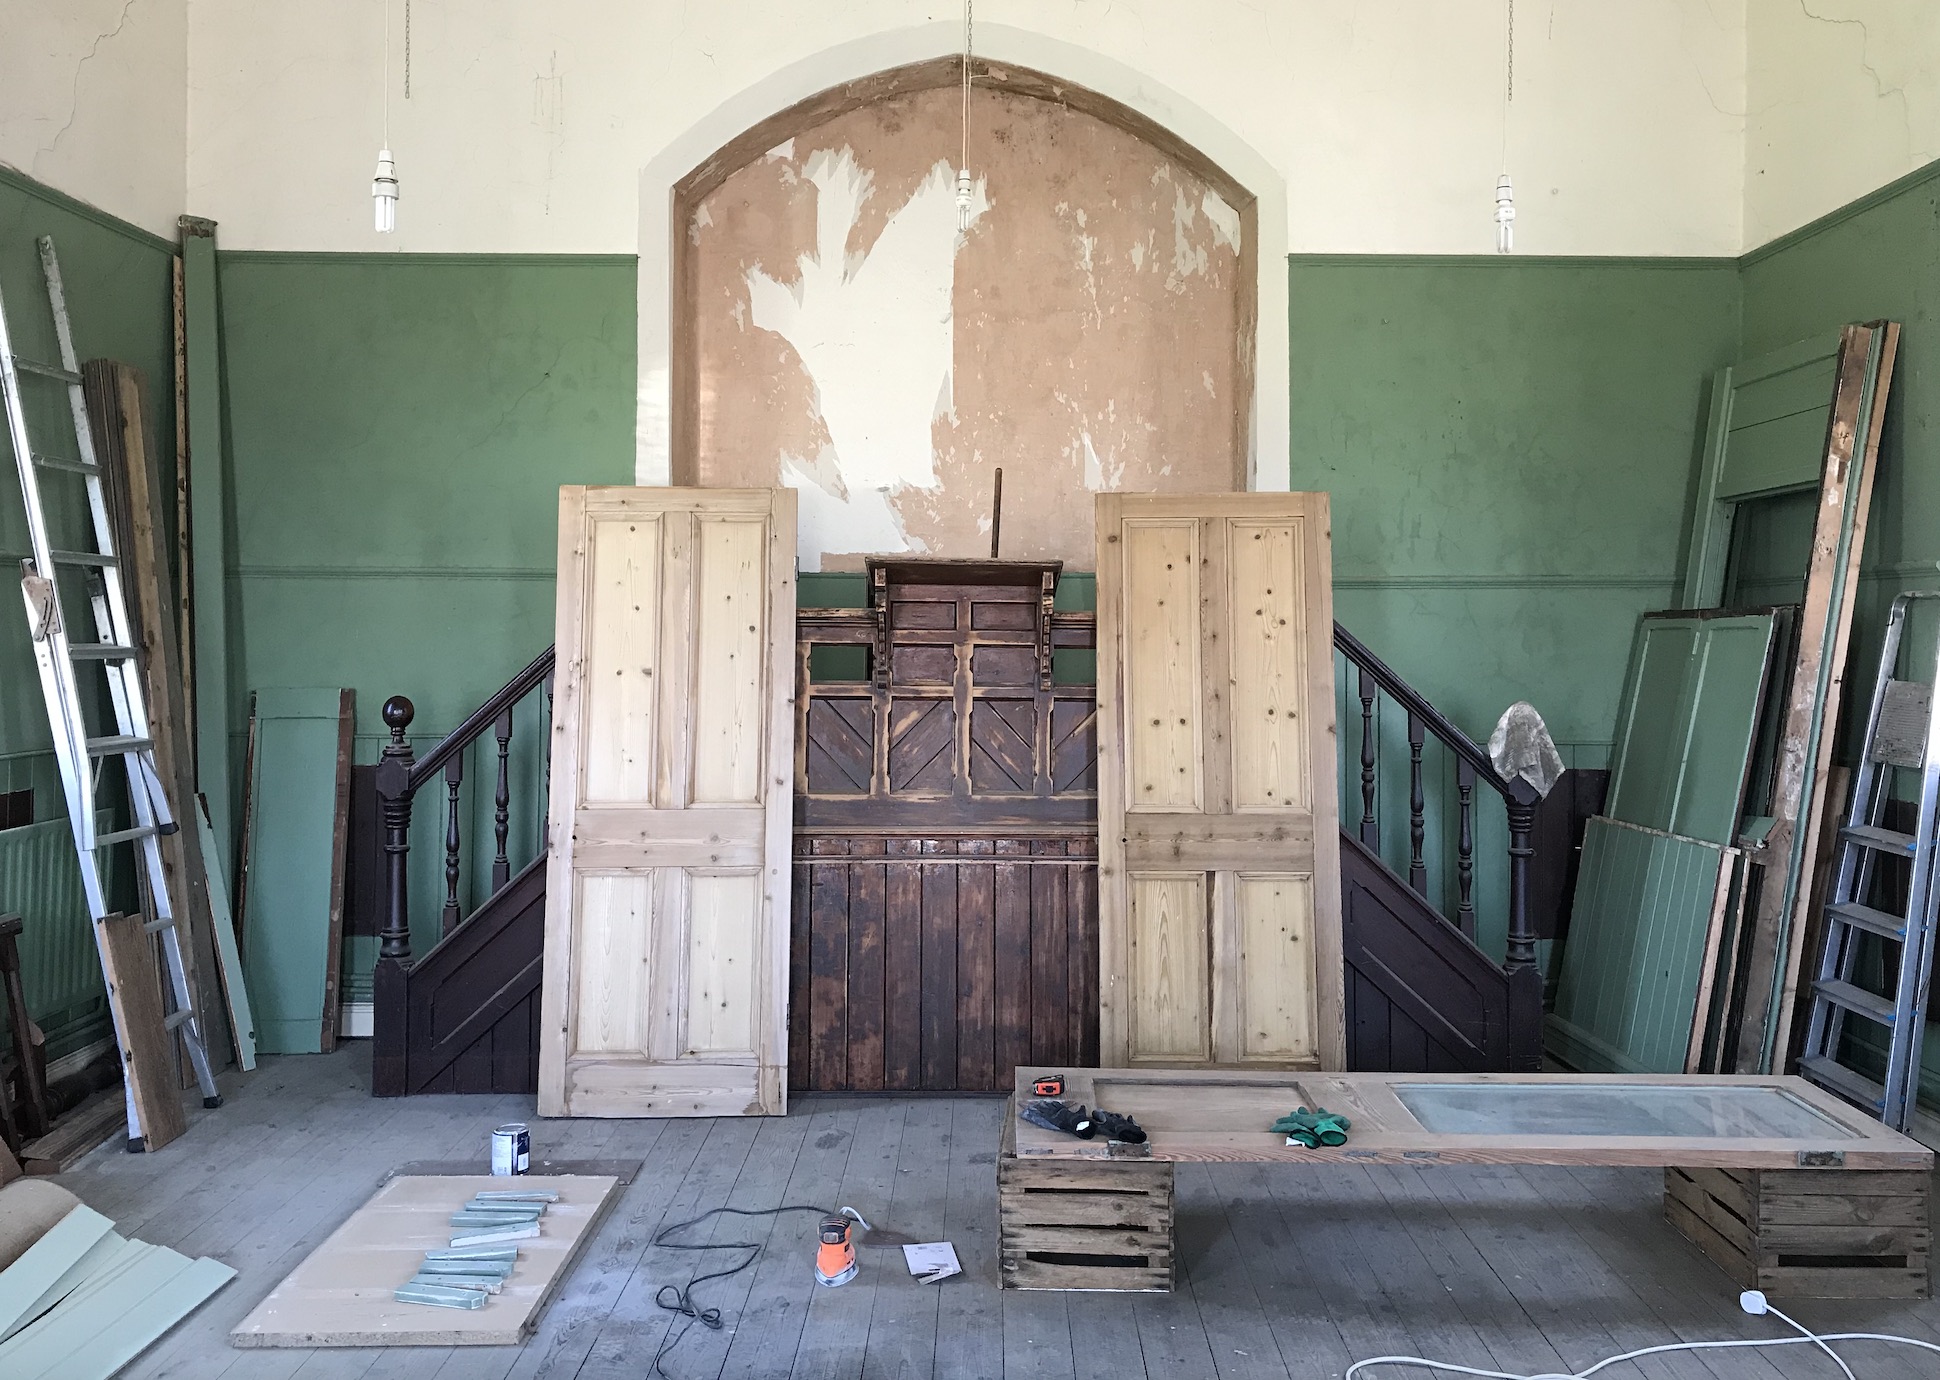
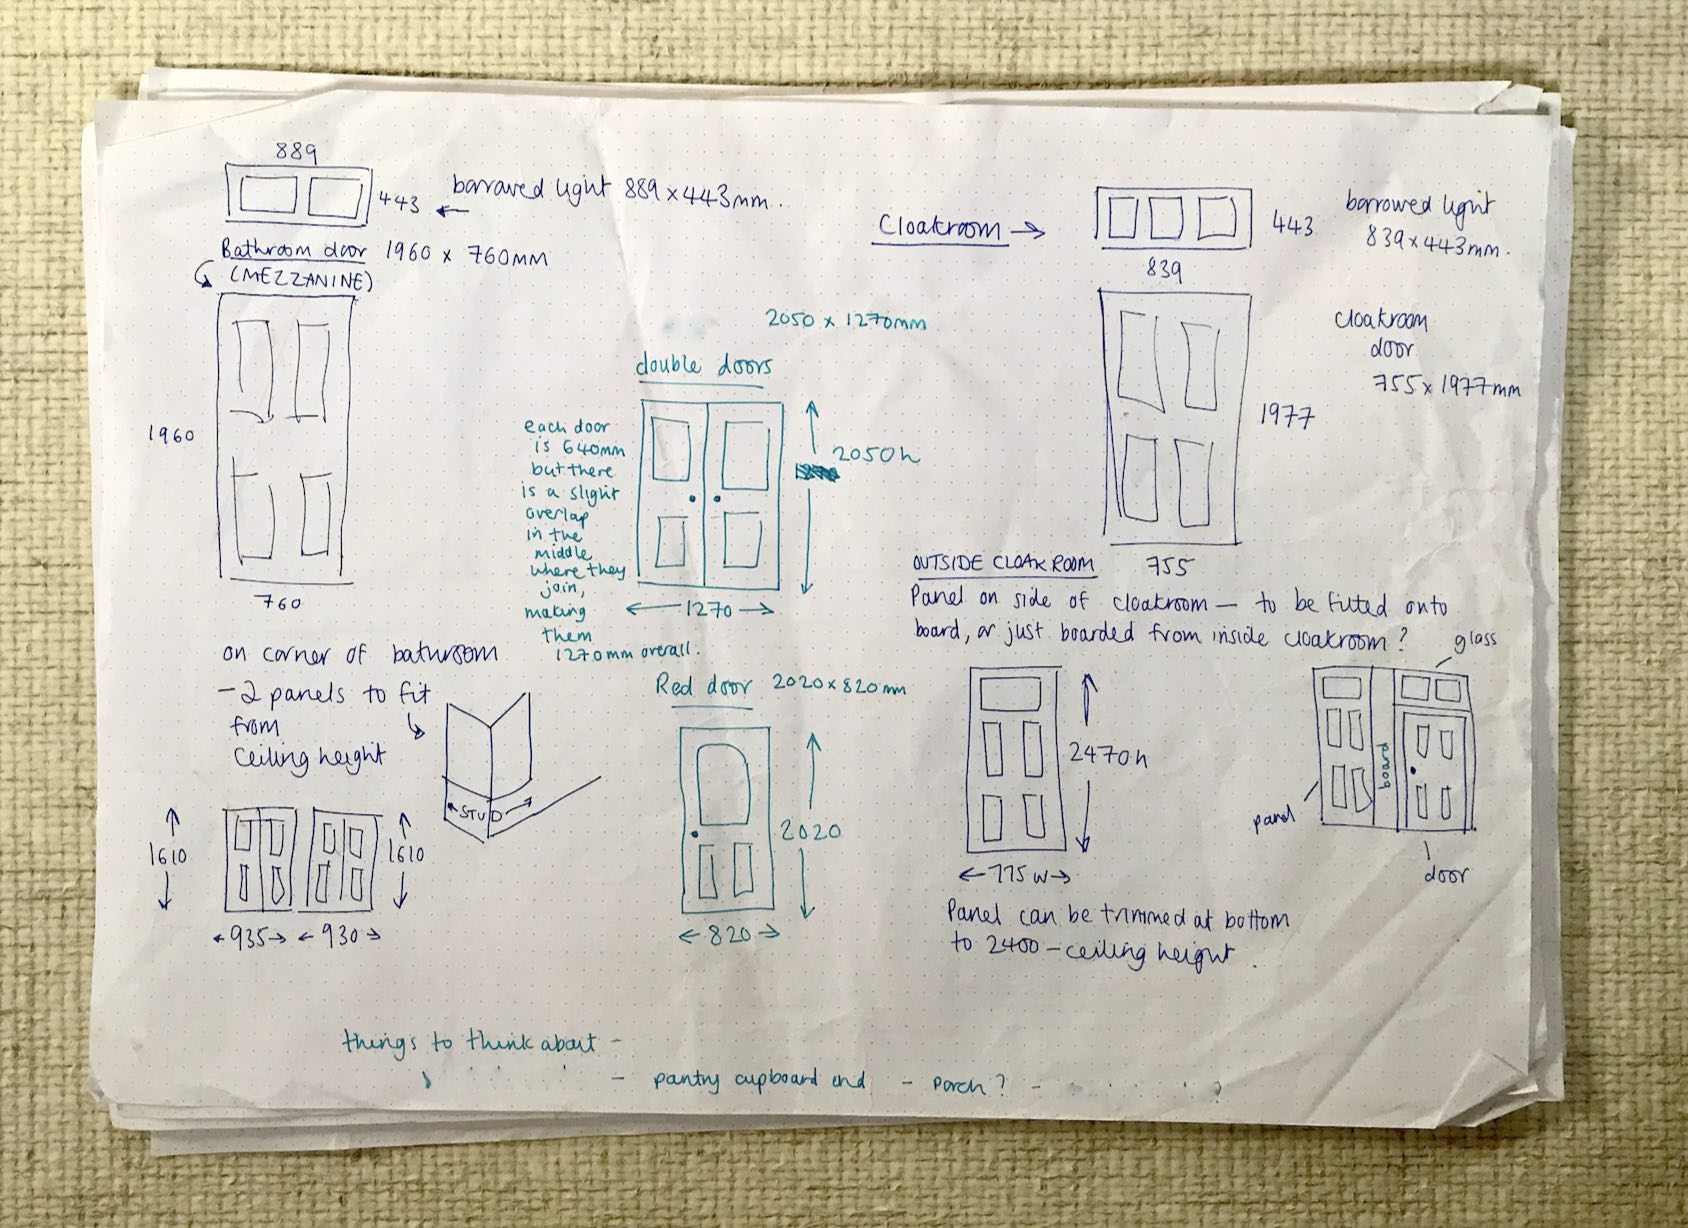
I’ll show you what I was thinking here — this is a good example of how I find it much more productive to work through drawing:
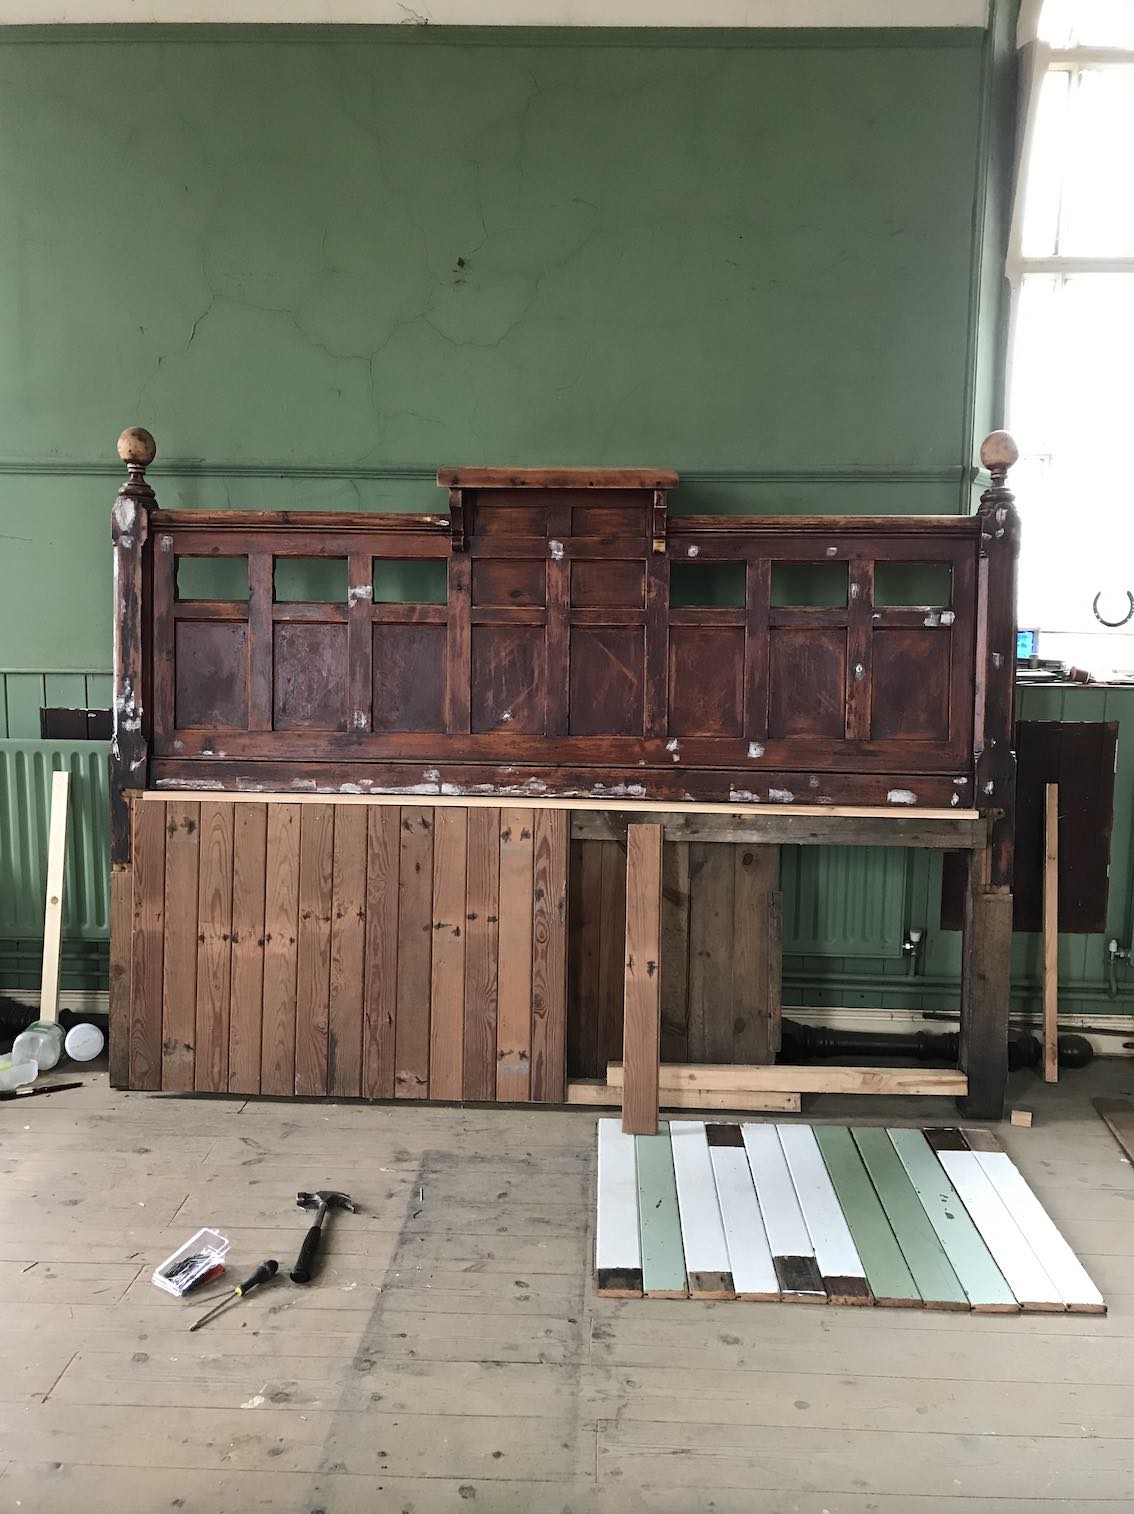
Dismantling the pulpit
Riding on the confidence we’d gained from managing to take the vestibule apart, we turned our attention to the pulpit… I’ll be honest and say we were quite daunted by this! We started slowly with the steps at each side + the platform, which gave us access to the pulpit bench that was built into the alcove. The steps were in a decent condition overall, some old woodworm but nothing major so we thought they we could use them to make some excellent bookshelves! Whilst there weren’t any pews left in the Chapel, this would have been the preachers bench so we 100% wanted to re-build it as a seat somewhere in the design.


Removing both sides of the structure actually got us thinking that the pulpit could potentially be incorporated into the interior design as a ‘screen’! We still had a way to go as it was attached into the wall with struts + we were working around the old electrics + an oil-fired boiler which was installed in the 90’s that was housed underneath the pulpit. It was a slow process but we inched forward + after a few hours we’d sawn off most of the awkward parts which just left the main supports to detach…

After much heavy lifting…we managed to move it out of the way + lean it against the wall...Ta-da!

On removing the structure, we came across the remainder of an early announcement (below right) pasted to the wall of the Chapel, previously covered by the pulpit!


Next we were able to lean the pulpit against the wall while we doused it in woodworm treatment + as it dried, we started to think about where we could incorporate this into the new design. The two ‘holes’ were from the sliding doors (out of shot) which we’d fix up + re-instate, but we’d need to build a new ‘back’ to the pulpit if we were to use it as a screen — we had some Victorian tongue and groove from the vestibule that we could potentially repurpose, but more on that a little later.


Renovating the pulpit bench


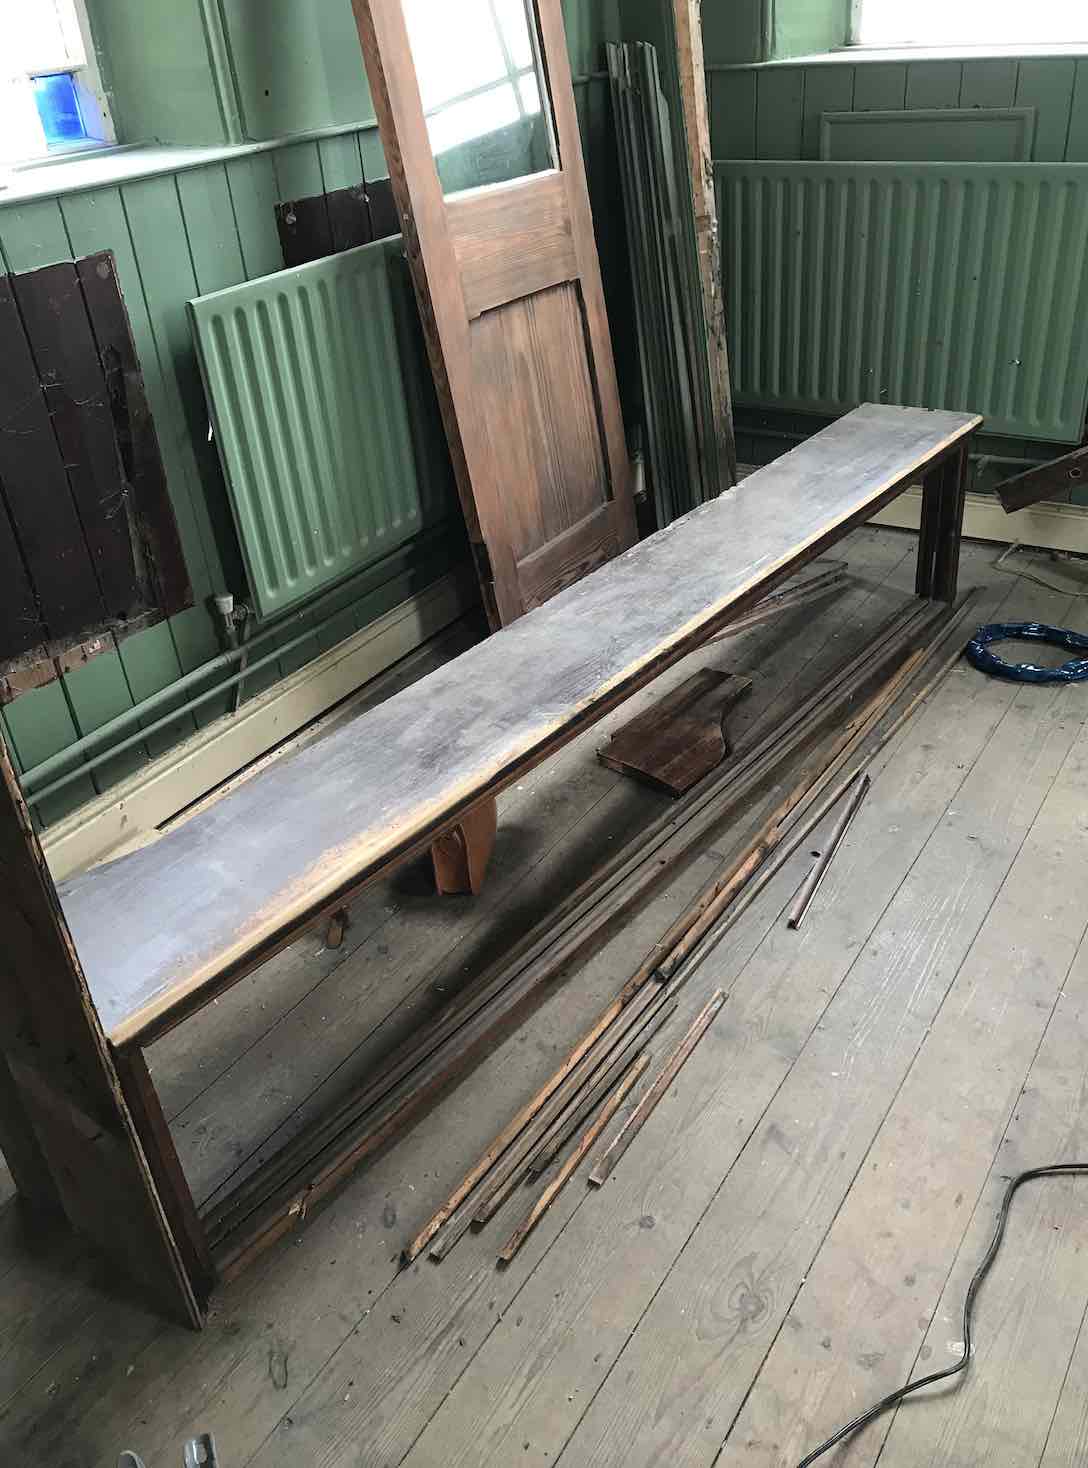
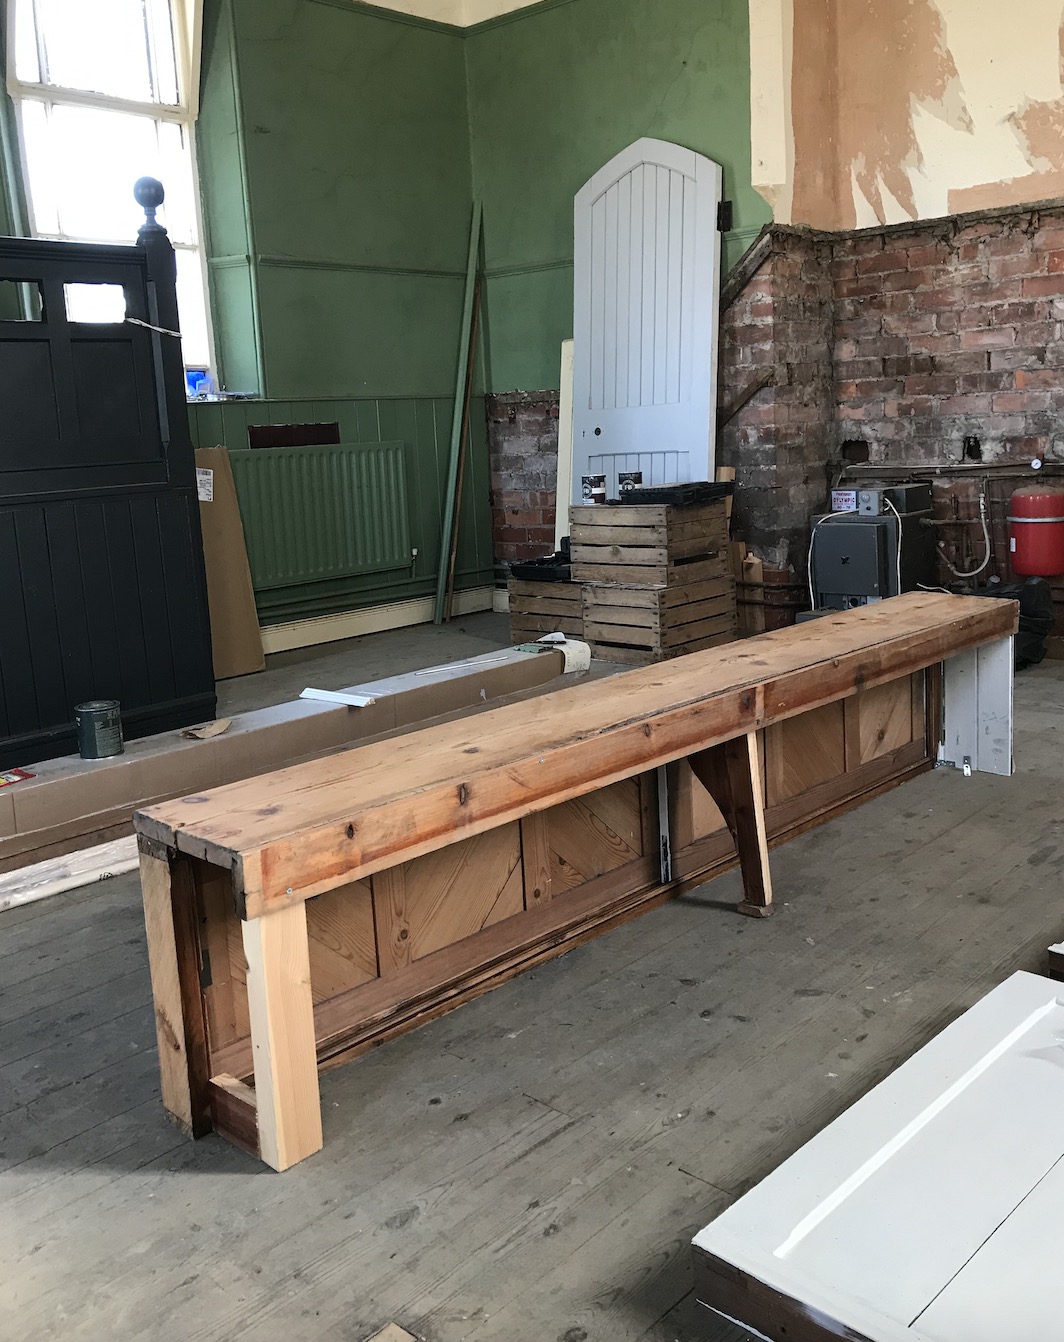
The pulpit bench was a really fun piece to work on and was a welcome change to the heavy lifting we’d been doing for a few weeks with the all the dismantling! Cleaning, sanding + woodworm treatment for all the component parts was the first part of the task — the two sliding doors came up really well, as did the frame, but the seat had some rotten parts that had split + required attention.


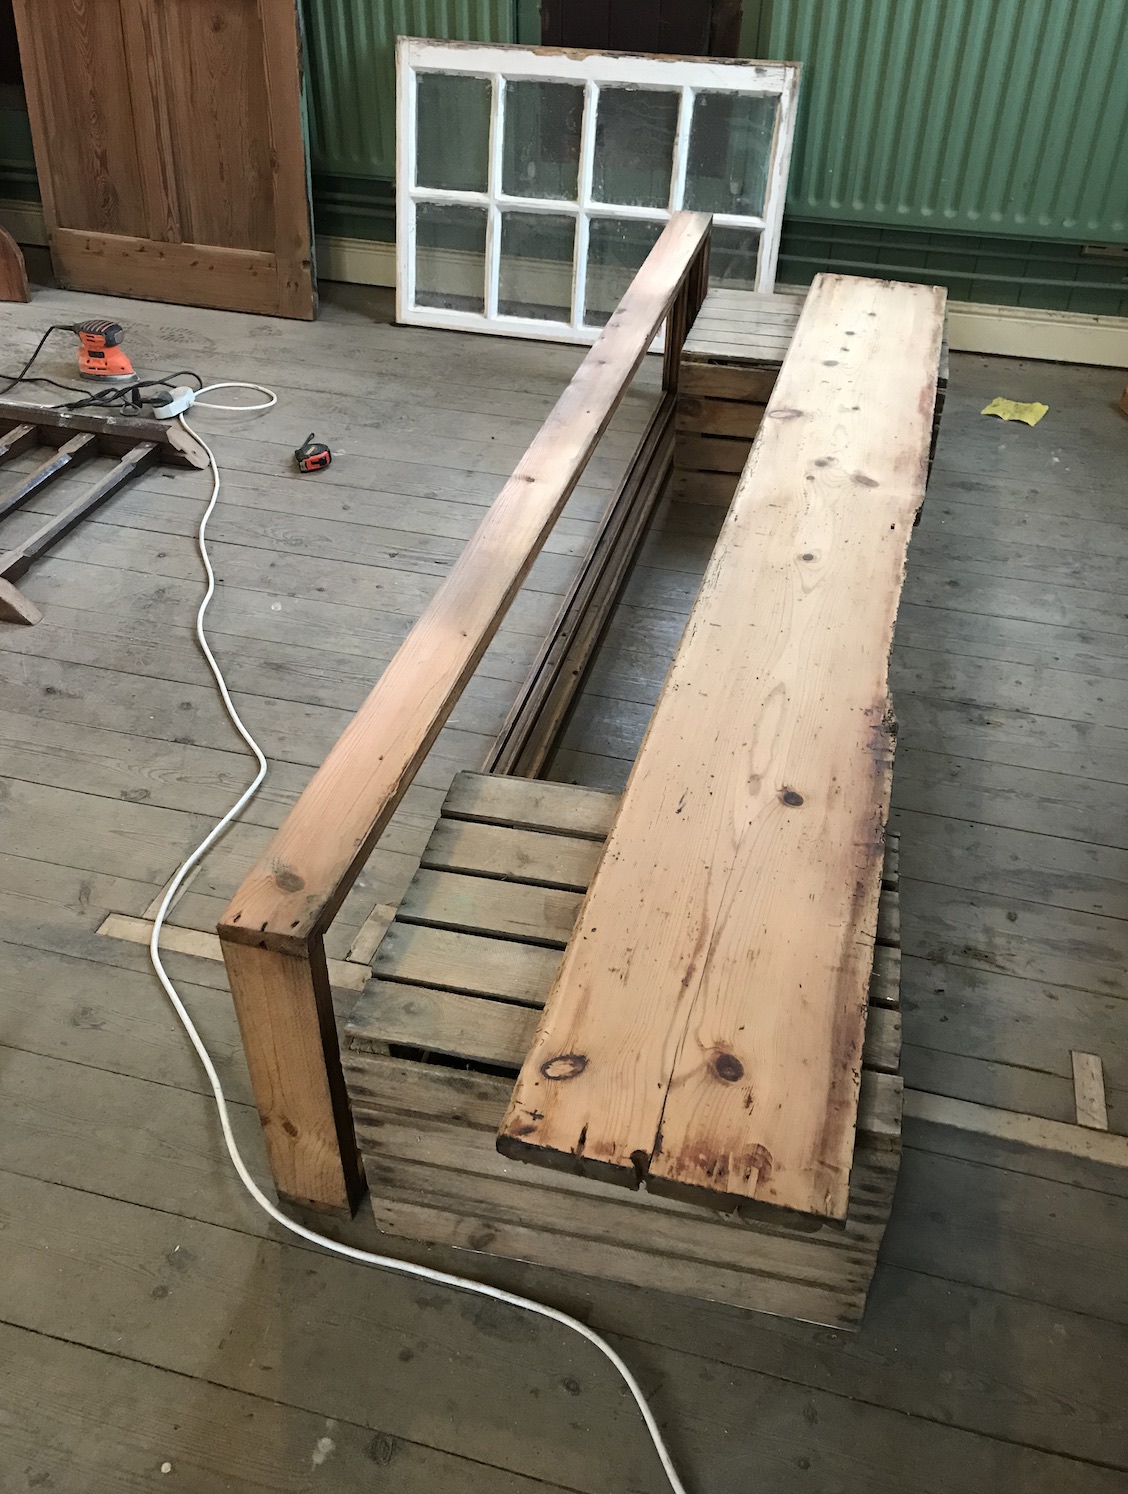
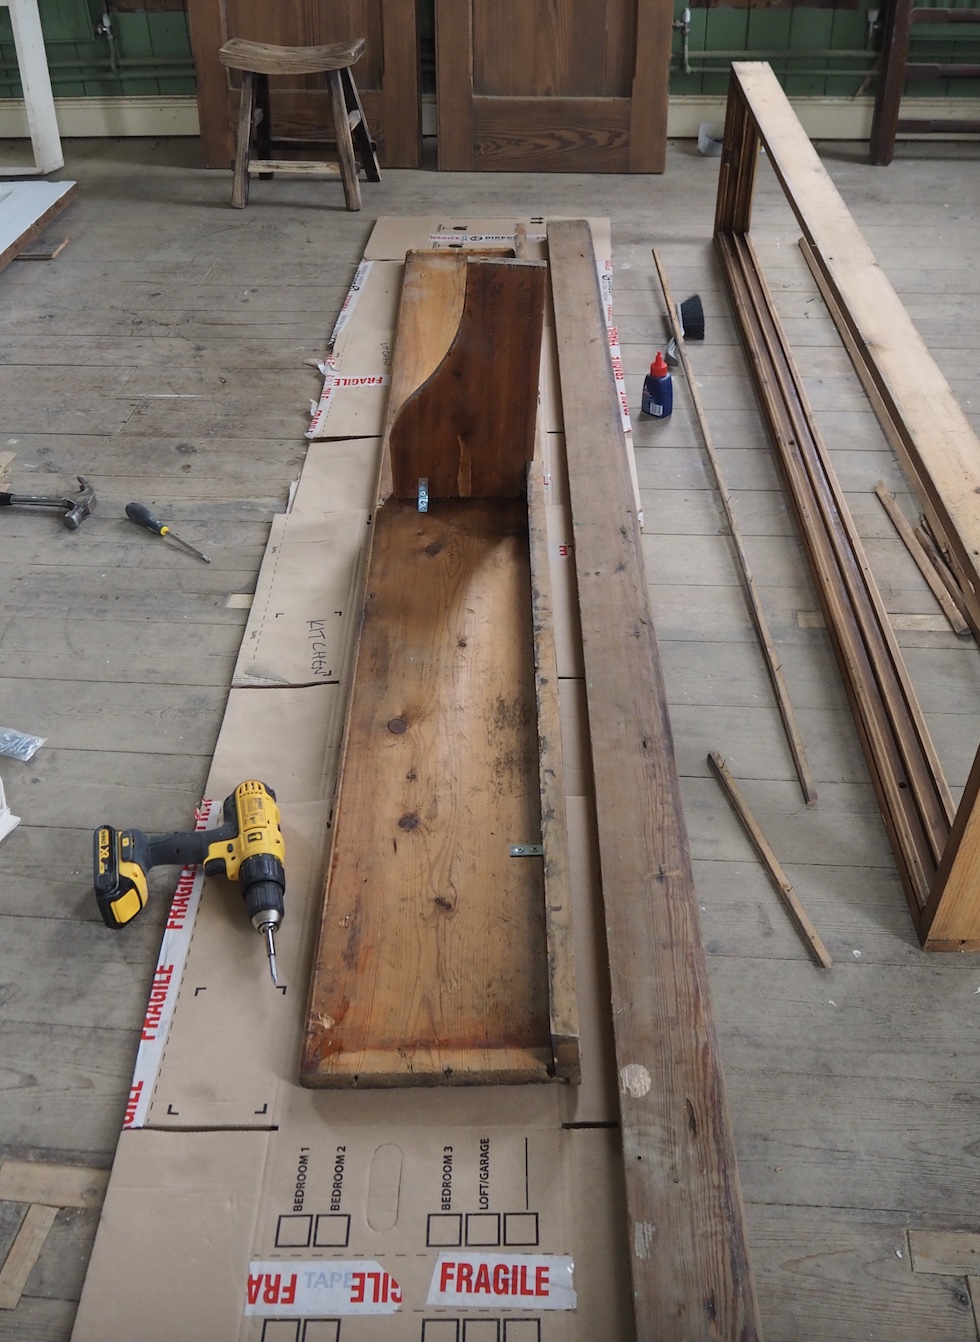
We had managed to salvage the T&G that was behind the bench in the alcove, held together by two batons. This made things much easier to move + we could work on repairing + re-building that + replacing any of the very rotten boards so that we could retain the original look of the bench in the new design. We repurposed some of the smaller T&G to construct end panels for the bench as it would no longer sit within a recess — we had an idea where it would fit nicely but would need to put it into storage until the building works were complete. According to my plans, there was a possibility that the bench would need to get shortened a little bit to fit in the space (accounting for insulation etc.), but this was a long way off yet.


Restoring the vestibule panels


Getting back to the vestibule + those large panels that flanked the double doors (above). The front sides were coated in a few layers of green paint but the backs were stained so would (thankfully) be easier to sand back. Below is a ‘work in progress’ shot of how I spent quite a few hours working on one of the panels — this one started to come up so well that I decided to keep going + get it sanded enough to just apply some wax. First though, woodworm treatment. Stinky but necessary with old wood, especially as we could see some damage to the floor in this area around the vestibule — below right is the panel drying off after painting on the liquid.


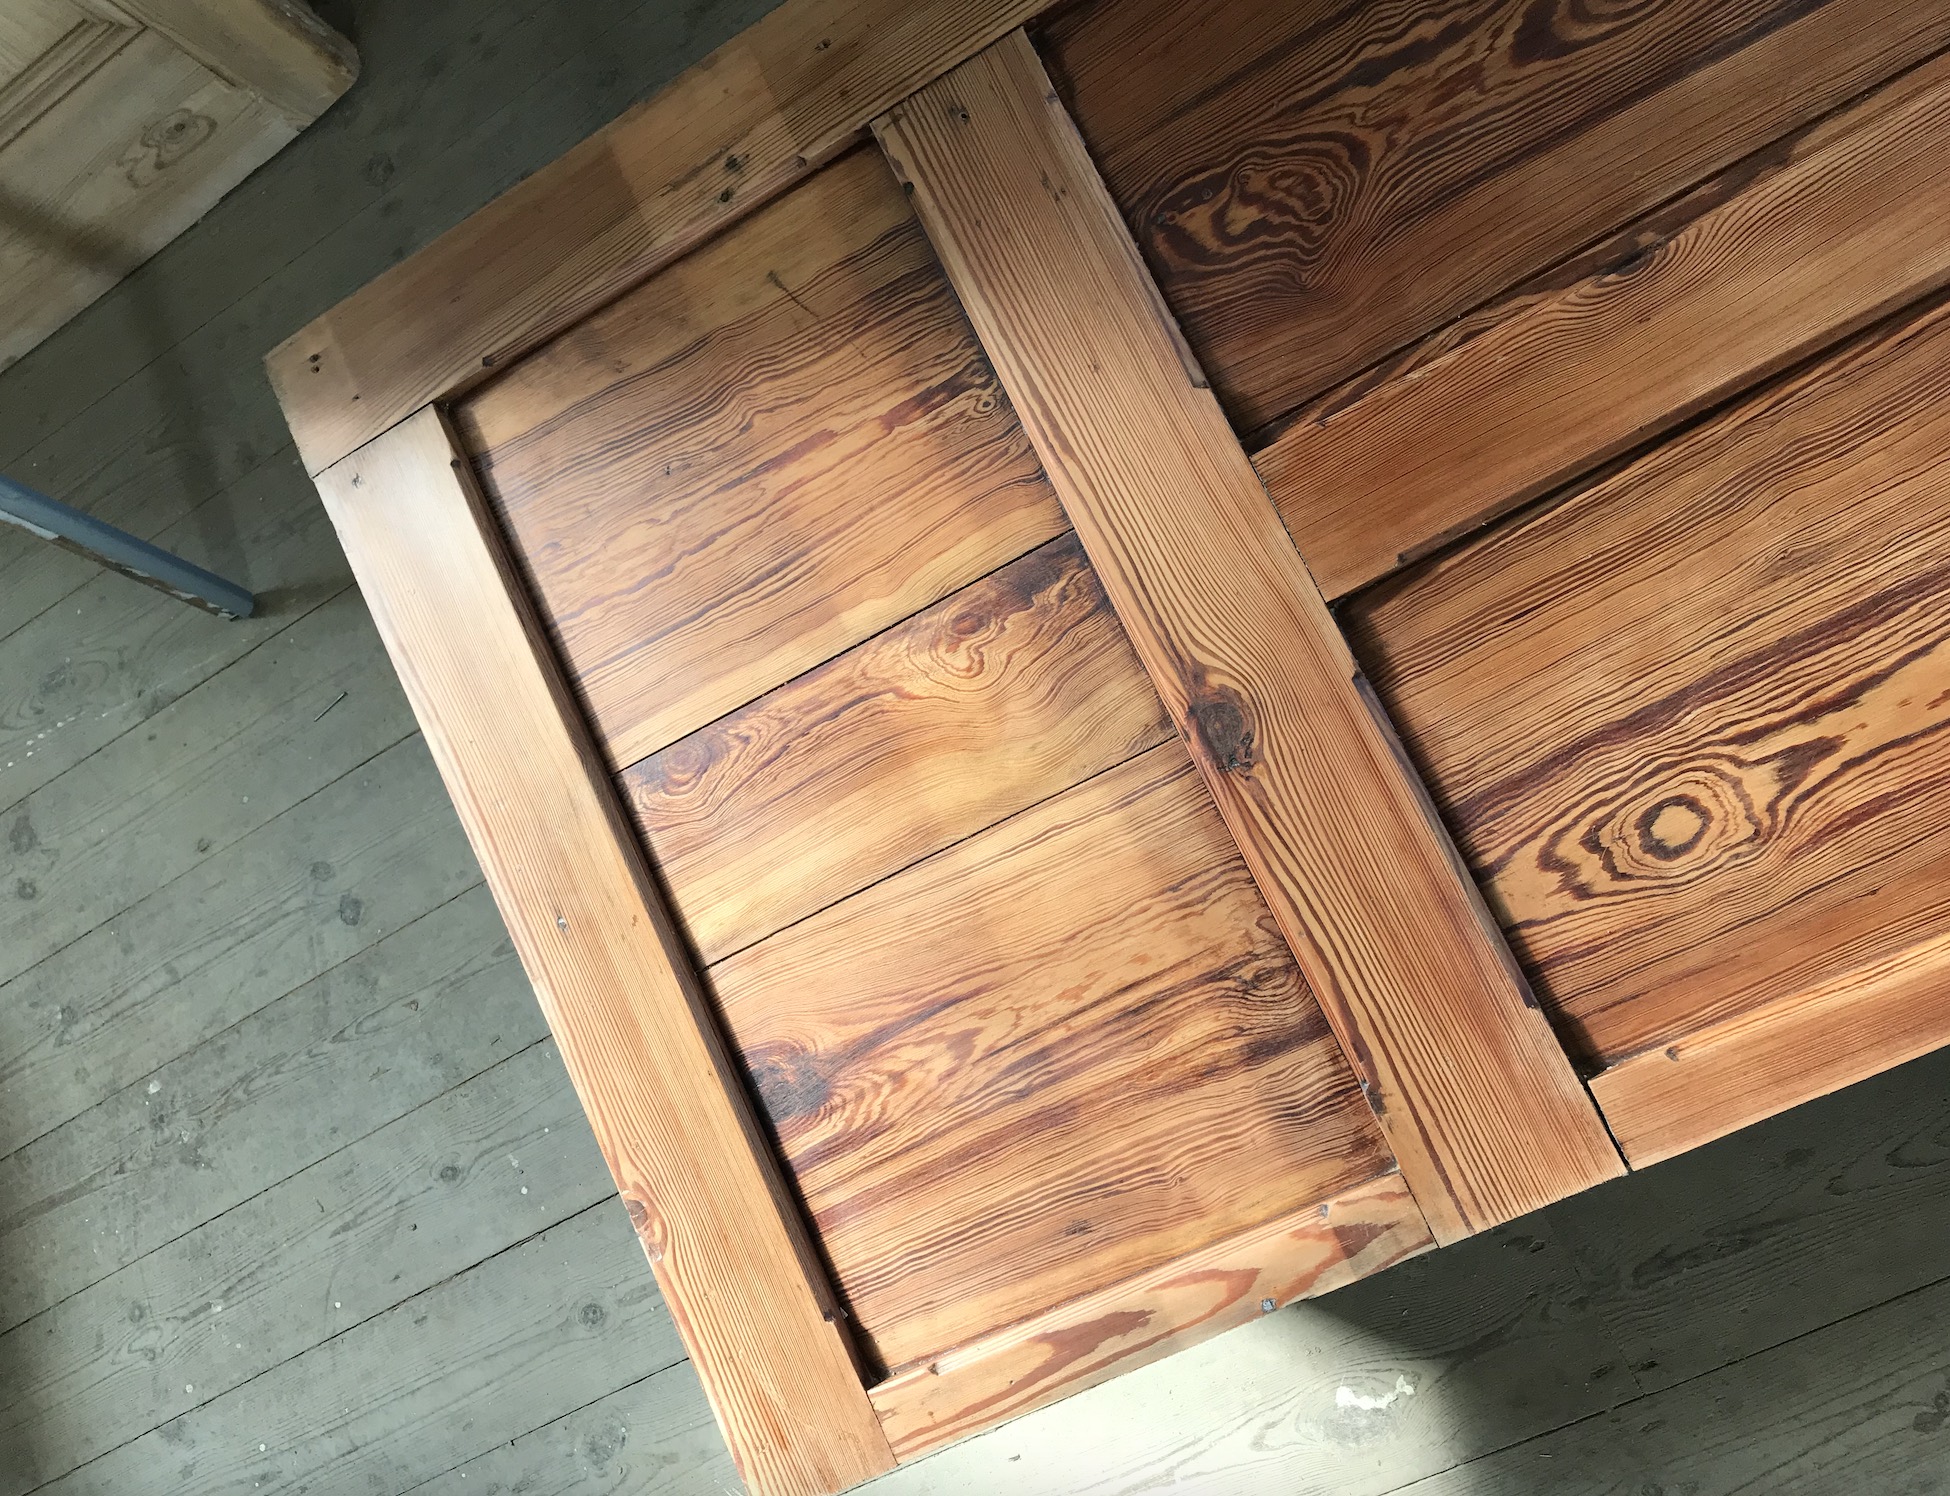
Below were some of the other lovely panels inside the vestibule — the two of them were added to the list of ‘Laura’s sanding jobs‘ + I just worked at these slowly over a few evenings! Like the large panel above, they cleaned up really well + we decided they would be nice kept as wood + possibly built into the stud work on the mezzanine, or used as panels that wrapped around the corner of the bathroom (you might have spotted this in the sketch above in the internal doors section).

Repairing + re-building the pulpit
One of the last woodwork type of jobs before the demolition started was to repair + re-build the pulpit so that it was in a secure state to move into storage. This was another of the tasks that I really enjoyed + the late Summer evenings meant we could work into the night in that lovely golden hour glow:

The main aim was to reconstruct some of the T&G that was previously underneath the panels in the vestibule to create a ‘back’ to the pulpit that had previously been hidden by the raised pulpit floor. We cut the planks down to size + started assembling it together. Old wood is often more difficult to work with so it took a while to get this side looking finished, but once we’d done some filling + sanding we gave it a coat of primer and that really transformed it!


At this point we knew we wanted to paint it as there would be a lot of wood used in the interior… but couldn’t decide on whether to go light or dark. Typically, once we’d painted the (white) primer on, we stood back + tried to imagine it in the space + decided that dark might actually work better! I’d always imagined the walls to be light in colour so the darker pulpit would provide a contrast + feel a bit brutalist + architectural in the space perhaps.


We decided to get an undercoat on, followed by a couple of coats of colour before taking the pulpit into storage — we could decide properly on the colour later on, in all honesty it just felt nice to do some painting! This is one of my favourite dark colours which is Lamp Black by Little Greene. A lot of ‘off-black’ paints have a blue tone to them, whereas Lamp Black sits as a warmer black that I really love. However, there were more pressing things to turn our attention to by this point…


Taking the heating out + chipping off the plaster!
So with the pulpit, bench, panels and doors bundled away into storage it was time to empty the inside — we’d accumulated a lot of tools + stuff over the last few months which we brought back to the cottage temporarily as we prepared for the biggest task yet… I feel like this section could also be called ‘tearing down the plaster’ but not sure if anyone would get the obscure song reference (Fontaines DC)! But anyway, that’s precisely what we were starting to do…
Before that of course, we needed to take out the old oil-fired boiler + drain the heating system — bleeding all the radiators + cutting up the copper pipework. I’d not done anything like this before, but it felt like a big achievement to get the space properly clear! Here’s a progress photo:

Once the radiators were out of the picture, it was time to work on removing the plaster. The bottom third of the walls were panelled in T&G so this was quite manageable to get off, as there was no plaster behind the boards but after this point, it was more labour-intensive, not to mention dusty!


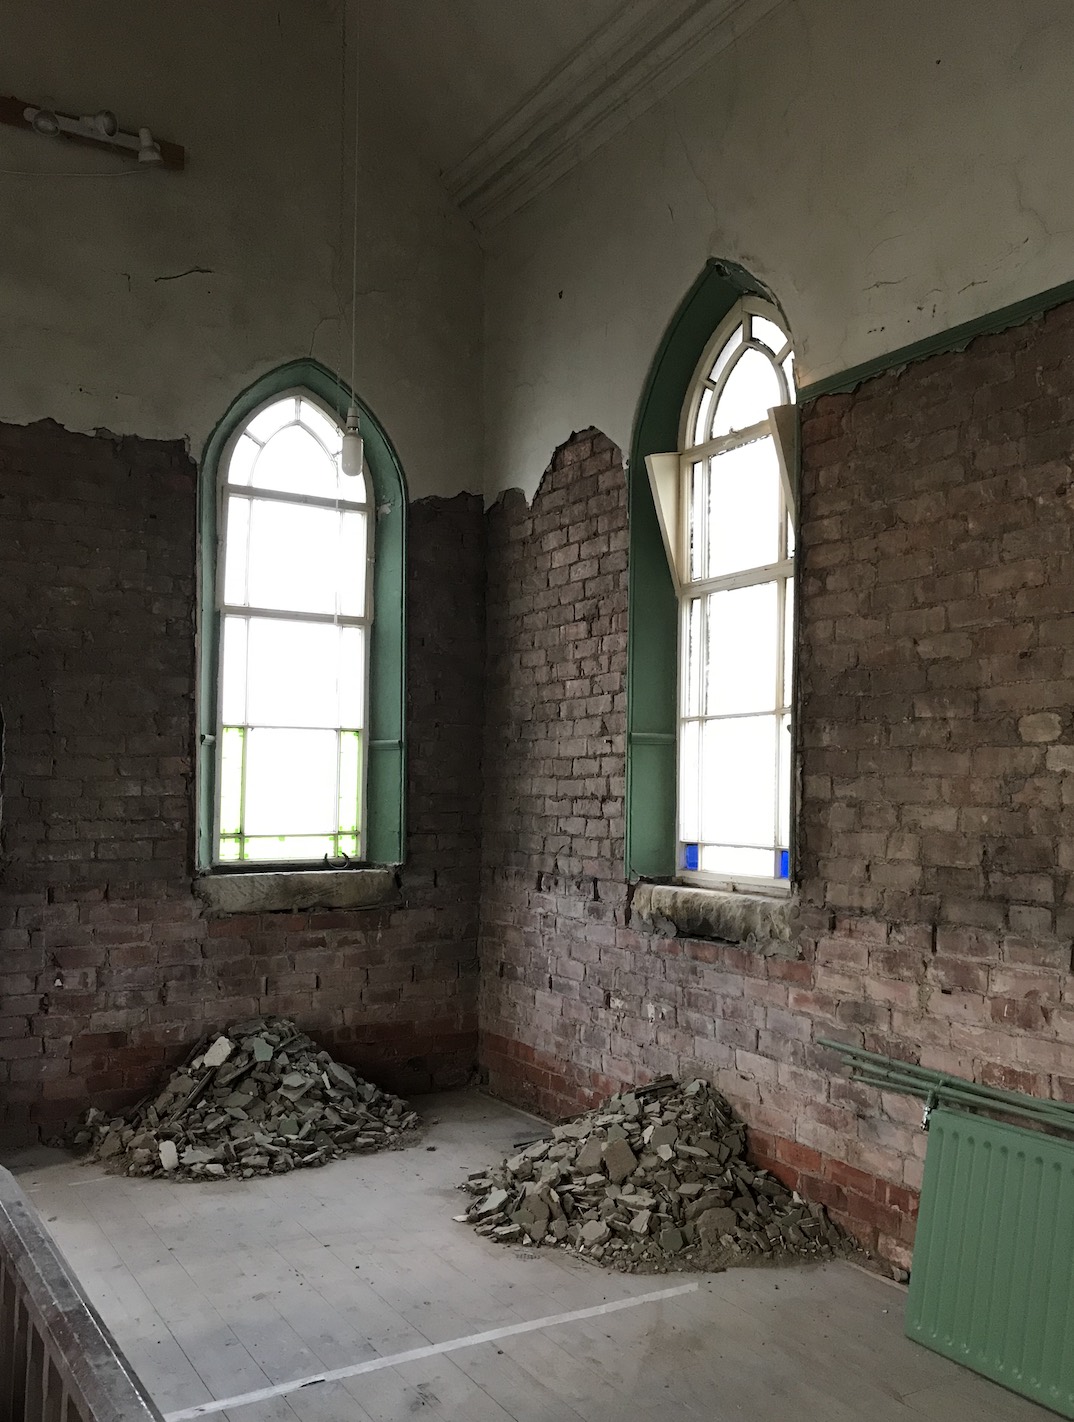

We hired a scaffold tower to reach as high as possible + after a week or so of hard graft the walls were back to brick!


Here’s how it looked through the door on a dark, cold winter night…


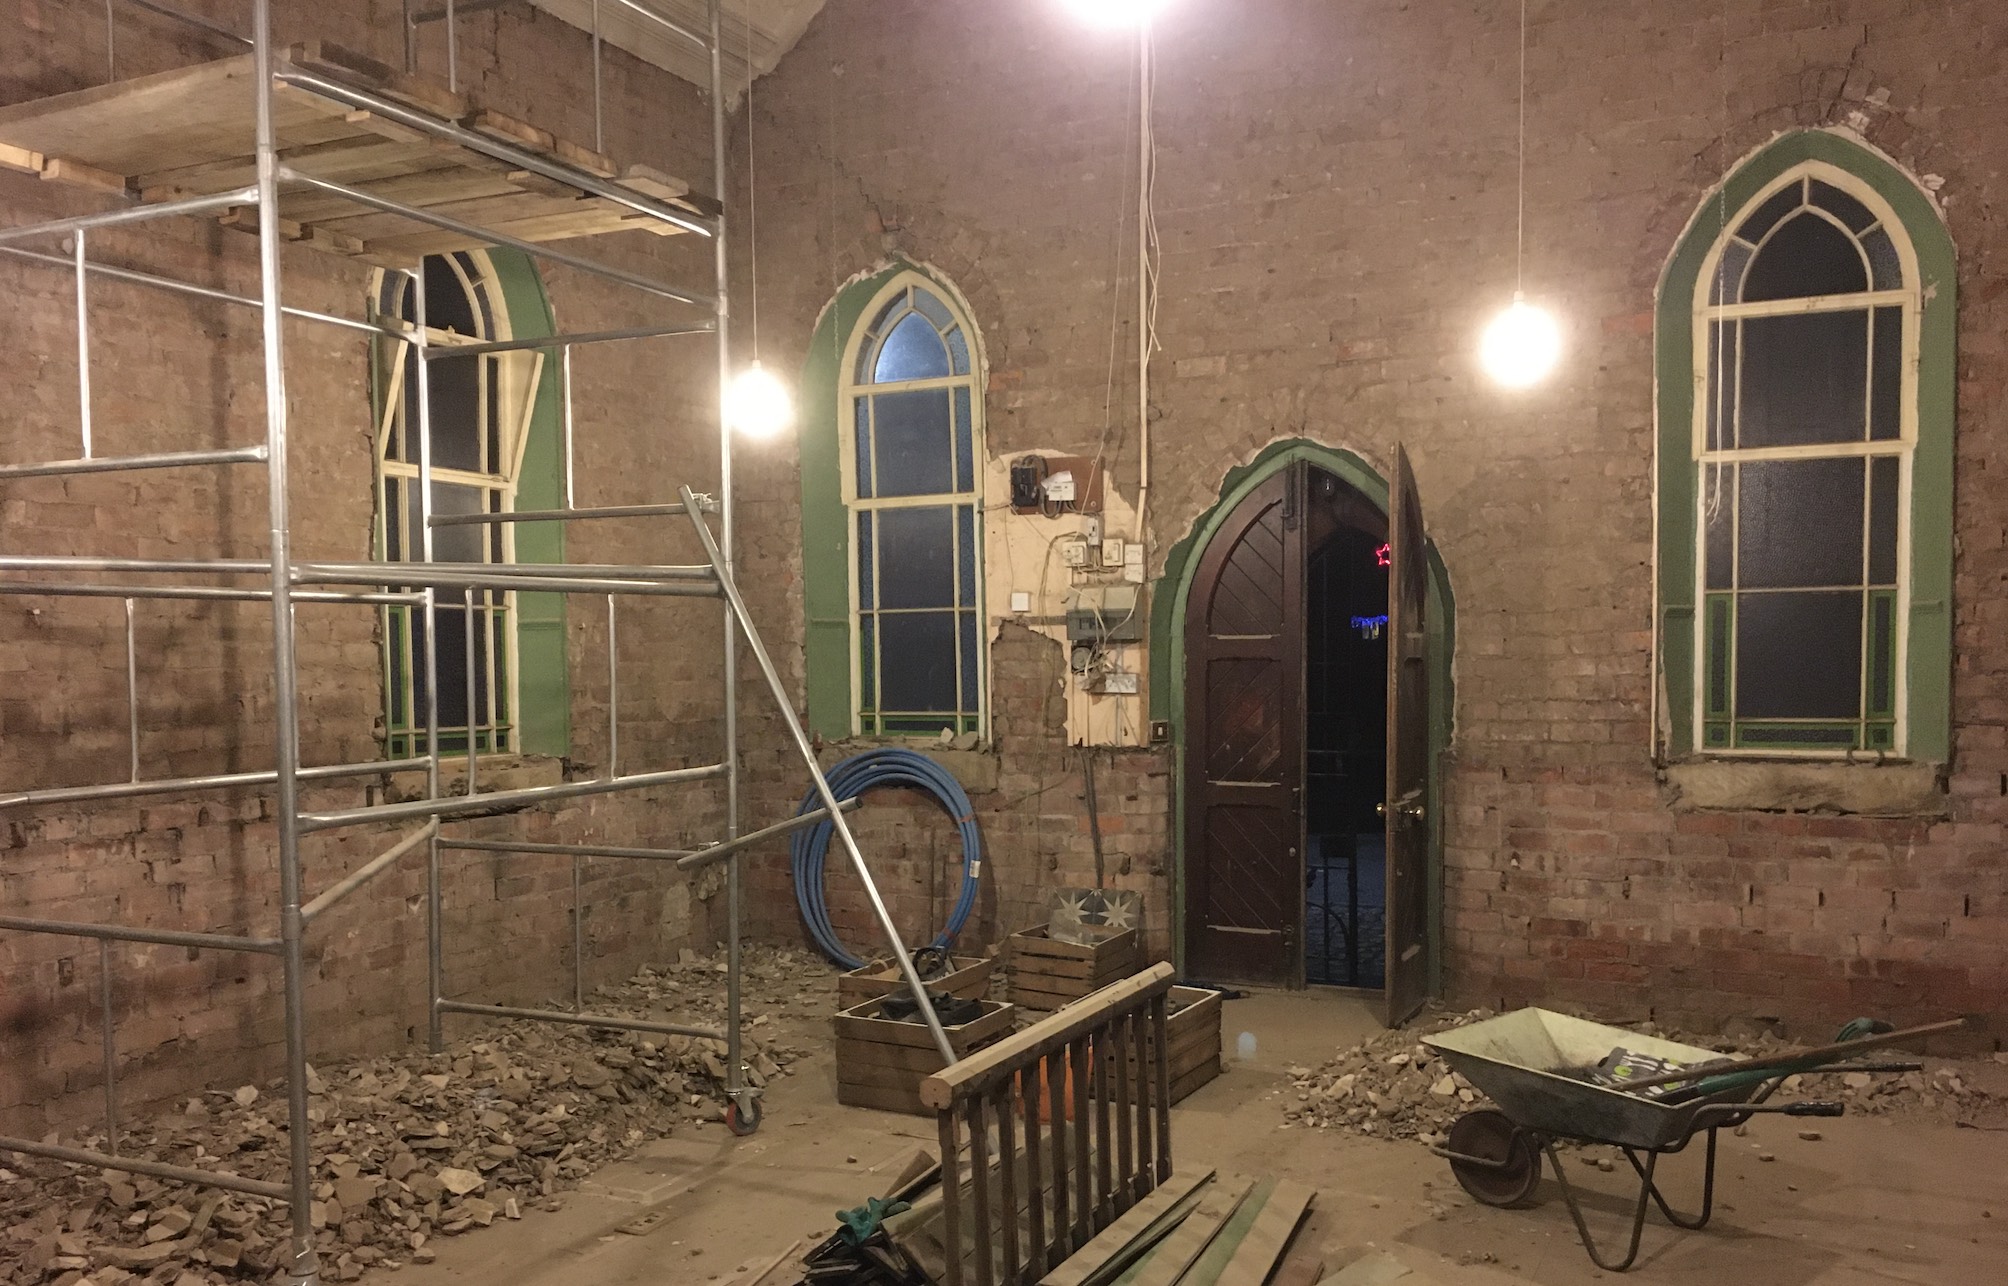
After each ‘chipping session’ we would wheelbarrow the rubble into the centre of the space so that we could then barrow it out into a trailer — because of the location of the site, getting a skip wasn’t a straightforward option! Below shows a pile of rubble looking like a Richard Long installation…!

Conclusion
One of the aspects I was most struck by at this stage in the conversion was how the sound inside the Chapel moved from quiet to noisy! Until this point, there hadn’t really been any noise at all — because of the lovely, serene atmosphere inside we chose to work in silence and at times it felt quite monastic. There was something about working on things like the pulpit that seemed to warrant a peaceful environment, which also helped to fully concentrate on the task in hand.
I hope you enjoyed seeing the progress up to this point for today’s post — I’ll go more into the construction side of things in subsequent Renovation Diaries instalments and explain a bit more about what we needed to do to make the building structurally sound and secure for the future.
I’ll be back with the next update in a few weeks in between my usual houseplant posts. For easy navigation, I’ve made a ‘Renovation’ tab on the homepage to catalogue this series. Alongside sharing the key points of the renovation on my main HOUSE PLANT HOUSE instagram, I’ve got a dedicated secondary page — HOUSE PLANT HOUSE renovates, which I will link here, where I’m sharing more of the project.
This process is actually quite intrinsically linked to HOUSE PLANT HOUSE because alongside being a space for my plants and I to grow, it’s also going to be a place from which I can run my small business. This was something I’ve had to put on hold for a while, with re-locating and all, but it’s a goal I’ve been working towards behind the scenes for the last few years. Essentially, the Renovation Diaries will document the creation of a physical iteration of HOUSE PLANT HOUSE, which I’m really looking forward to sharing.
