One of my favourite aspects of growing plants is propagation, which will come as no surprise to regular readers of House Plant House! For today’s blogpost, I wanted to share an update on how some of the propagated pots in my plant collection have fared over the last few years – from what they looked like when planted to how they are growing now.
Introduction
Documenting plant progress via photographs can be a really helpful way to track growth; tracing how they’ve grown over time through a clear visual record. I know not everybody photographs their plants, but it’s a habit I’ve developed over the last few years which has not waned yet! I’m sure I’m not the only one to scroll way back down my instagram feed to see how my plants and propagations have grown!
Of course it’s worth saying here that to an extent my plant growth is subjective to my own environment and conditions, but I hope you find it useful in offering some comparison to similar plants in your own collection and how they can grow over time. Alternatively if you are new to this aspect of keeping plants, I hope this post provides you with some practical tips and encouragement in growing your collection. I’ve got a propagation tab you might like to explore more, which I’ll link here.
Perks of propagation
Propagating can help us understand our plants on a deeper level and it also allows us to grow our plant collection for free! Plus, pruning can contribute to keeping the main plant healthy and can prevent it outgrowing its location too. If you are short on space and don’t want to feel like the plants are taking over, keeping them at a size that works for you is a game changer. If you are new to plants, I know that it can feel counter-intuitive or ‘bad’ to chop them but this really isn’t the case. I’ll link last weeks’ blogpost here where I go into some tips for a Post-winter plant pep up, basically helping your houseplants to look their best!
Let’s have a closer look at some of my houseplant propagation projects and how things have been doing… Oh and in each case, I’ve written the propagation method in the heading for reference.
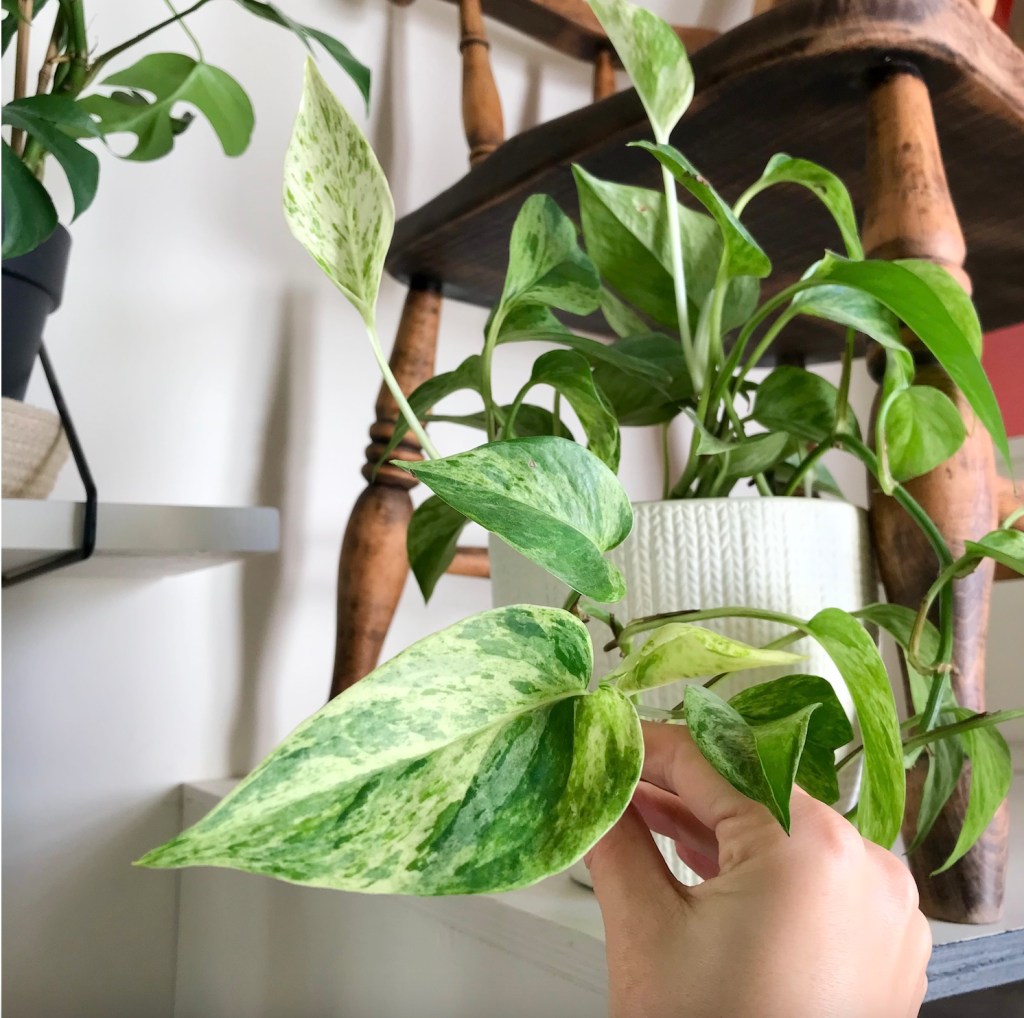
Epipremnum aureum ‘Marble Queen’ Pothos: propagation from cuttings
Of all my Epipremnum gang, Marble Queen is my favourite. The creamy variegation looks excellent against light walls and each new leaf is like a surprise. What will the variegation be like this time?! When I am attached to a particular plant like this, I feel the urge to make a back up plant…or two, or, ahem.. three…
Luckily, Pothos propagation is a breeze and my preference is rooting cuttings in water until the roots are a few centimetres in length before transitioning to soil. I always advocate choosing the propagation method that suits you and your lifestyle. Some plant lovers might enjoy success with soil propagation too (particularly those in warmer climates I’ve found). There’s more on that here.
2018 + 2019:


In the jump from 2019 to 2021, you can see that the little pot has become an actual trailing houseplant now! The variegation is beautiful as always and this pot currently lives on top of my fridge. I’ll have do a ‘fridge plant tour’ soon as it’s changed a little since this photo…
2021:


Related post:
Pilea peperomioides plantlet: propagation from cuttings
Next up we have some of my ever growing collection of Pilea plantlets. I’ve lost count how many of these I’ve propagated over the years! With these, I will generally go down the water propagation method, though if I remove plantlets that have developed some roots, I’ll stick them straight into potting mix.
This is a good example to show that plants really can take on their own personalities over time! Pilea plants come in all shapes and sizes and I think my favourite stage of these plants was how they looked in 2019 below. The subsequent chunk of time involved moving house twice, periods of neglect and less-than-ideal conditions.
2018 + 2019:


So even though these two pots are looking quite sculptural and elegant now, I do yearn for some more compact growth like we see in the photograph above right. This Spring I’m planning on removing some of the baby plants around the base, which look ripe for propagation.
In the photo below, the two plants from above (right) are the ‘medium-sized’ pots in between the front two smaller pots and the larger main plant behind:

Related posts:
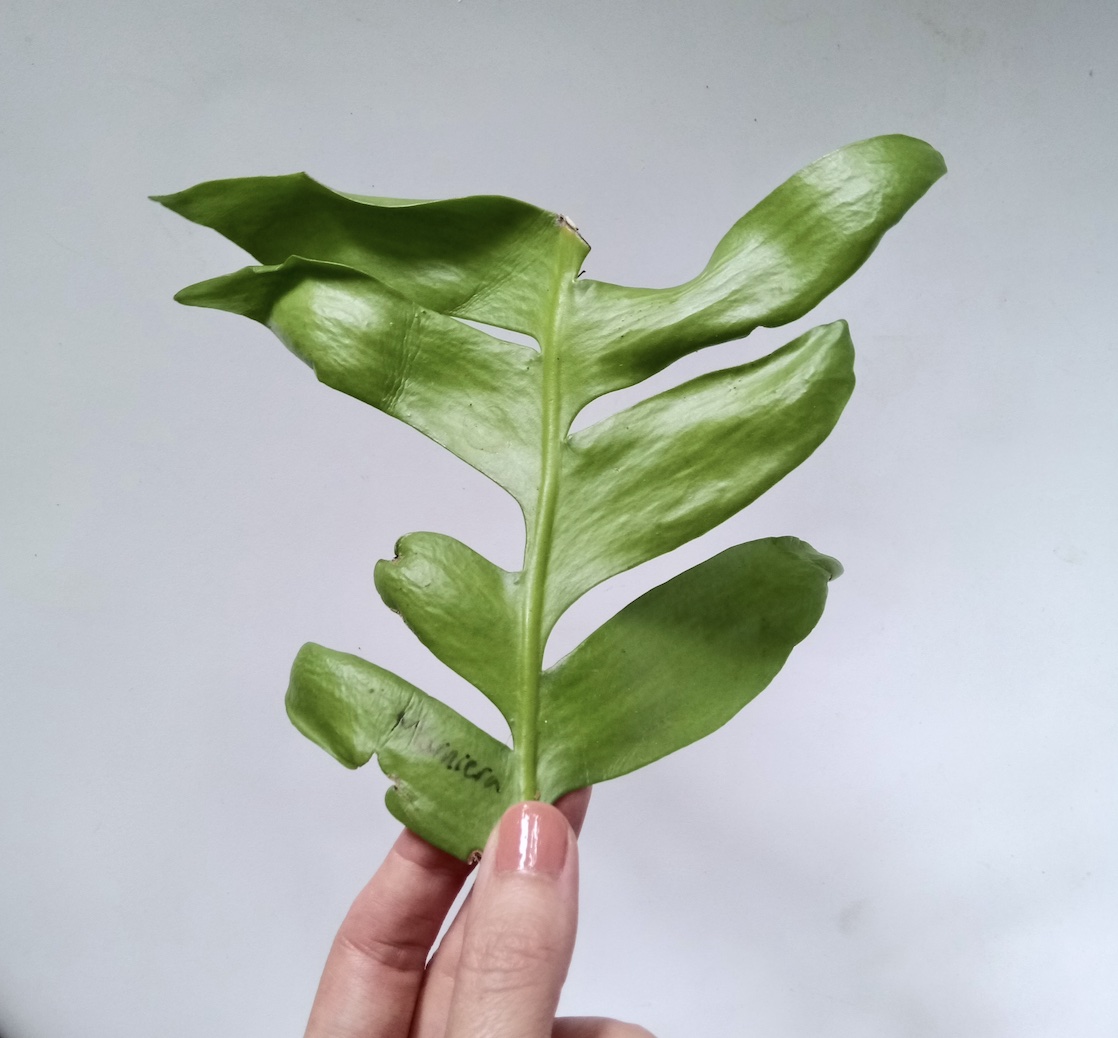
Fern leaf cactus / Selenicereus chrysocardium and Selenicereus anthonyanus: propagations from cuttings
I’ve included two plant propagation projects together for this one as they have a similar look and came as a plant swap from Sweden back in 2018. If you’ve been reading the blog for some time, you might recall the story of lost plant mail where these were stuck in a post office for a number of weeks before landing on my doormat! The photograph below left shows how they looked on arrival.
Clockwise from left, the plants in the photo here are Selenicereus chrysocardium (fern leaf cactus), Selenicereus anthonyanus and Hoya publicalyx (more on that later):
2018:


As a result of their long stint in transit, I opted for water propagation for all these to help hydrate the cuttings. As you can see, above right marks the point where both plants put out their first new growth since planting up. This is always an exciting moment to observe, and document of course!
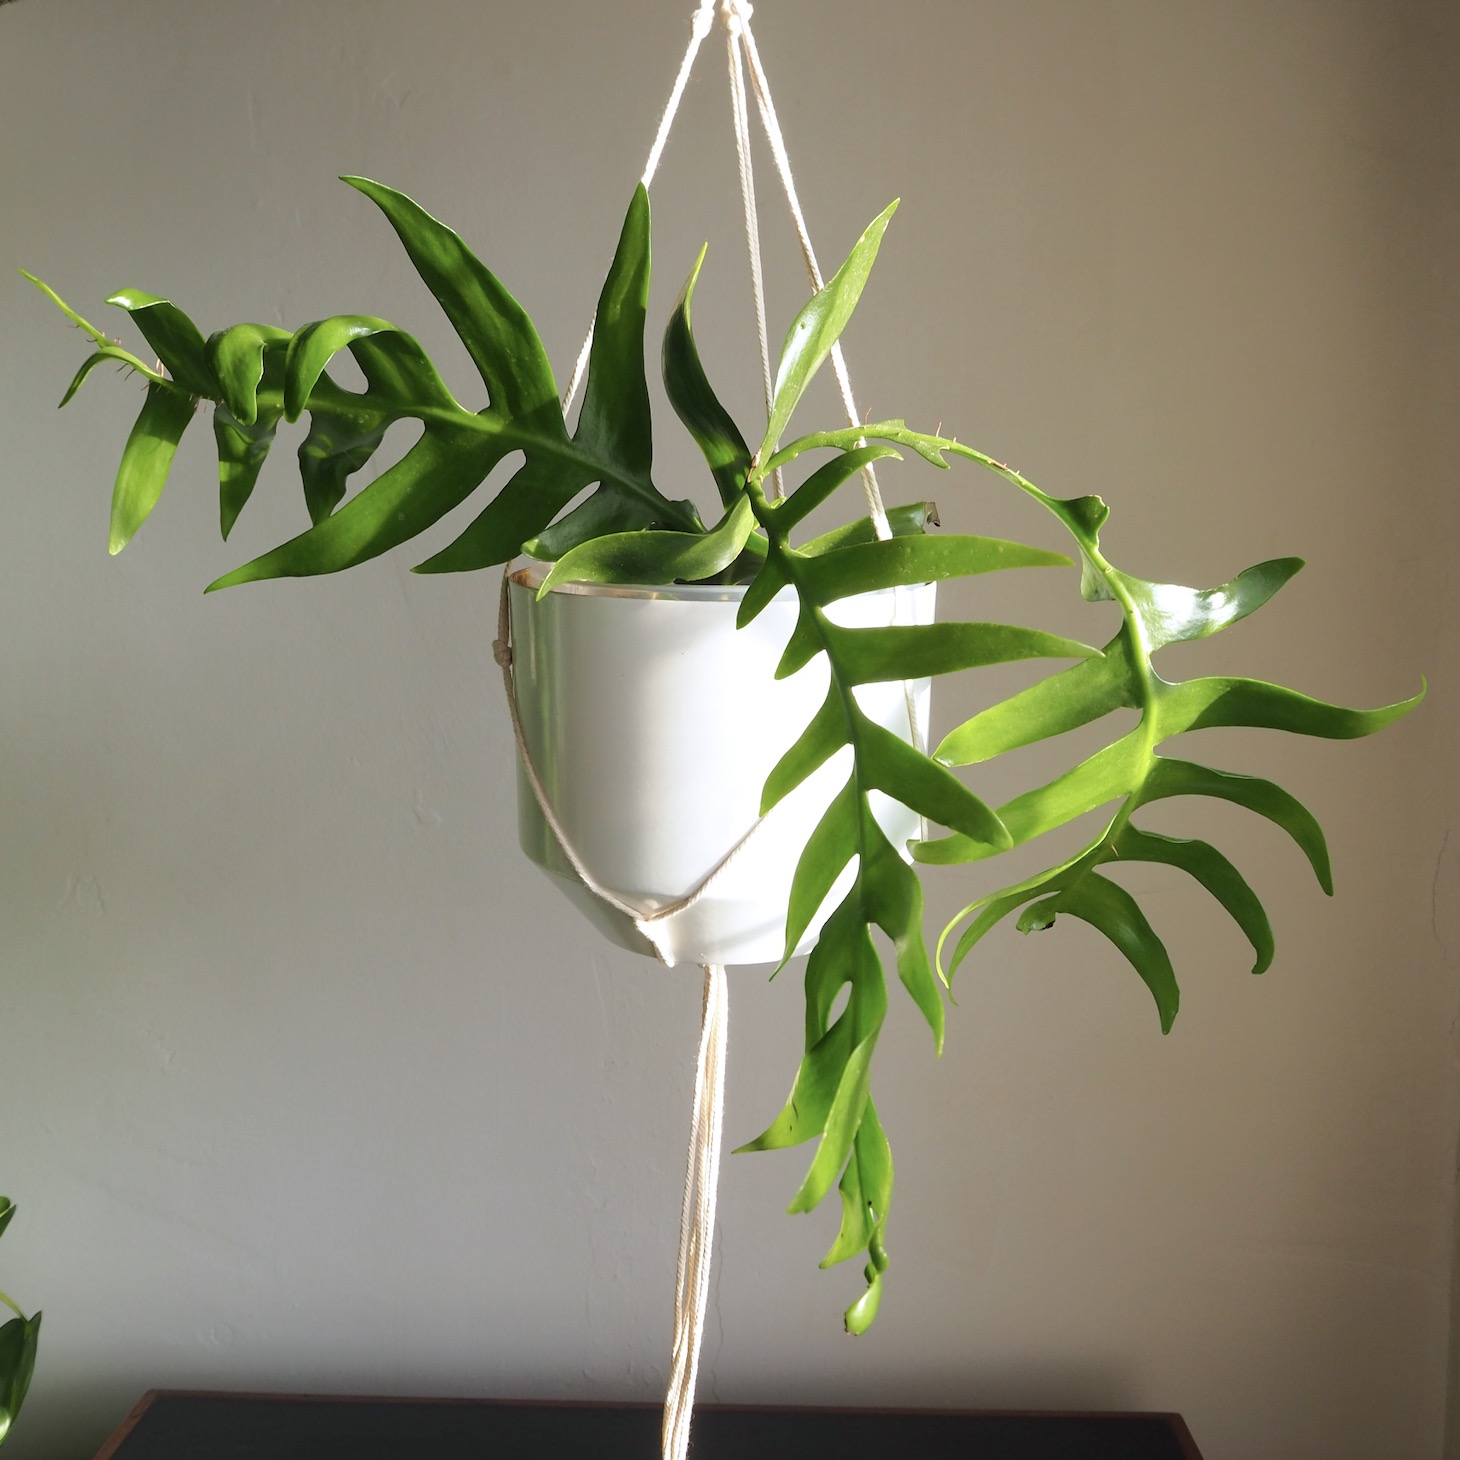
Fast forward to the Selenicereus anthonyanus in 2020 (below) – it’s looking like a real plant now!


Related posts:
Next, propagation progress of my beloved Fern leaf cactus. I’d coveted this plant for AGES! Nearly four years later it still feels so special to me, which is often the case with plant swaps. Aside from that, the growth habit is very cool and it’s now got large enough to trail. Of all my ziggy-zaggy plants, this one is certainly the most unique and my personal favourite.
Clockwise from left… 2018 – 2019 – 2020 – 2021:


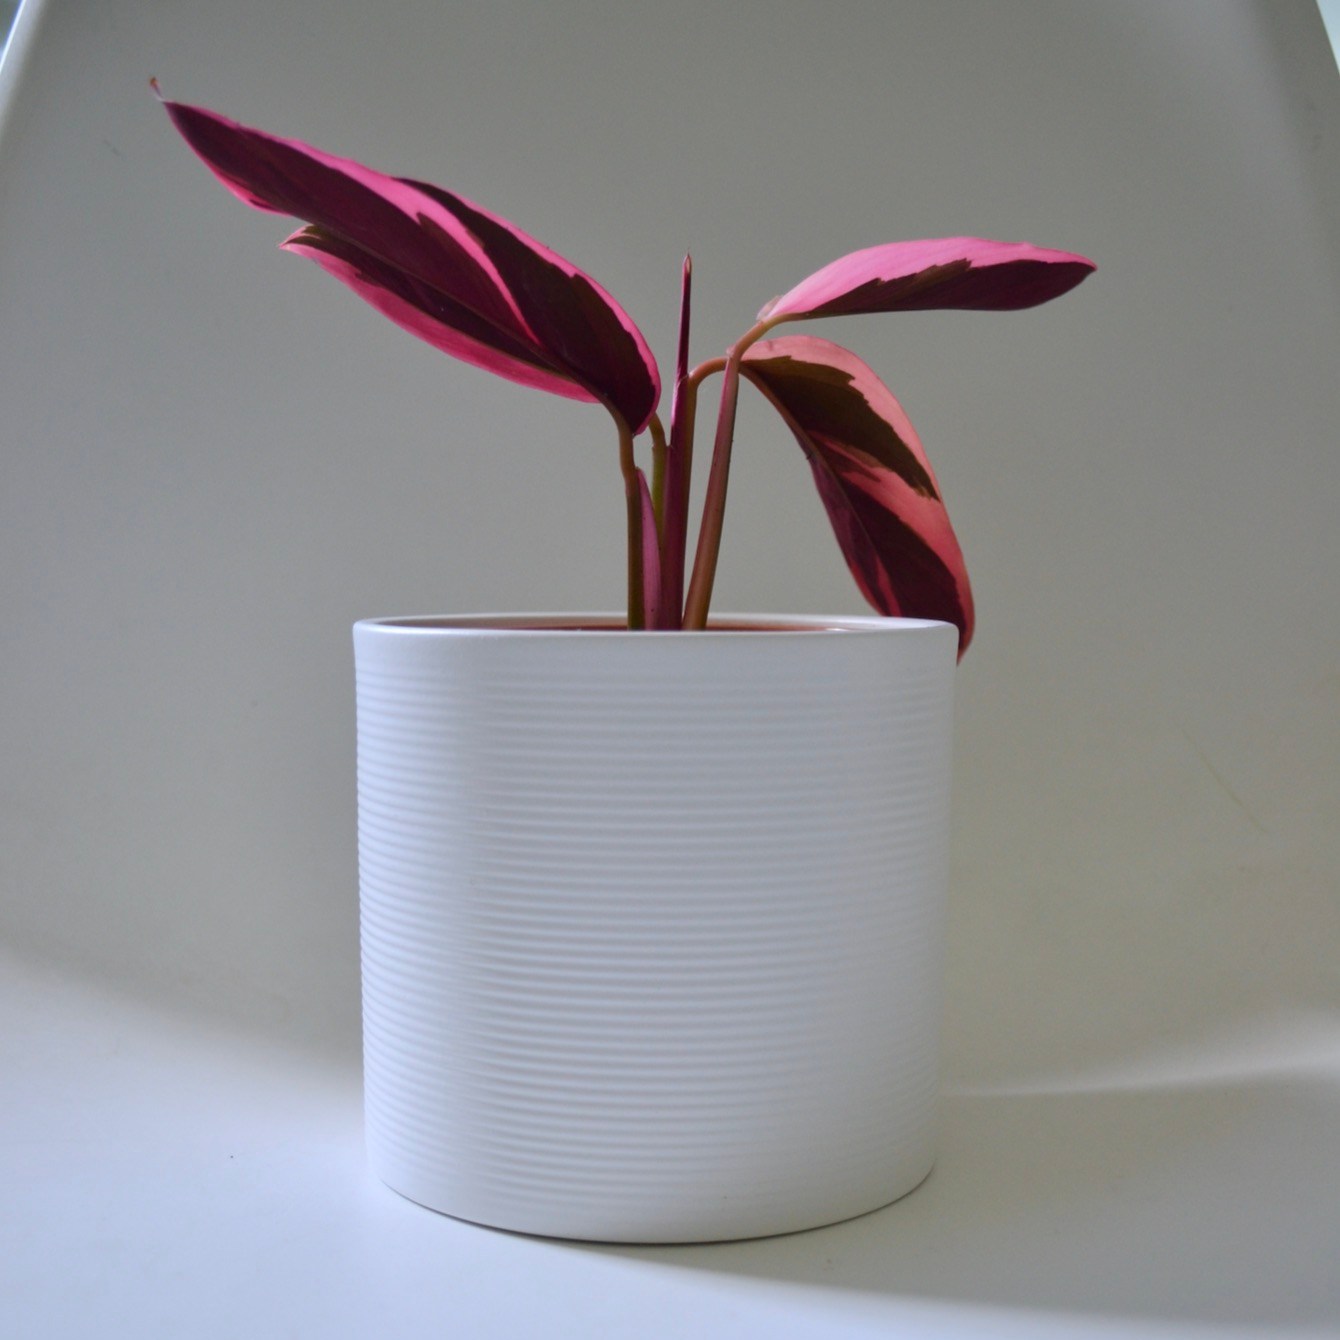
Stromanthe triostar: propagation by division
My main Stromanthe plant, below, has been a staple in my plant collection for some years now and I grew it from quite a small pot. Back in 2018 whilst repotting, I took a small division of the plant and potted it up.


Here’s how the plant grew in it’s new little pot over 2018:


You can see it nestled to the left on my plant shelf here in 2019, it was a lovely colour then:

After four years, the little pot is not so little anymore! I will admit it’s looking bedraggled after a winter of living in a renovation site, but it really needs repotting and I’m hoping it’ll perk up this year with some more attention. I have a feeling my larger plant is also getting to the point where it would enjoy a pot that is one size larger – I’ll be sure to check come Springtime. If it does, I think I’ll look out for a smaller division again as I’ve really enjoyed the process of growing a smaller Stromanthe. I’ll document and share the process of course…
Whilst I think it’s problematic to think of plants as merely ‘decor’ items, there’s no harm in curating a collection – you can certainly design your space with plants. For more, you might like to read A mindful approach to keeping houseplants. With my Stromanthe, I’m envisioning a pot of pink leaves on my coffee table! Aside from the aesthetic consideration, I also think the light conditions will suit it there. Don’t forget about this when planning where you are putting your plants!
Left top + bottom: 2019 / Right: 2022:


A repotting video from the last time I repotted my smaller Stromanthe in 2020:
Related posts:
Epipremnum aureum ‘Neon’ Pothos: propagation from cuttings
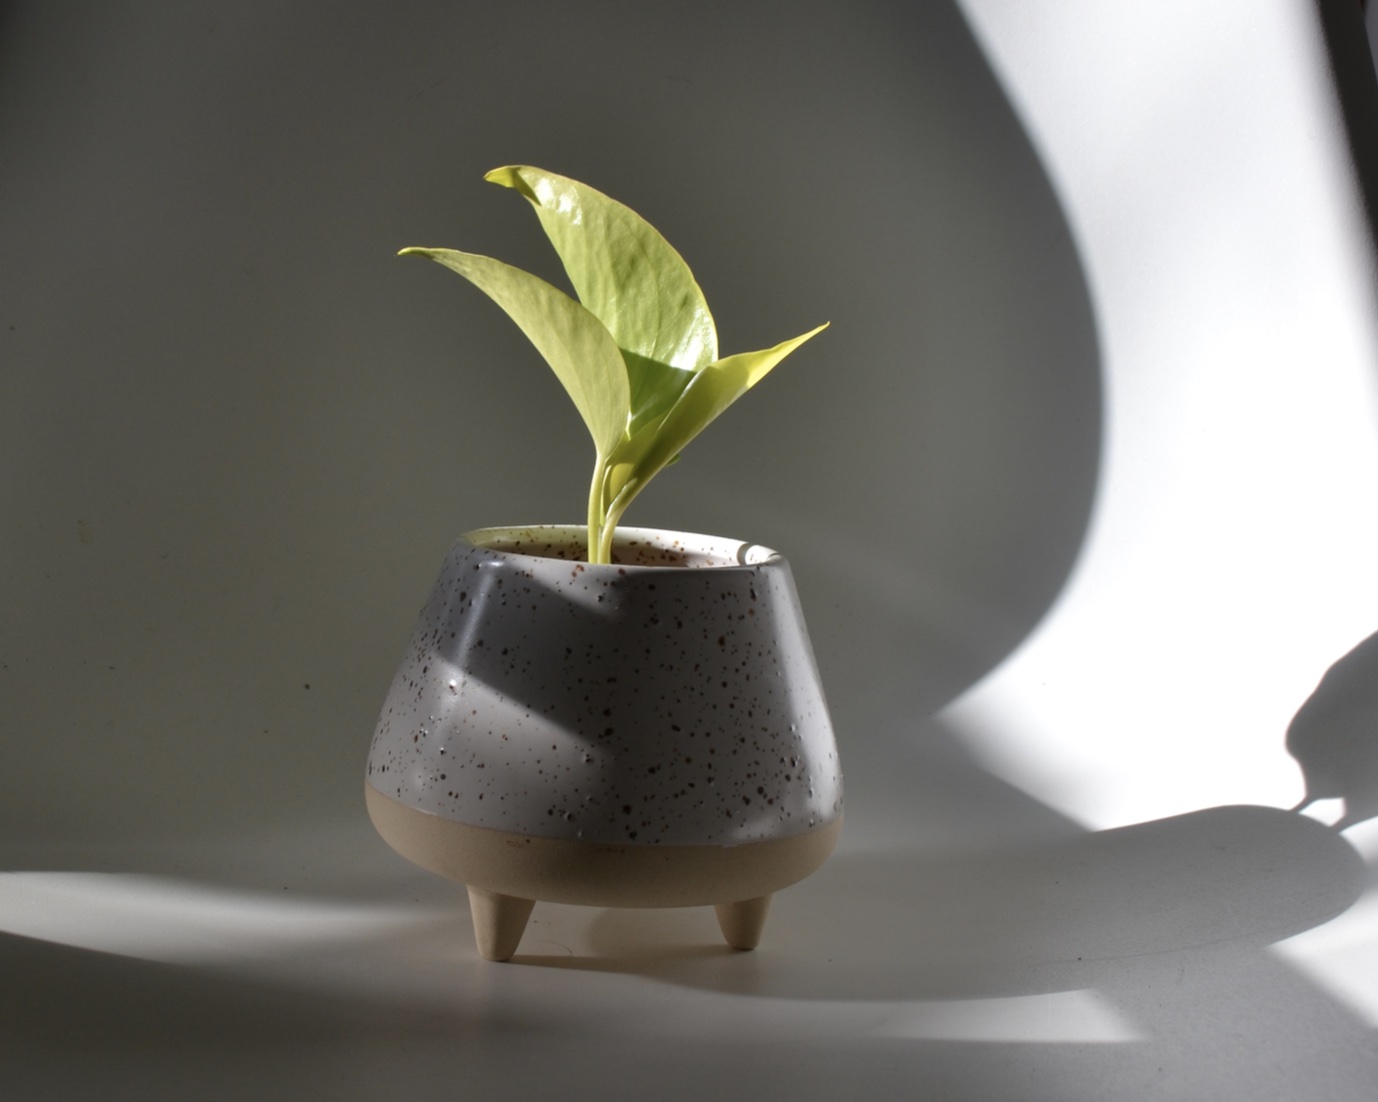
This adorable little pot of neon is a good example of the joys of propagation. First up, a little plant in a nice planter is lovely to look at! Second of all, to observe this neon pothos as it develops and grows is an aspect of propagation that brings me endless enjoyment. I took these cuttings from my larger plant as a bit of a durational growth experiment.
This is from 2018:

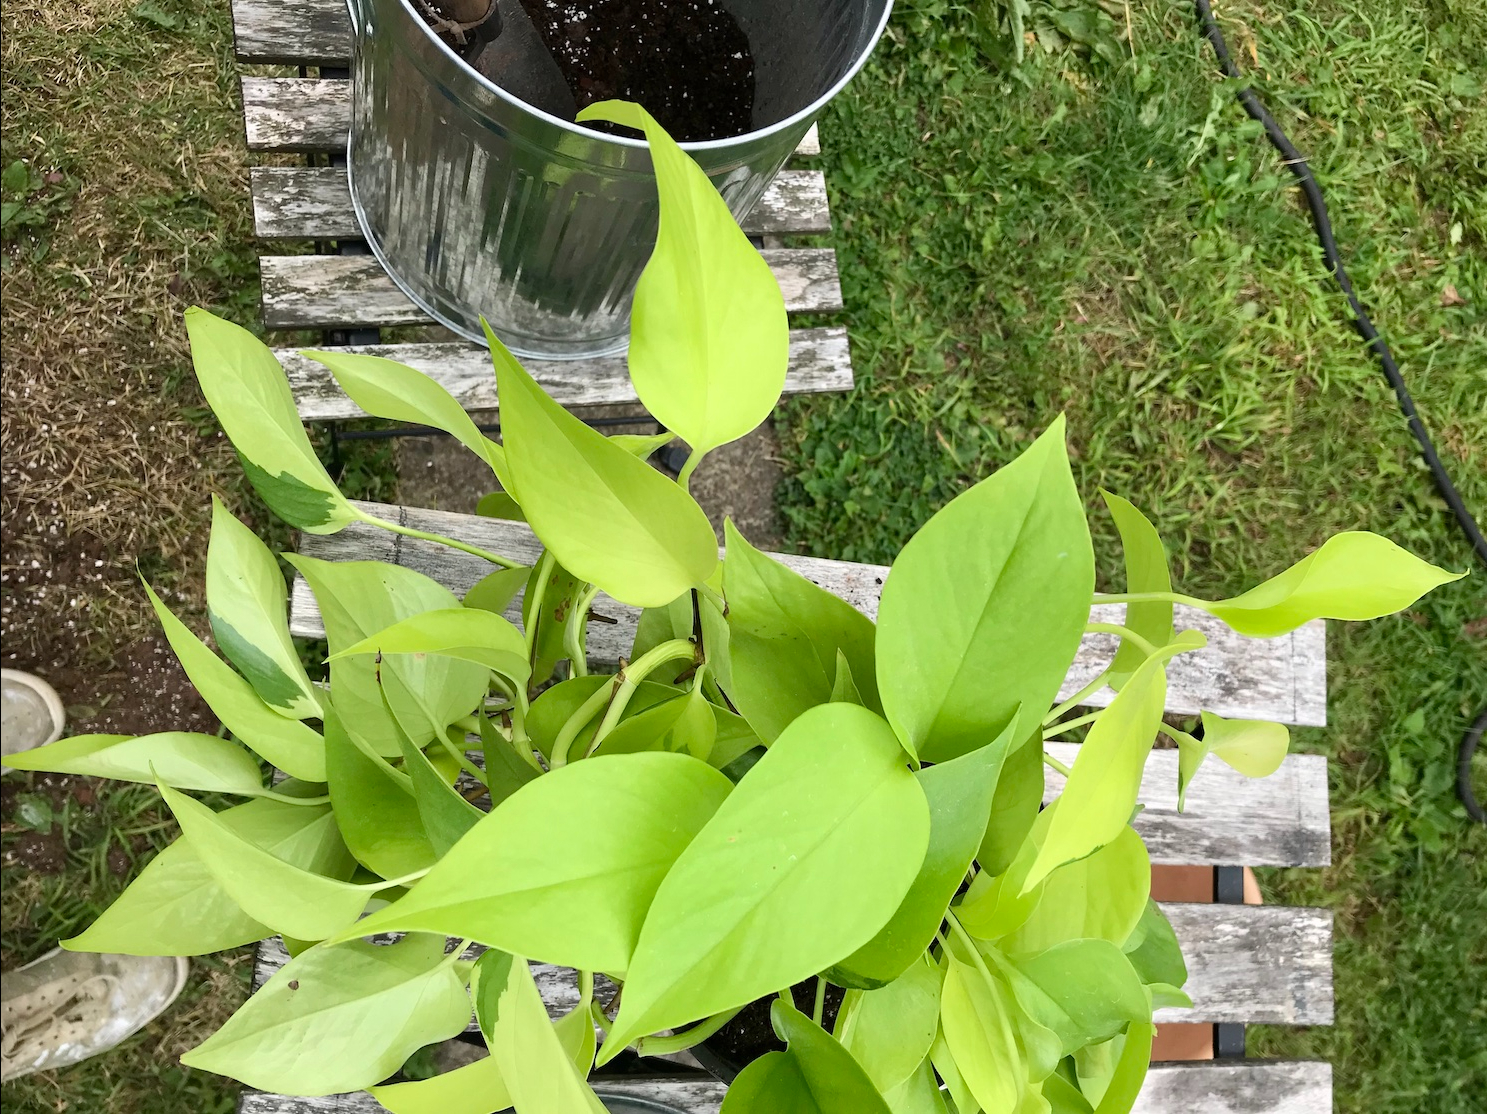
And jumping forward to 2021. the plant has really grown into a zingy pot of chartreuse foliage of much larger proportions:
As with all Pothos plants, they can start to look straggly over time and you might decide to prune them back or propagate some stems to go back into the top of the planter. For me, I wanted to pot my two pots of neon together to create a fuller plant. At the time, I was starting to prepare to move house, so I was trying to amalgamate pots where possible to make the task of the plant move slightly more manageable!
Below shows the new ‘merged’ plant in 2021. From a styling perspective, I always love a neon in a black planter like this as the colour really pops!

Aspidistra elatior: propagation by division
My lovely Aspidistra is one that I shared a blogpost about recently in the context of heirloom houseplants. My two plants are divisions of my grandparents plant that was a key feature in their hall way for as long as I can remember.
After my Grandpa passed away, it was my task to tend to Nan’s houseplants, including their much-loved Aspidistra elatior. These plants dislike frequent repotting but in 2017, I noticed the plant was needing much more frequent watering. It even flowered too! There was hardly any potting mix left in the pot and it was severely root bound. As a result, I divided the plant into three divisions so that the plant could go back in Nan’s jardiniere, albeit with more space to grow. I brought home one of the divisions and my mum took the other pot. One Aspidistra was now living with three generations.
My division in 2017:

Some years later, after Nan passed away, Mum and I shared her Aspidistra between us. The plants are very special ones in my collection and I feel a responsibility to take good care of them! I have since made a further division which means I have three pots from my grandparents plant now. Due to their growth habit, propagation by division works really well with Aspidistras, but don’t mess around with their roots too often. As I said above, they really don’t like being disturbed!
2022:


Related posts:
- Heirloom Houseplants Part 1: How to find pre-loved / old plants (and how to revive them)
- Heirloom Houseplants Part 2: Celebrating my oldest plants
Hoya publicalyx: propagation from cuttings
Back to the plant mail now and one that I mentioned earlier in the post. The Hoya pubicalyx was the other one in the trio of cuttings Hillevi kindly sent to me. This one took quite a while to propagate as the woody stem is not as quick to root as, say a Pothos or Philodendron.
2018:


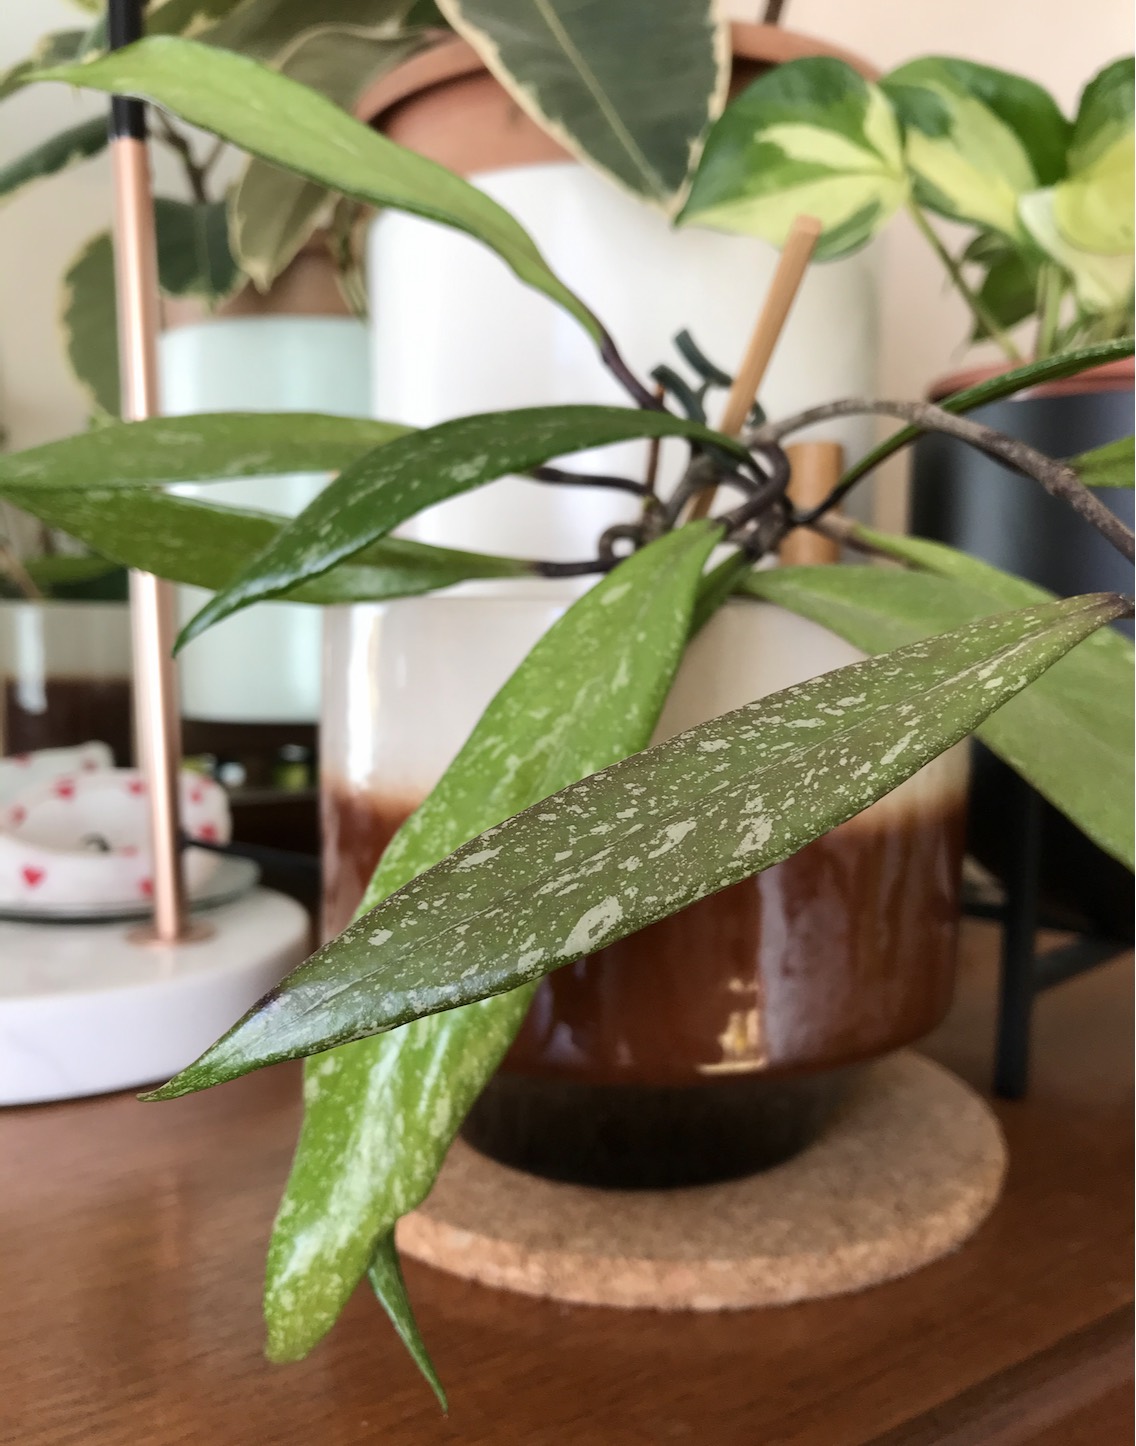
Despite the wait, I’m happy to share how it settled into potting mix and jumping forward to 2021, has started to trail! Hoya’s aren’t the fastest growers but it’s always fascinating to see them start to mature and look more like a plant in its own right.
2021 / 2022:


Related post:
Monstera adansonii propagation from cuttings and by division
Finally, my Monstera adansonii propagation experiment. With its thin foliage, this plant can be a little troublesome! Mine did NOT appreciate moving during Winter into a cold cottage and so I opted to divide up the plant the following Summer. It had been growing around a cane support so I opted to make a few smaller plants and chop up some stems too. There’s a whole post here on the process if you’d like to see more.
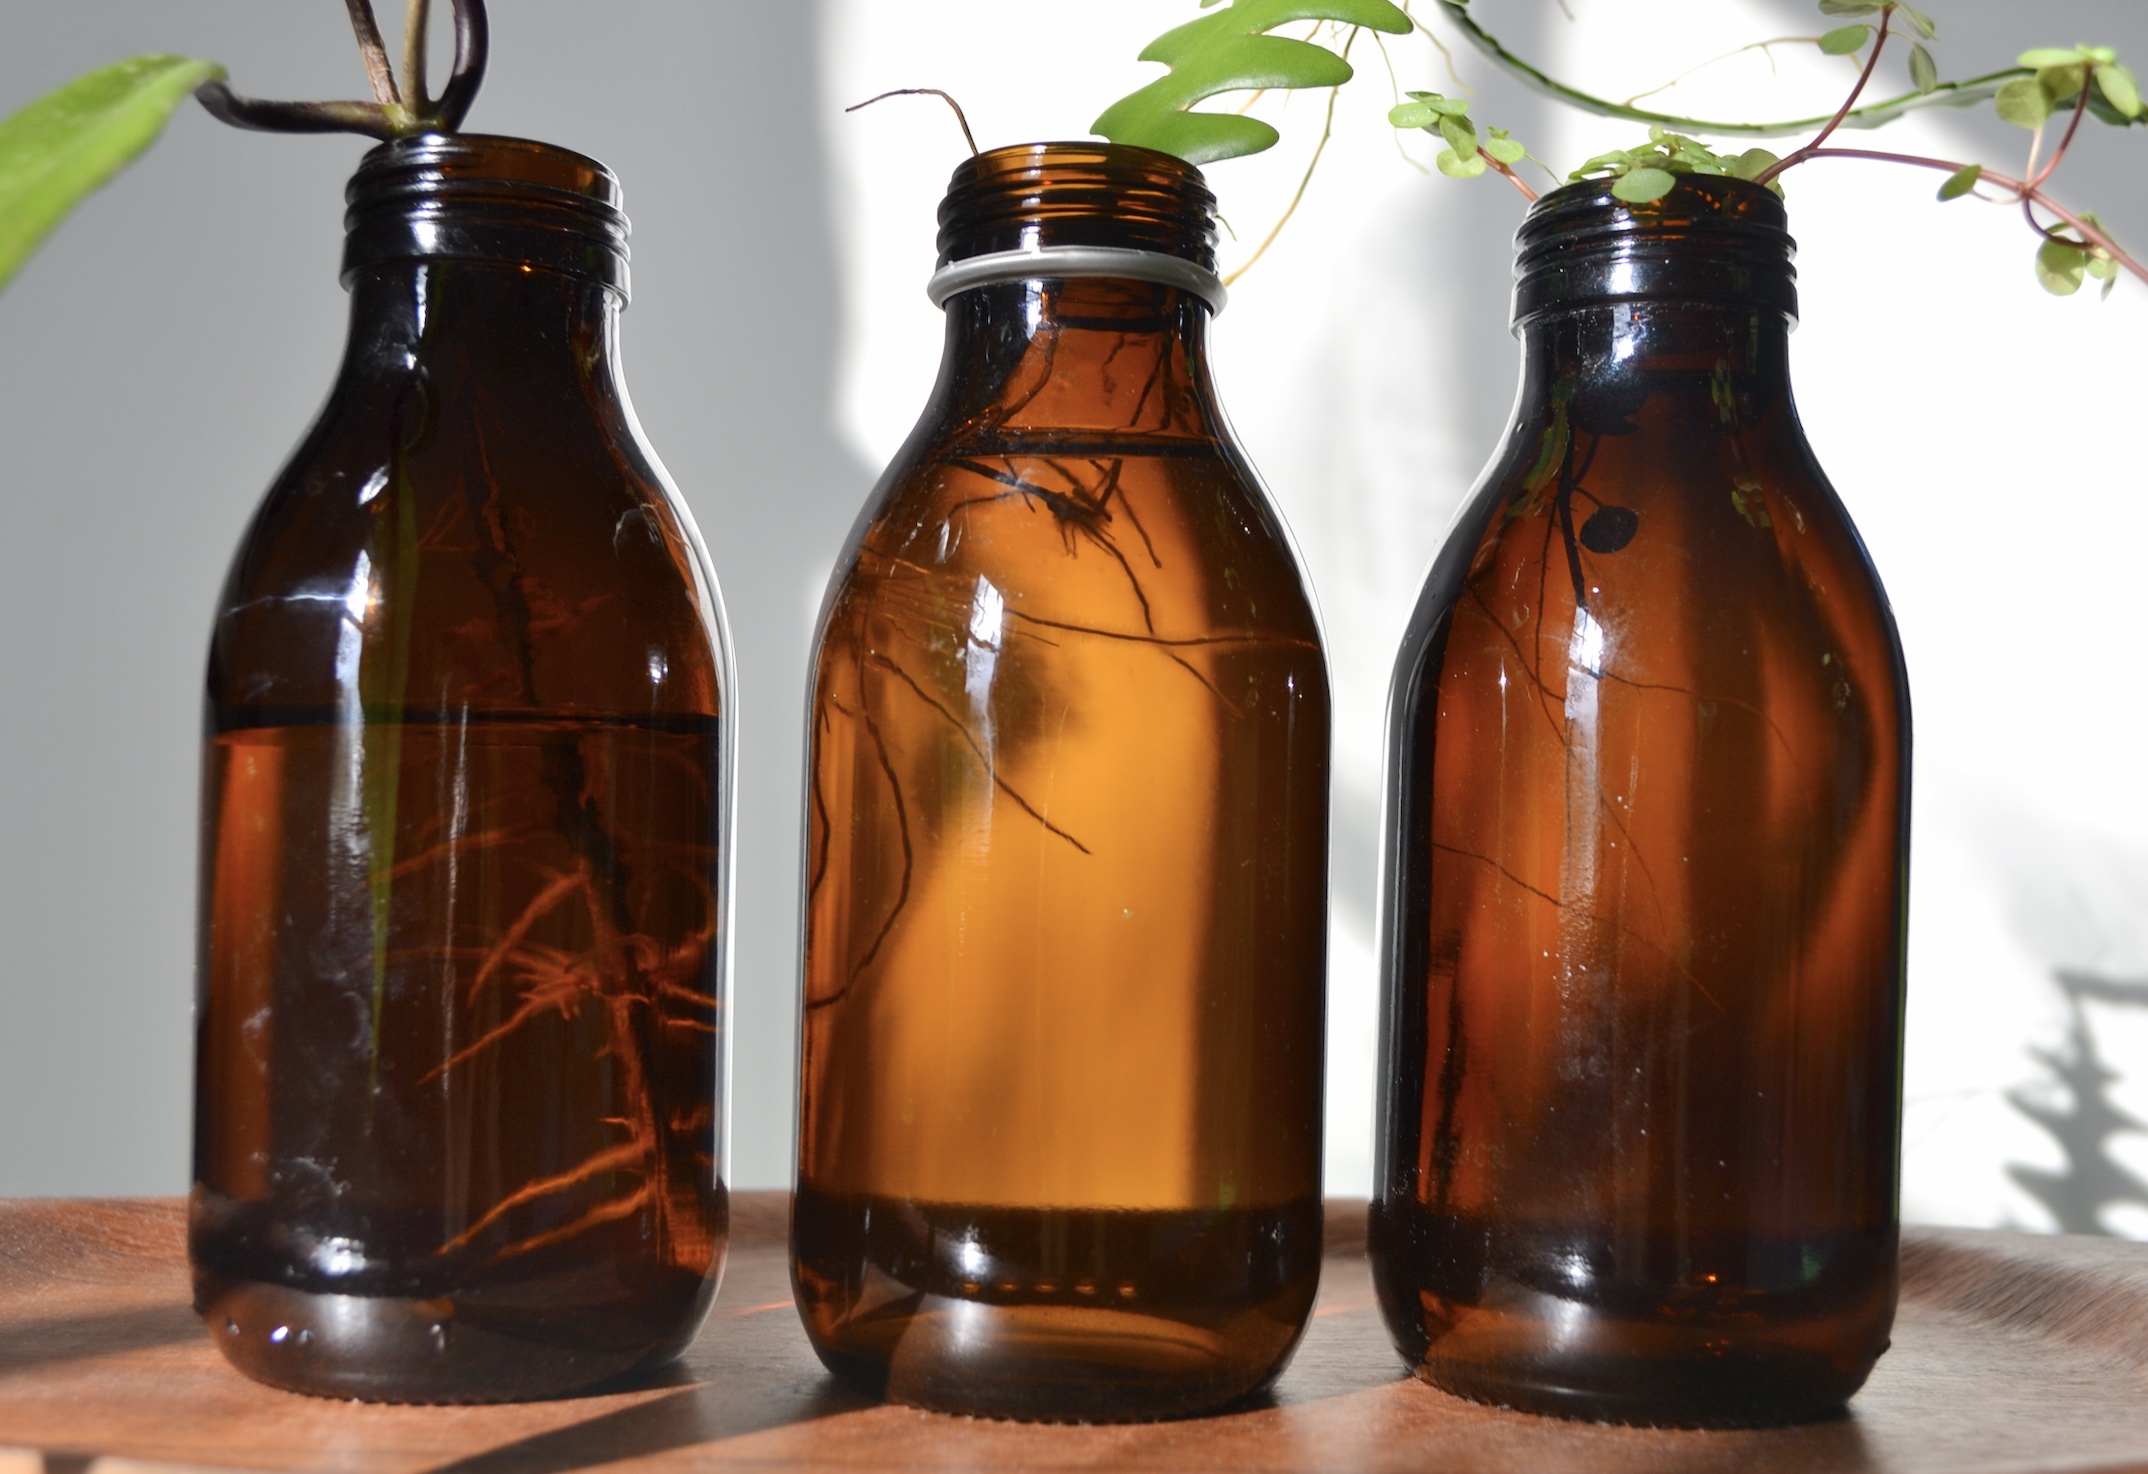
Some of the cuttings I made in 2020, rooting in water:
As you can see below, in 2021 some of the plants I propagated by division were trailing and the cuttings above were rooted and formed a smaller plant:

Here in the new place, one of the plants in 2022:
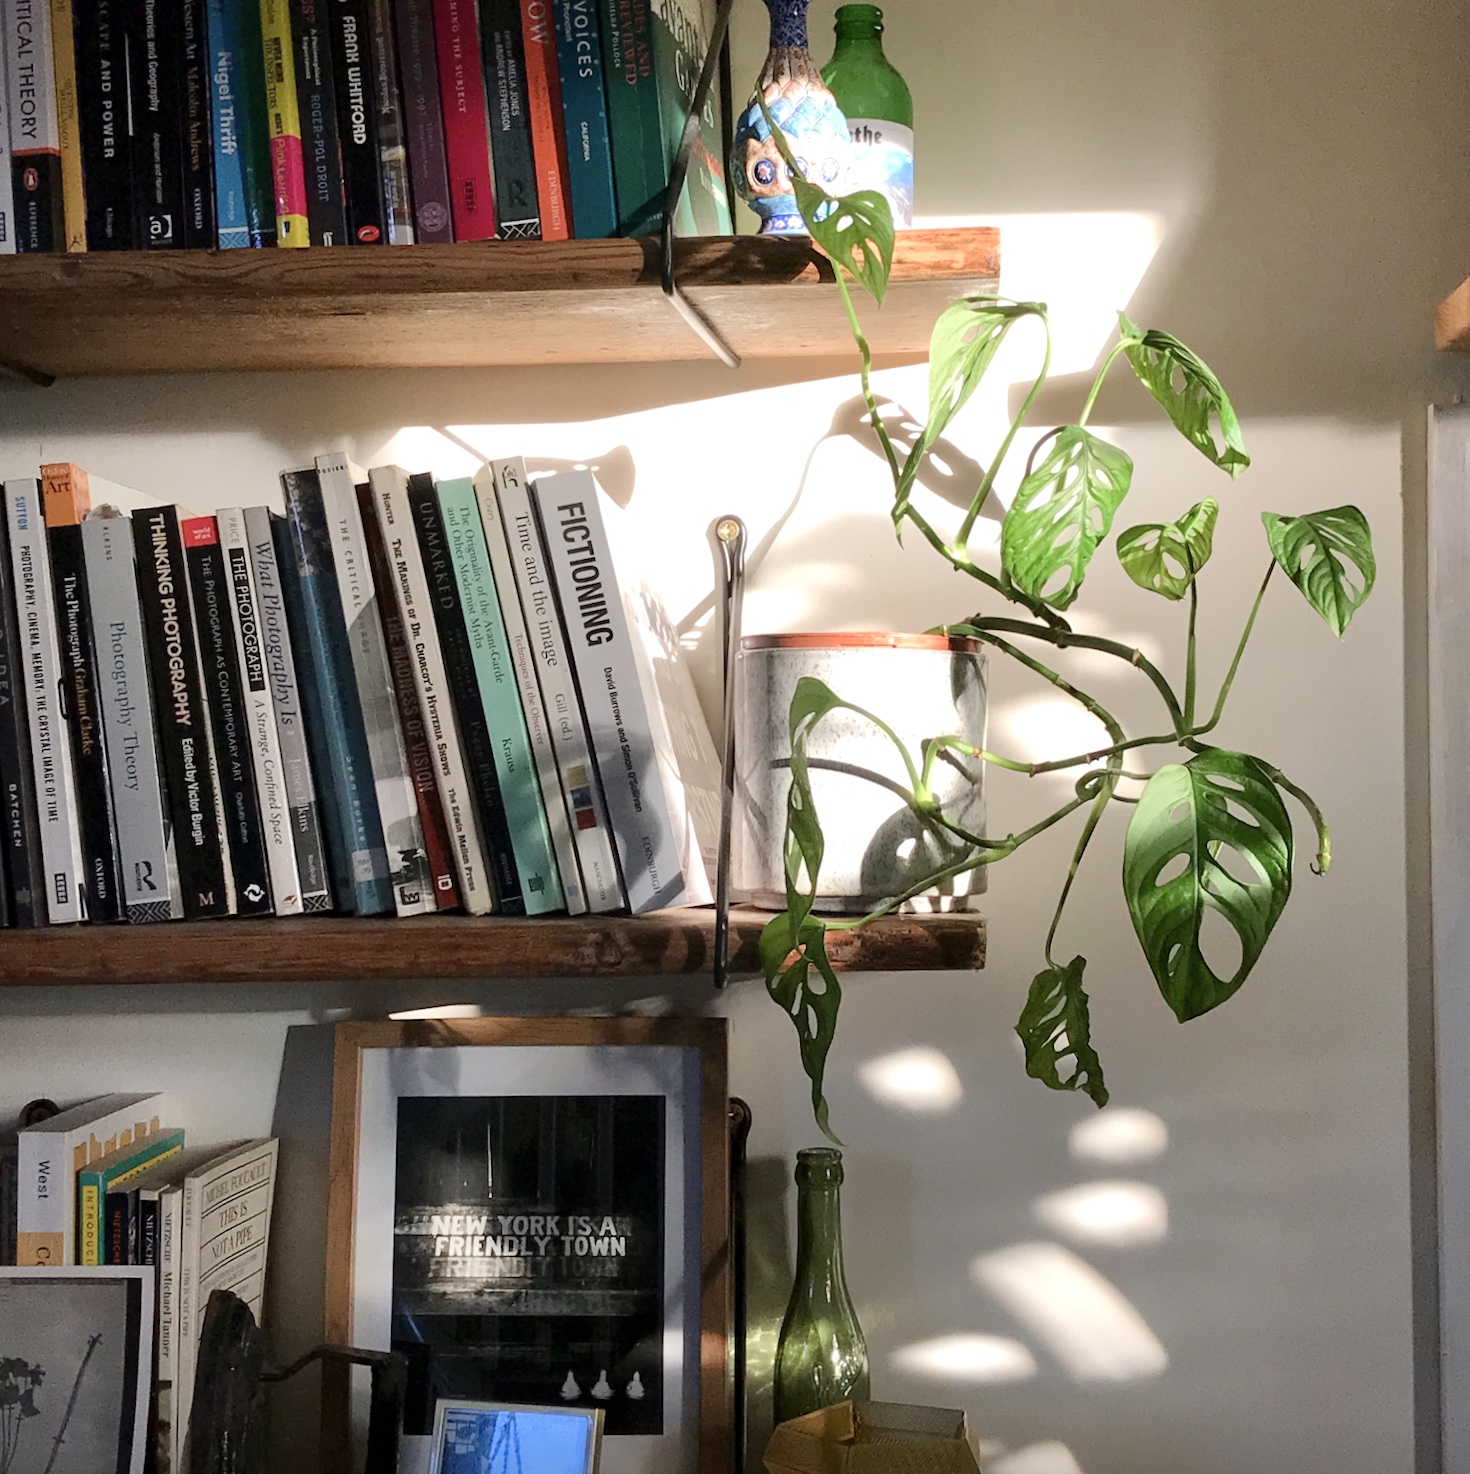
I’ve found Monstera adansonii to propagate well by both division and from cuttings. It’s often dependant on the ‘look’ of the plant in question and if the division has roots. When the renovation has settled down, I’m planning on filling out this plant a bit on top by taking some cuttings of one of the other trailing plants. I love how it looks trailing from the shelf like this!
Related posts:
Conclusion
So there we have it, I hope you enjoyed a closer look at some of my propagation projects. For new plant lovers looking to dabble in propagation, I hope this post offers some inspiration. From tiny cuttings to full plants over the space of a few years, propagation can help us to practice patience and encourages us to take time to grow the plants we love. For some more plant progress, I’ve got a dedicated Monstera post about that here as it’s a frequently asked question around these parts: Plant progress: 5 years with my Monstera.
If you want to see more propagation progress, I’ll leave the links to my socials: here’s my main plant instagram and you’ll find my Pinterest here!
