
In this post, the Chapel interior takes shape in a big way. I will share some of my salvaging finds and discuss how I am incorporating them into the design. We work on the re-building of some of the original panelling and I set about restoring my nan’s old table too. A plastering job of epic proportions commences and everything starts to look a little more like we are getting closer to moving in!
Borrowed lights are fitted
These are the windows from the salvaging mission at the old school where we also found our kitchen window. I was looking for something that would sit above the cloakroom and bathroom doors as borrowed lights. Borrowed lights are one of those traditional terms that aren’t always widely used. But I’m referring to that space above internal doors, which in old houses was often glazed in order to maximise the light in the home. Despite not being used in this way originally, you can see in the photos below that the measurements were very well suited to what I had in mind!


The window with 3 panes works well above the downstairs cloakroom doorframe to relate proportionally to the kitchen window at the other end of the space. Additionally, the double-paned one suits the upstairs well.


Re-purposing the T&G panelling
Next up, we got the bundles of tongue and groove panelling out of storage in order to create some new panels to be used in the porch. Please ignore the slight chronological timeline jump here as the walls are still uninsulated in these photos. Everything was happening so fast at this point! Anyway, we laid out the boards and re-assembled them in the original configuration so that the seat shape was present. This is where the pews went into the Chapel wall. We fixed the T&G onto two batons to create two panels to go either side of the porch once insulated.
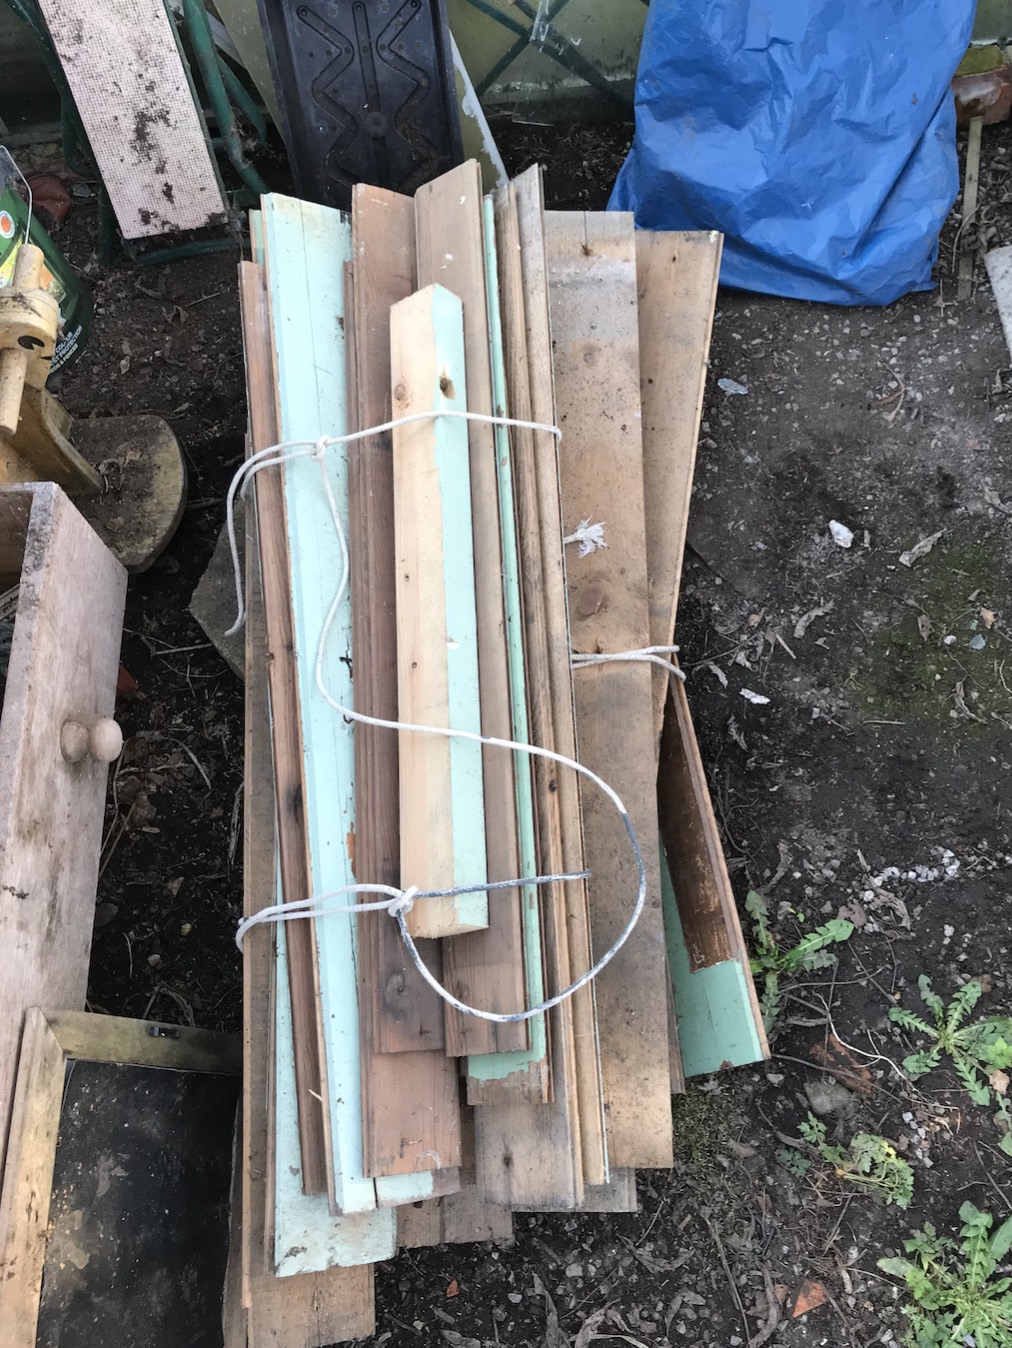
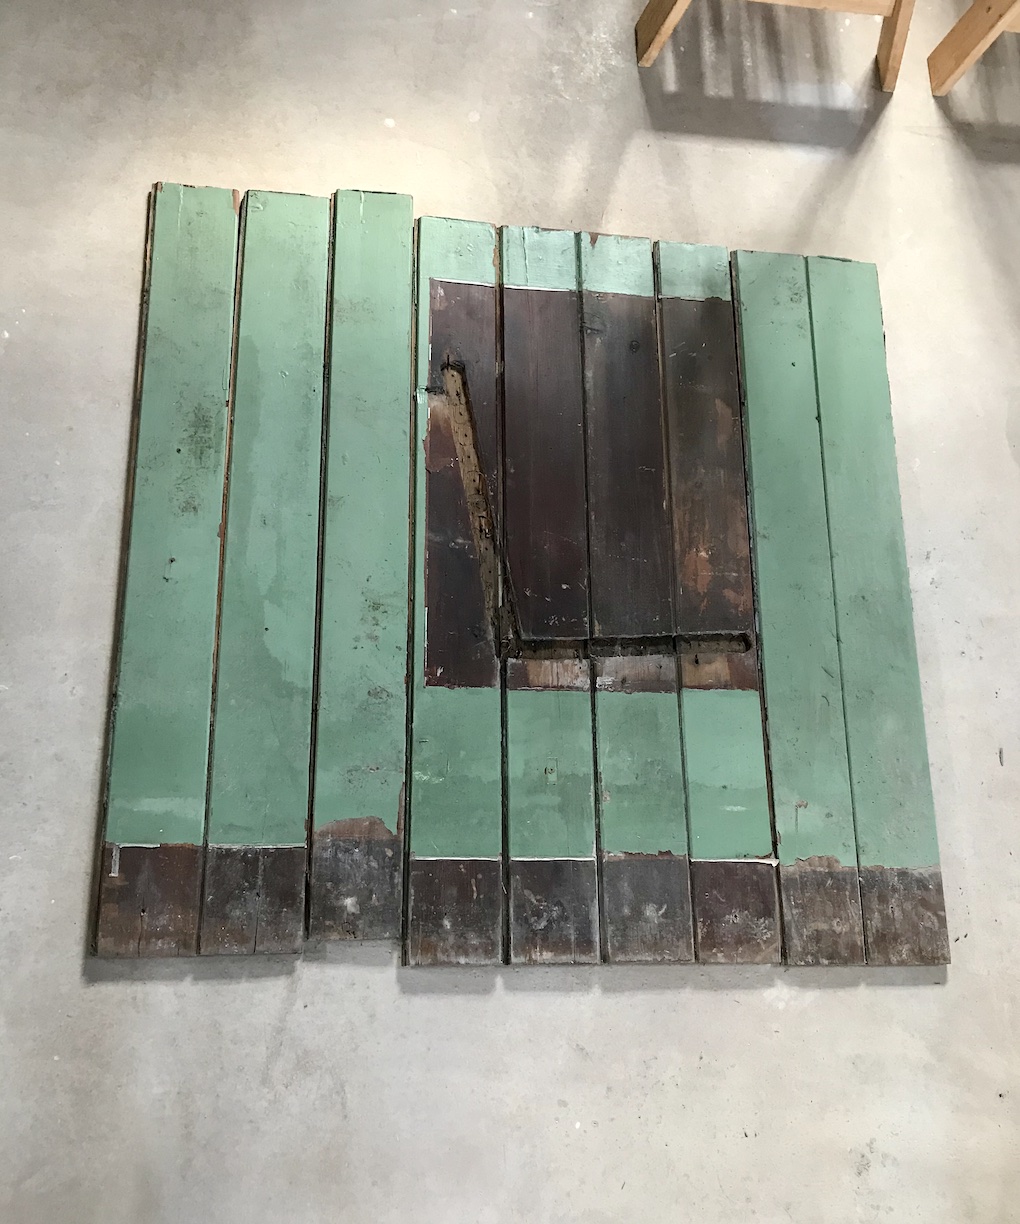

It might sound like a little detail, but we wanted to ensure we were salvaging a seat shape from each side of the Chapel in order for the ‘L’s to face towards the pulpit, just as before!


Lots of sanding and treating for woodworm just in case:


After priming and a few coats of paint, here they are:

When we install them, I’d like to inset the ‘L’ shape with some reclaimed timber to accentuate the seat detail. Whilst new tongue and groove panelling isn’t hard to come by, we wanted to use as much of the original wood from that Chapel in the design, whilst salvaging the other elements like the doors and windows.
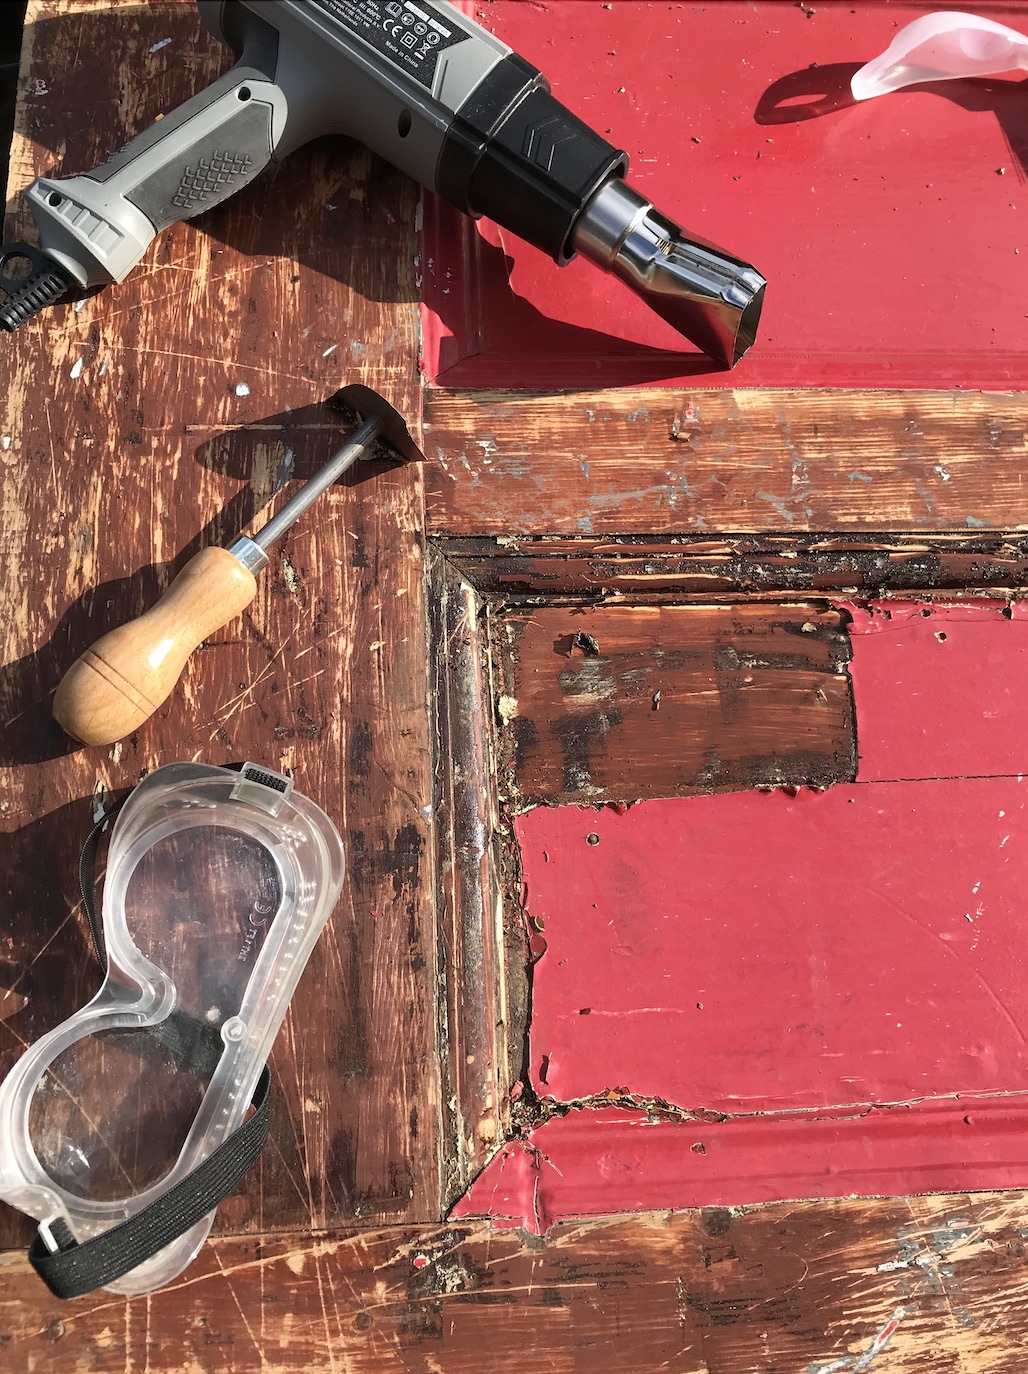
Starting to work on the red door
You met the (Manchester Pub) red door for the first time a little earlier in the project. Whist I love it like it is, it’s now time to get rid of all those layers of paint so that we can get it in a condition to be regulation standard. Salvaging old pieces like this is endlessly fun to me, even though they can take a lot of work! We need to bring our doors up to meet fire regulations so will be using intumescent paint, fire glass etc. But more on that again. It’s going to be a project we chip away at for a while… Because let me tell you, fire glass is not cheap.


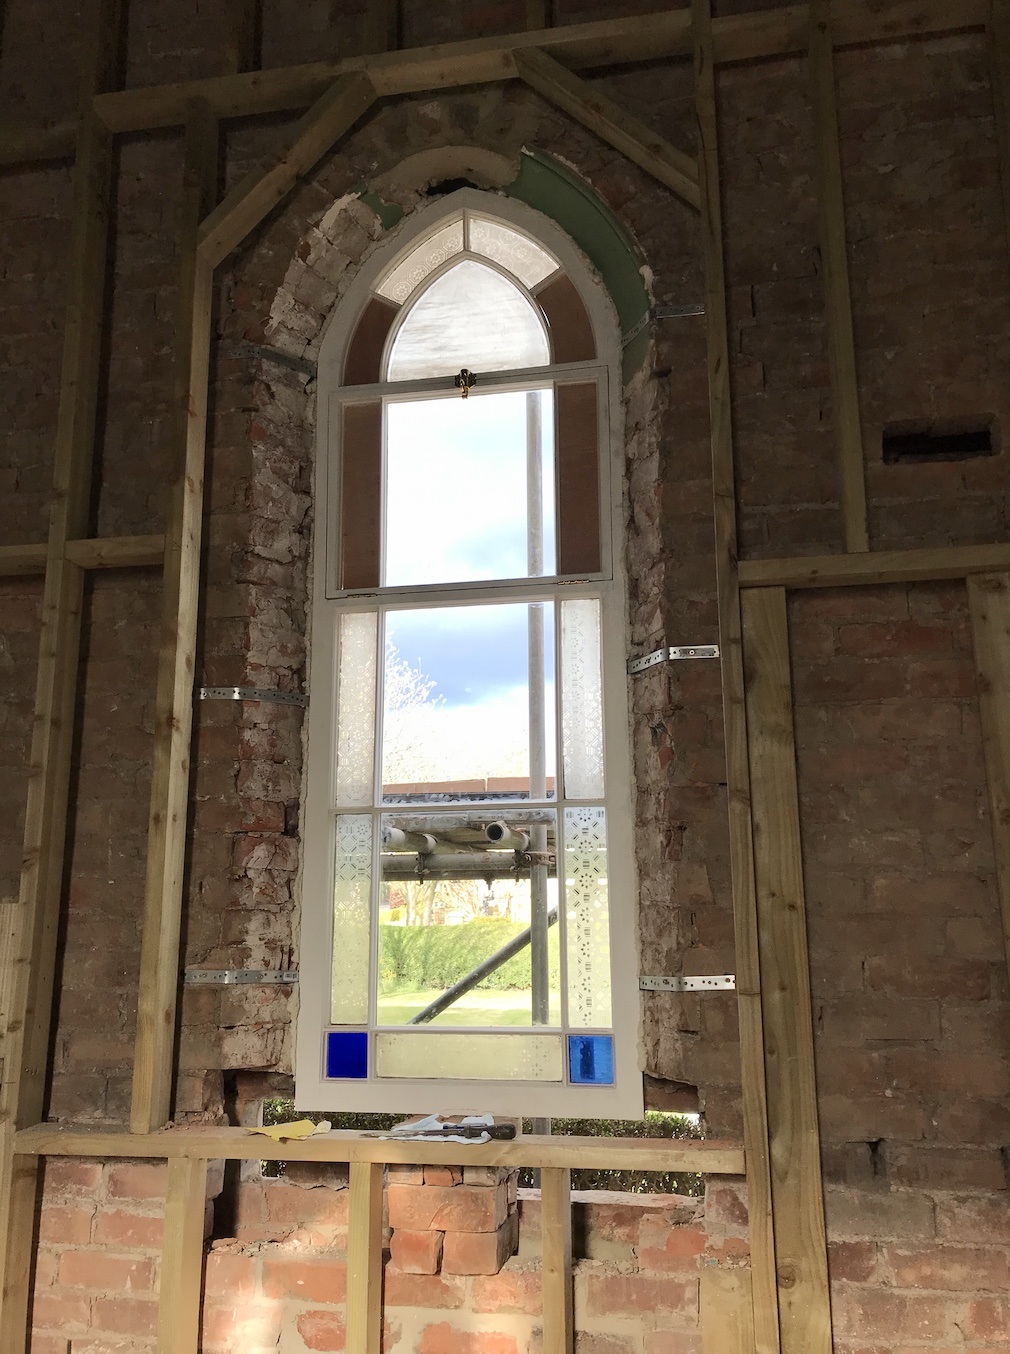
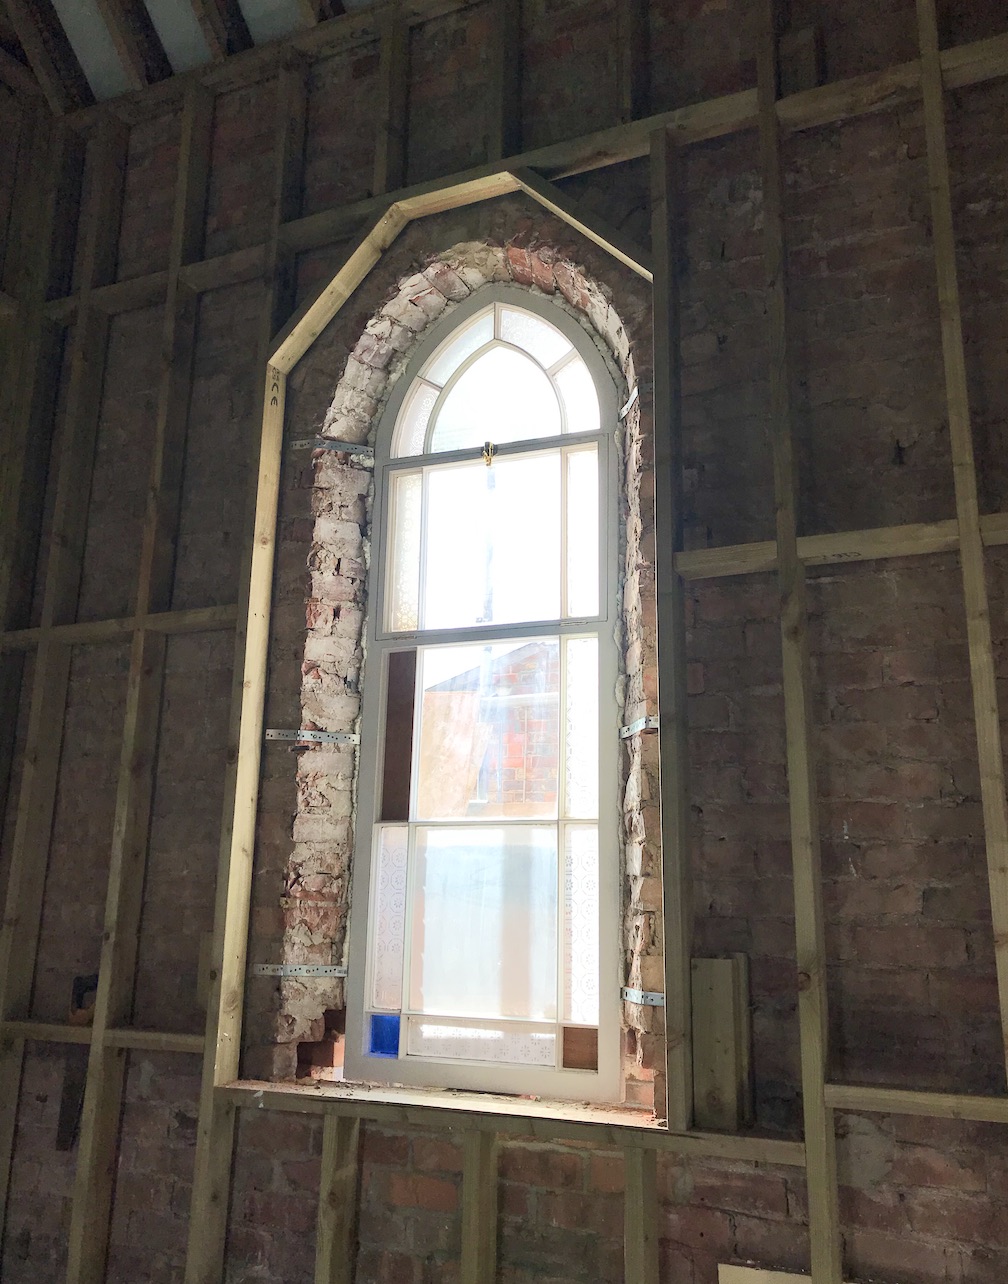
Windows come back
Another momentary timeline jump for a second while I show you the restored Chapel windows arriving back on site. I’ve actually missed those beautiful blue squares!

There are more photos in my Instagram post below – swipe to see the carousel of images:
Boarding progress and windowsill progress in the evening sunshine…


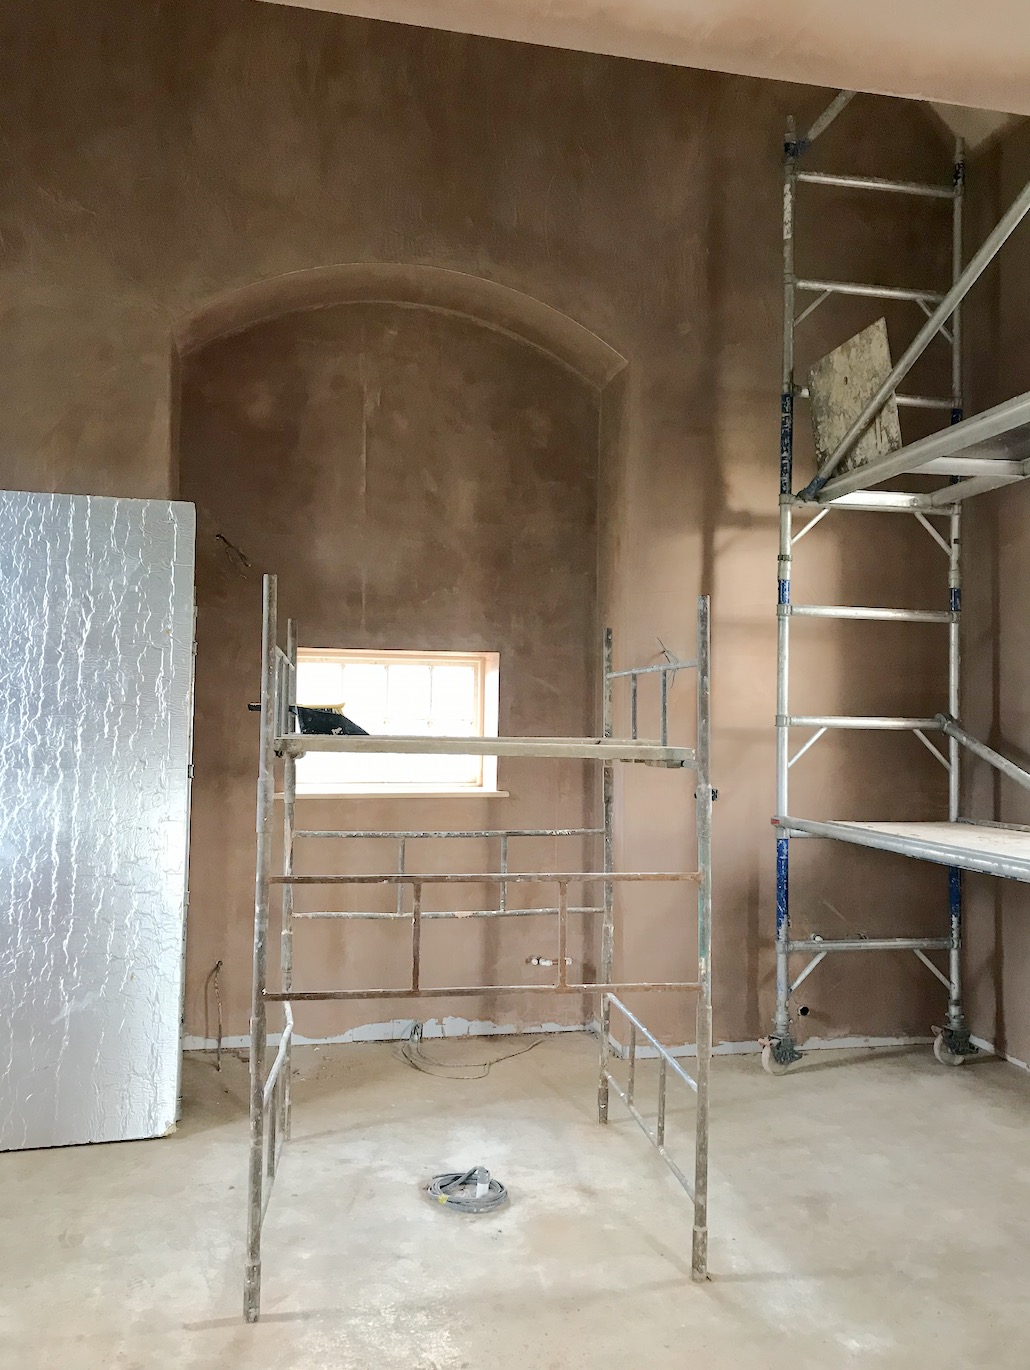
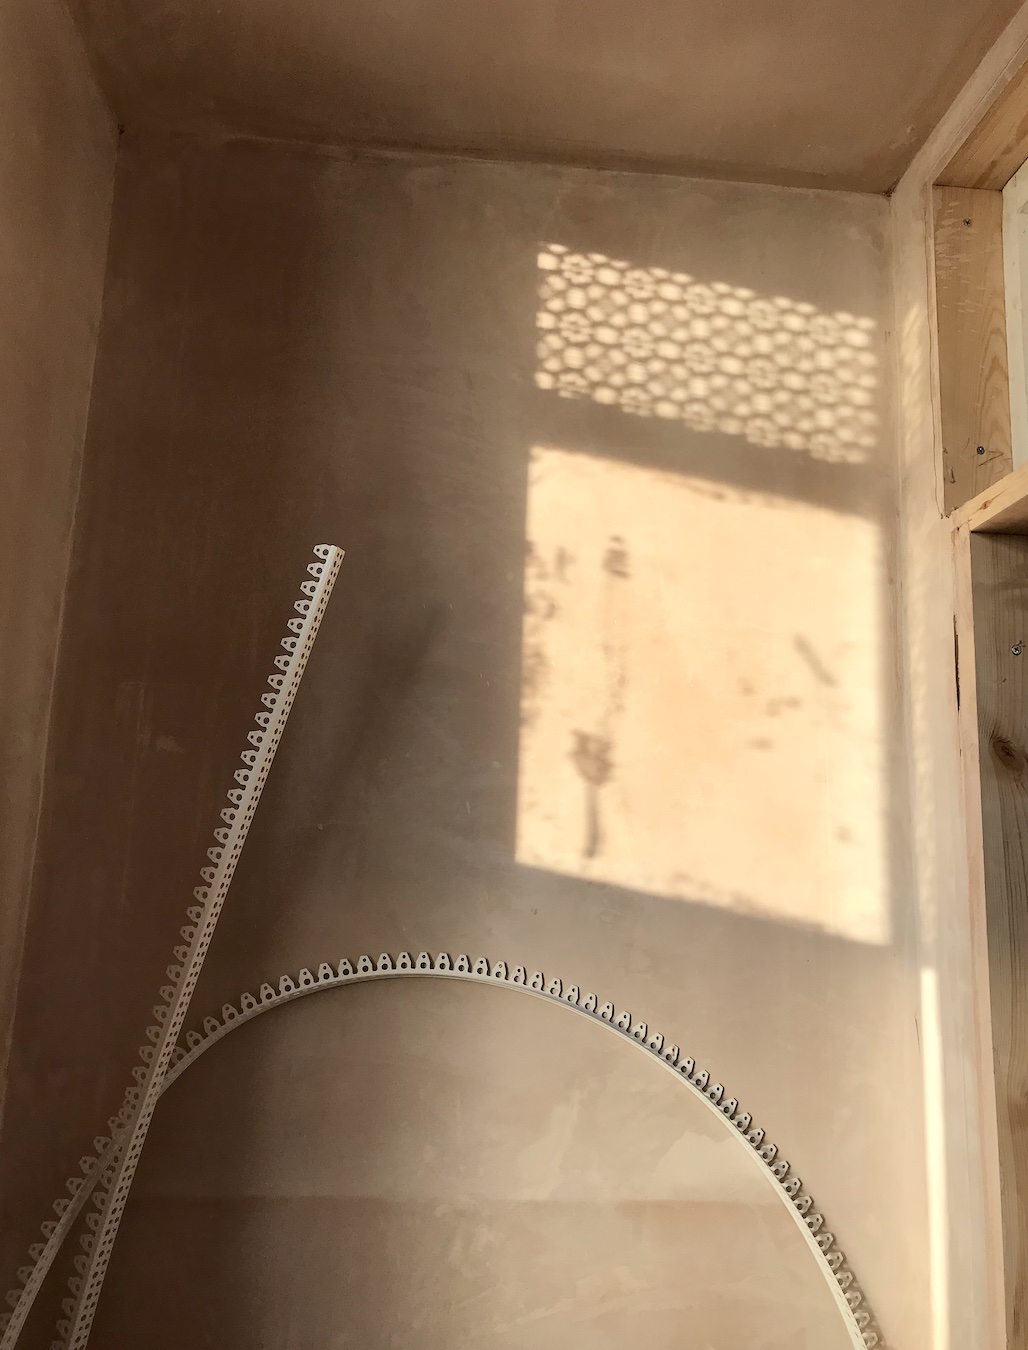
Plastering!
For months now, plastering seemed like this elusive task that would happen at some point in the future; just out of reach. I’m sure anyone that has ever done a renovation can relate that when there’s fresh plaster drying, you’re making some real headway! So when the rather epic task of plastering the Chapel commenced, I will admit that my excitement levels were high.
Just. Look. At. That. Ceiling!


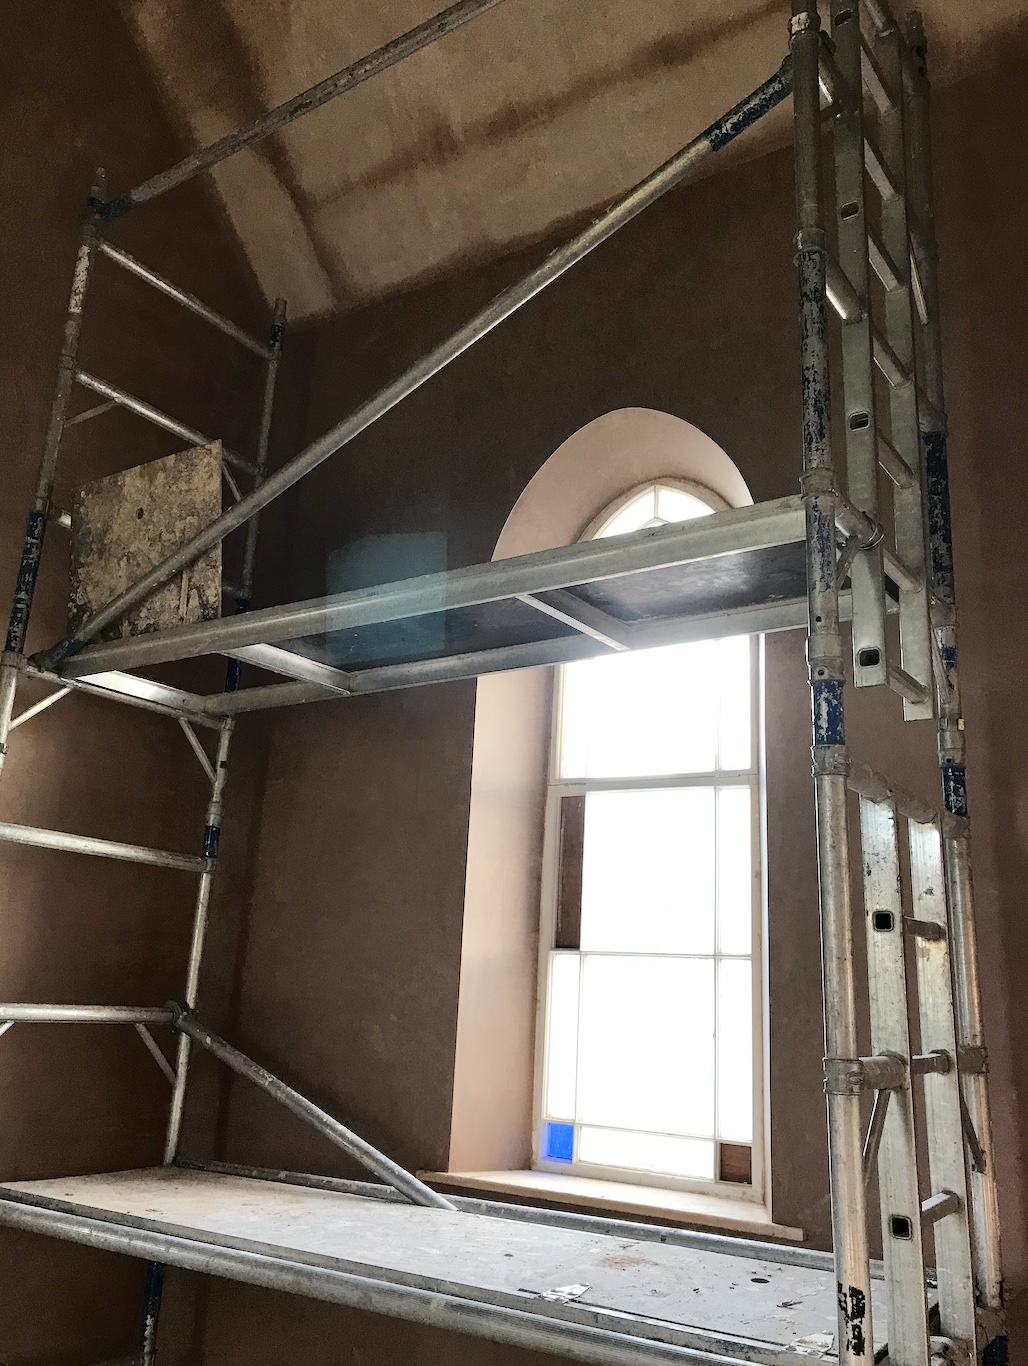
We hired a great big scaffolding tower for the plasterers to work in the double height space. I’ve done a little bit of plastering and would certainly not envy the task of tackling that expanse of ceiling!

Let’s take a moment to appreciate how BEAUTIFUL the arch looks, not to mention the curved window reveals! I love their new depth too, which was much more than before because we added in all that toasty insulation.
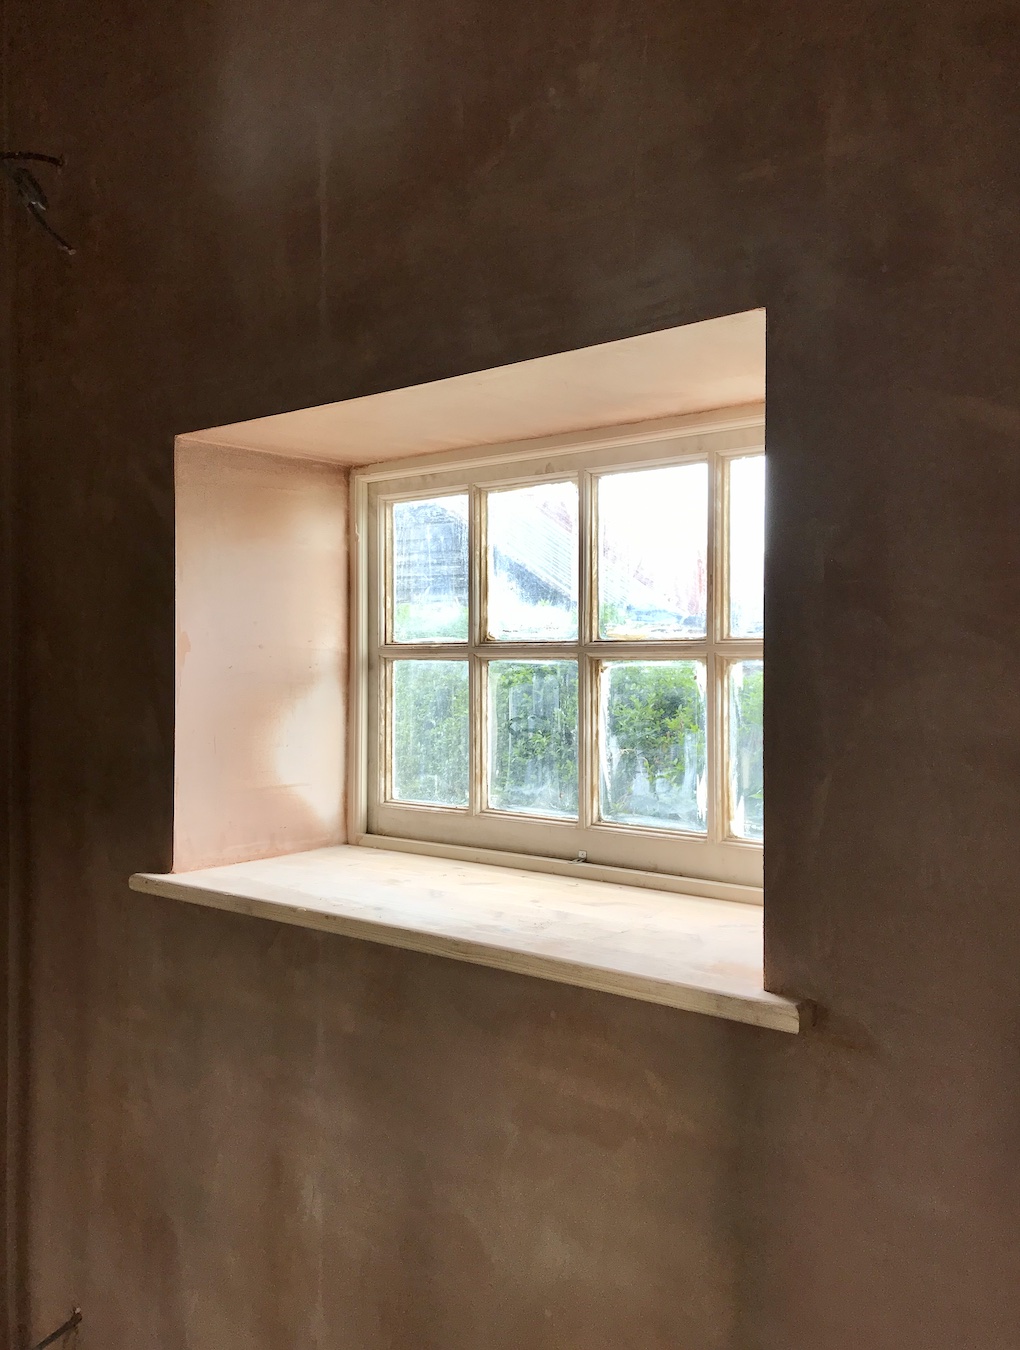


Above is honestly the deep kitchen windowsill of my dreams! I can’t wait to enjoy those window shadows as I’m washing the dishes…


The boarding and the plastering happened really close together and over a few weeks the Chapel went from looking like a silvery tin-foil interior to a surface that resembled an actual home. I loved watching the plastering process and seeing how certain walls would need to dry out before adjacent walls were plastered. I also started to notice new shadows and ways that light moved around the space now that a) the windows were back in and b) that the stud work divisions were now real walls!


Drying out…


That soft curve of the window arch above is breathtakingly spectacular. And our lovely plasterer Mark had a lot of fun working on that little cupboard…! It looks tiny in the photo but I promise it’s not as small in real life.
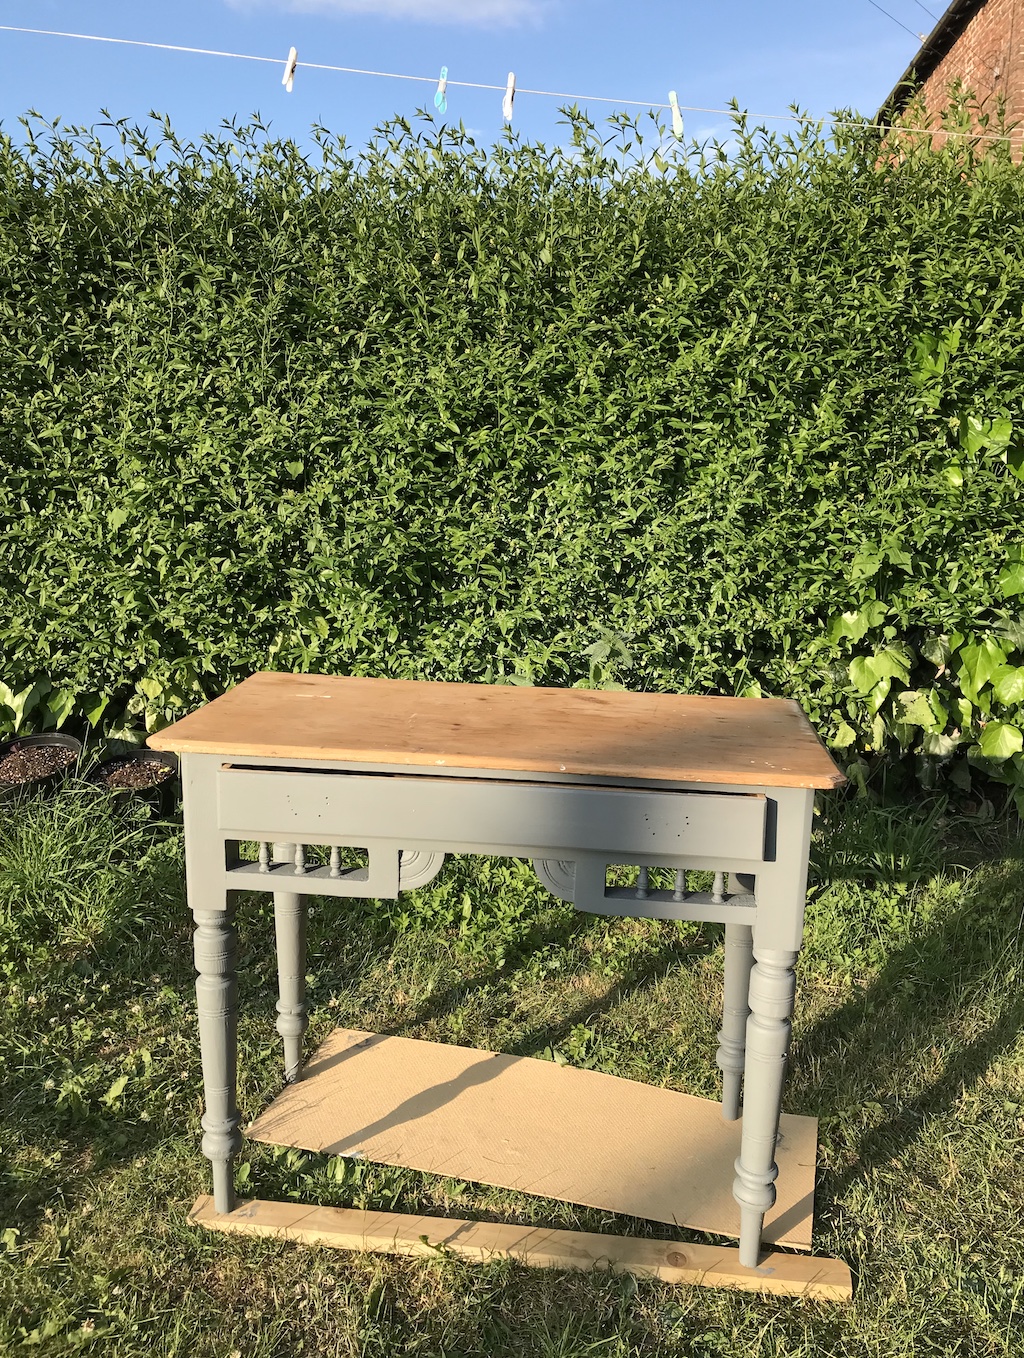
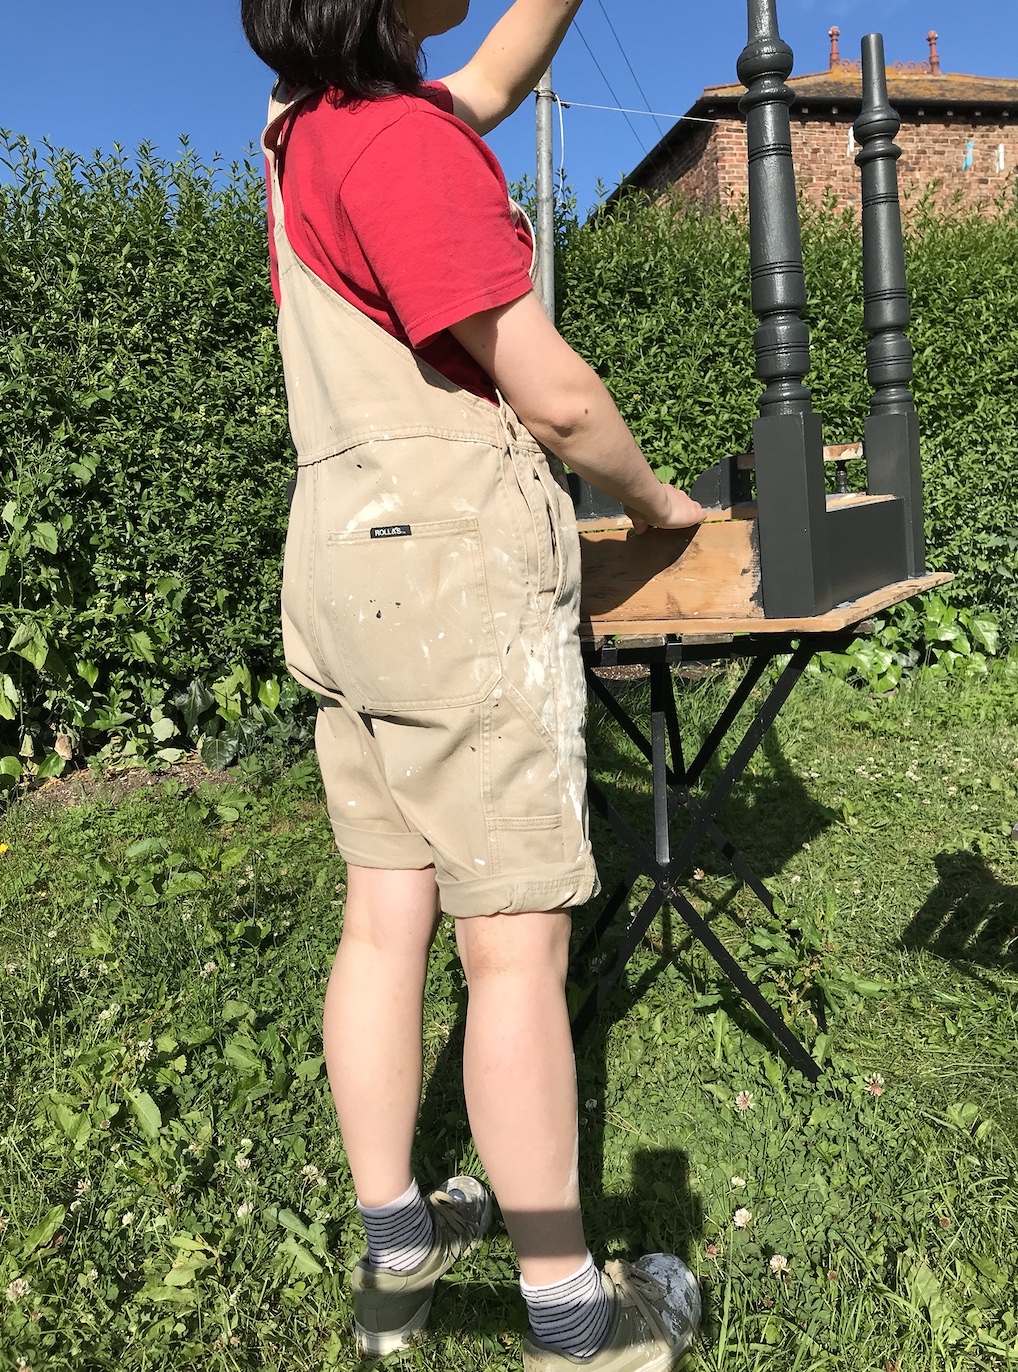
Restoring Nan’s table
If you follow my main House Plant House page over on instagram or are a long time blog reader, you might recall seeing this table a few years ago. It belonged to my grandparents and was something I planned on salvaging for a while. It’s been a piece I’ve actually worked on sporadically over the last few years… It took a lot of paint stripping to get it to this point and it was finally time to restore it to use! Growing up, I remember Grandpa having some plants on here in their lean-to next to the kitchen. I set about priming and painting the legs and drawer of the table in my favourite Lamp Black by Little Greene. I just love how the darker tone accentuates the detail on the legs:


Some architectural salvaging and vintage pieces
The purpose of working on Nan’s table at this specific point in the project was connected to my plans for its new use. After salvaging those two fluted sinks, I knew that I wanted to set one on some kind of base in my studio. After looking around with the dimensions in hand, it soon struck me that nan’s table might actually work. Coincidentally, the dimensions of this were perfect to sit the smaller sink! We added metal reinforcements to the underside to strengthen the table and prepared it for our plumber Martin to do his thing to transform it into a sink unit…
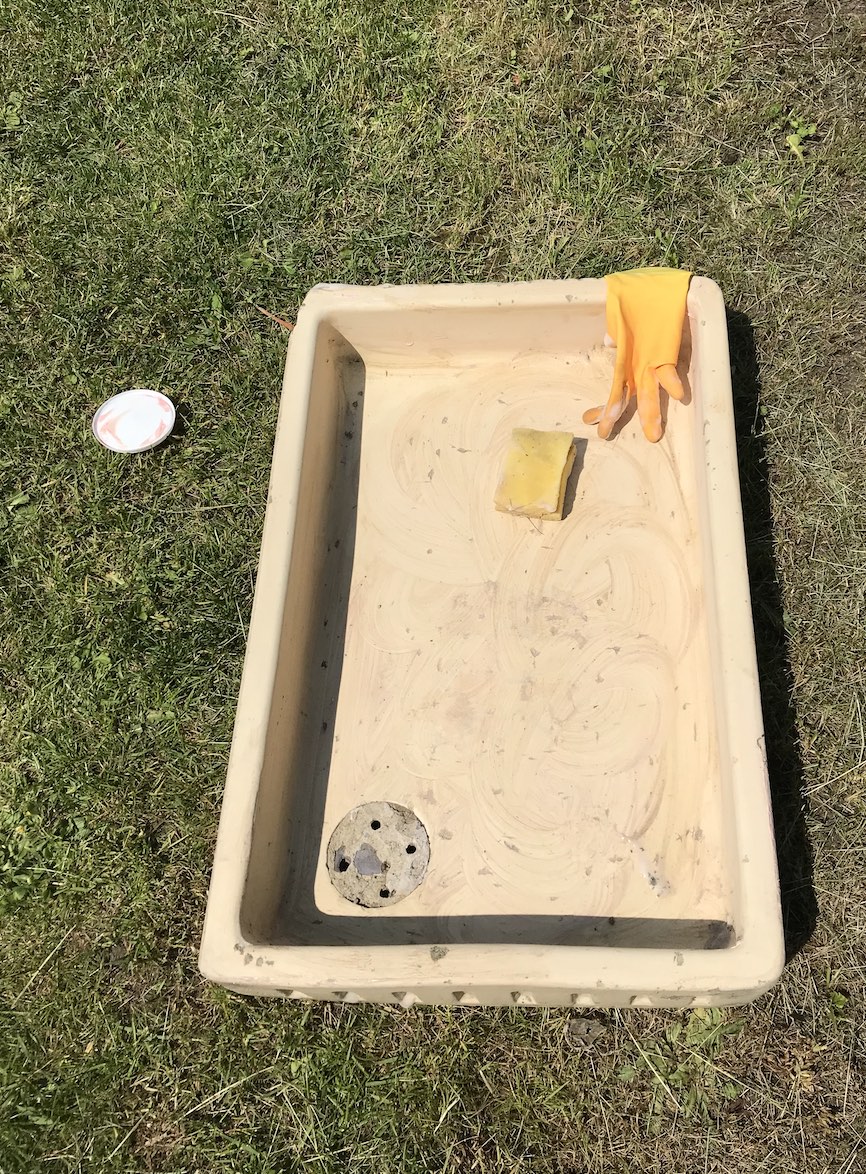
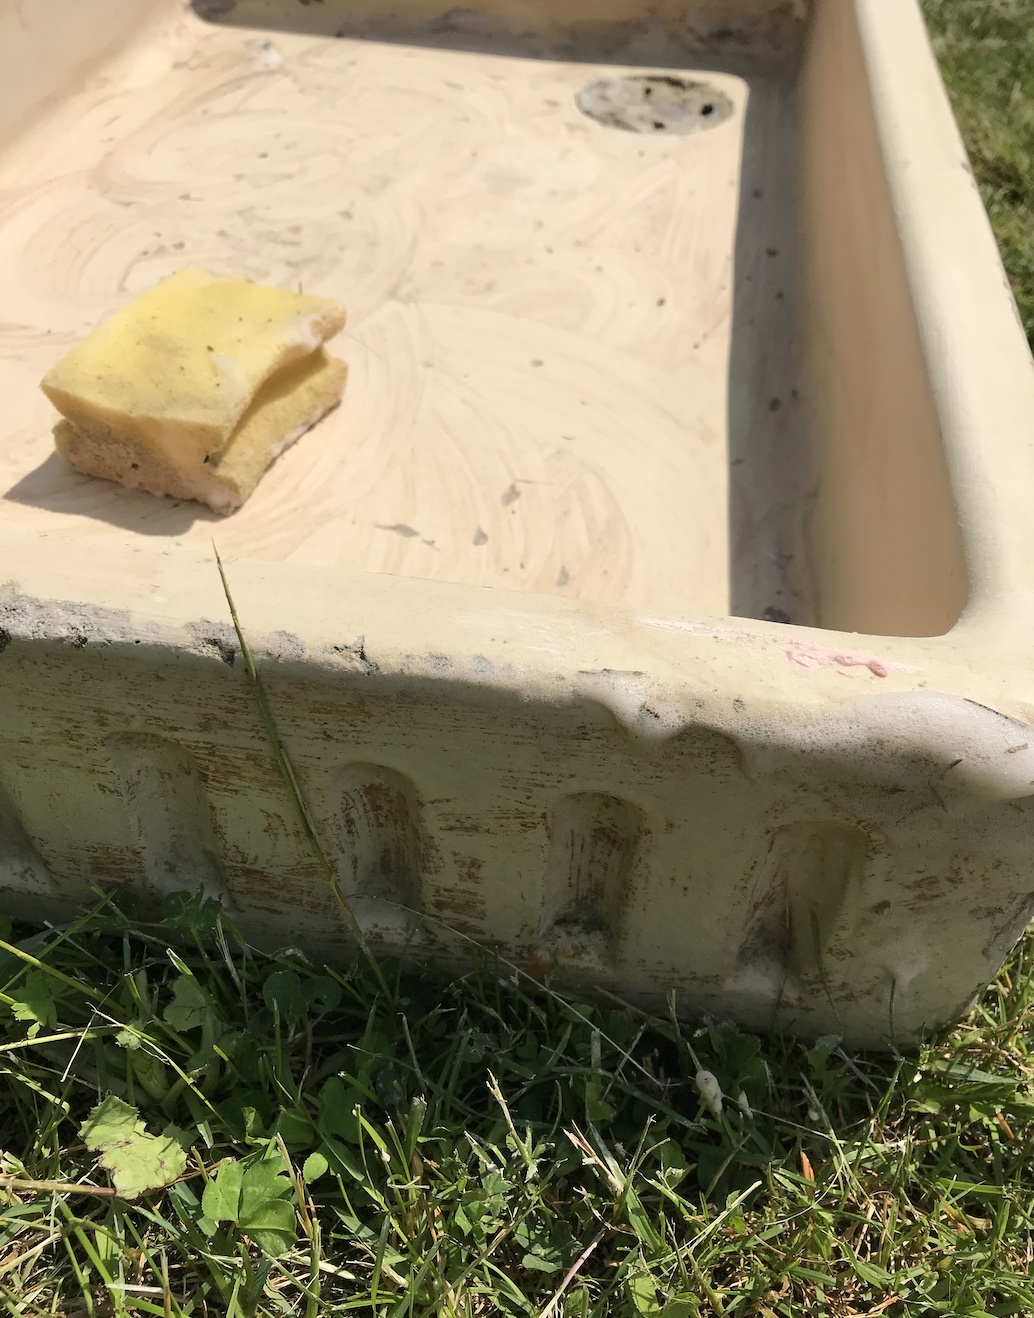

Salvaged sinks like this often require some clean up and in case you wondered, my favourite item I use for all sorts of tasks is The Pink Stuff. I use it on all kinds of things and it really cleaned this sink up well. It still looks old with lots of ‘patina’ but that’s how it should look I think. It’s going to be my work sink after all! I haven’t quite worked out how I want the plumbing and tap etc. but the sketch above right shows how the sink will fit atop the table.
Continuing with the sink units for a minute, I want to introduce you to another find, which is actually an old Ministry of Defence cabinet:


I had been looking for a vanity for the bathroom for quite a while and knew I wanted something vintage. I think elements such as this can add a softness and warmth to a space that can often look a bit sterile and cold. As with the old fluted sink in the studio, we’d re-work this cabinet to use in a similar way.
Designing the kitchen worktop…
Turning our attention to the one of other areas with a sink now – the kitchen, or more specifically, the kitchen worktop. This also has a salvaging story behind it because when clearing out my grandparents place a few years ago, we removed the framing from one of the outbuildings and started piling it up. It had been there for years and years and was a lovely quality. Dad and I were unsure if it was Teak or Iroko, but either way, we knew it had potential. I kept looking at it and thinking what I could possibly use it for…
I’ll leave some of my sketches here and I’ll revisit in more depth in the next renovation diaries instalment…


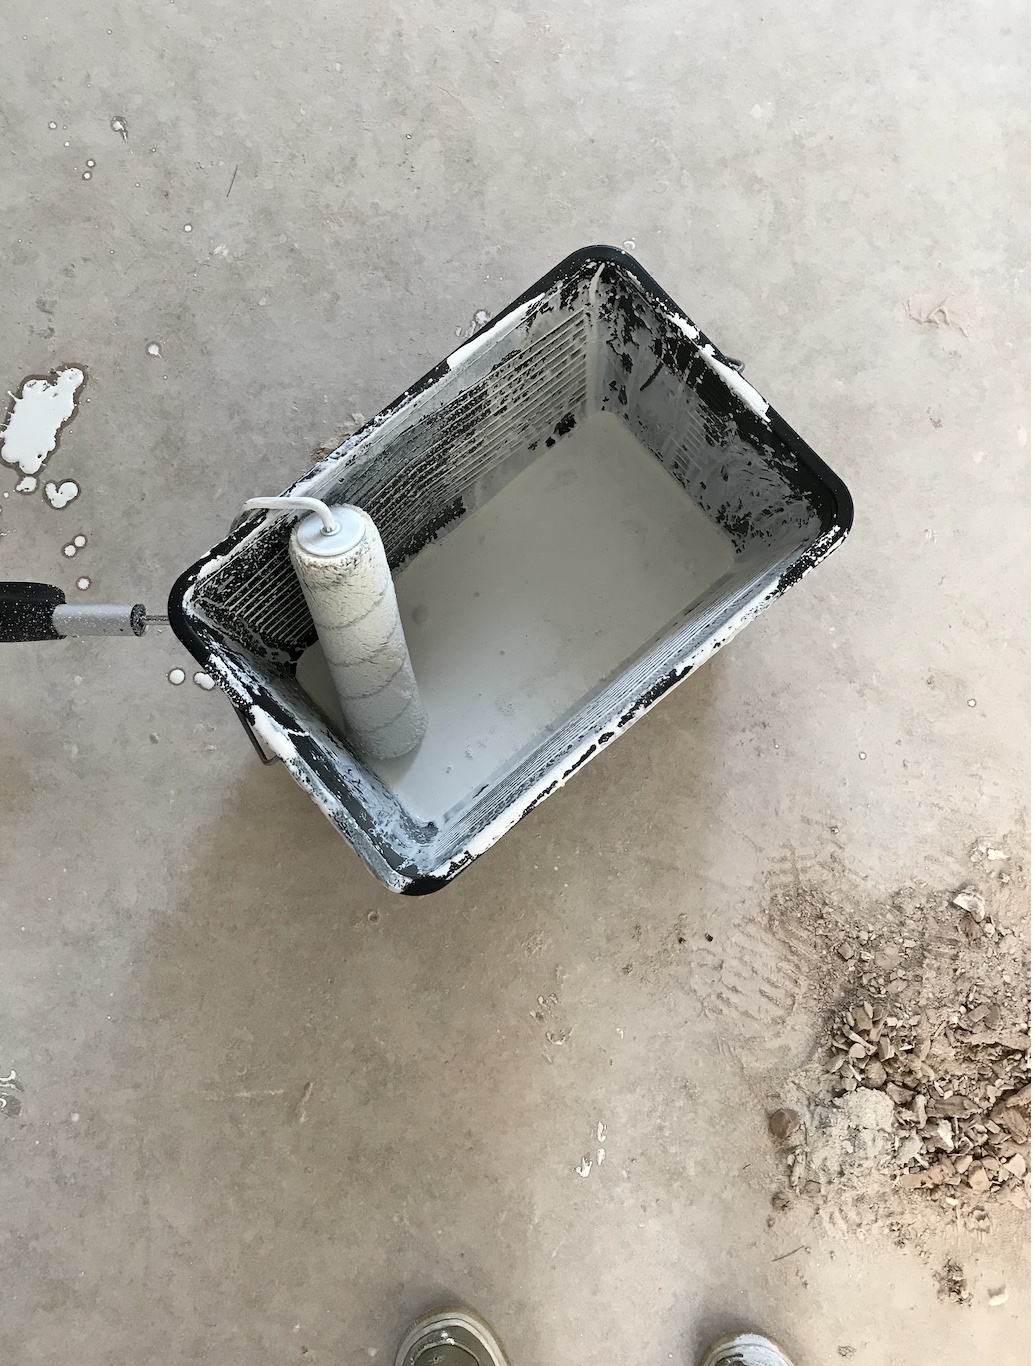
Starting to paint!
Lastly, a part that’s equally exciting and daunting… it was time to start painting! We needed to seal the walls with a mist coat for starters and here are the results of the initial few evenings of painting…


Conclusion
So there we have it! I hope you enjoyed seeing lots of progress in this mid-week post. As with any project, there are ebbs and flows. These few weeks saw particularly good progress, though there are many other times where things were much, much slower. You can now start to see some of our design ideas taking shape with the pieces we’ve got from salvaging and restoring. There’s lots more of that to come and I look forward to sharing more in upcoming posts.
For easy navigation, I’ve made a ‘Renovation’ tab on the homepage to catalogue this series. Alongside sharing the key points of the renovation on my main HOUSE PLANT HOUSE instagram, I’ve got a dedicated secondary page — HOUSE PLANT HOUSE renovates, which I will link here, where I’m sharing more of the Chapel renovation project.
This process is actually quite intrinsically linked to HOUSE PLANT HOUSE because alongside being a space for my plants and I to grow, it’s also going to be a place from which I can run my small business. This was something I’ve had to put on hold for a while, with re-locating and all, but it’s a goal I’ve been working towards behind the scenes for the last few years. Essentially, the Renovation Diaries will document the creation of a physical iteration of HOUSE PLANT HOUSE, which I’m really looking forward to sharing.
*The links in the post are affiliate links which means I can receive a (very) small amount of commission if you make a purchase — thank you for your supporting my blog. I often get asked where I get specific items from so have linked these here. I have bought all these products with my own money.

Leave a Reply